Introduction
Transform humble graham crackers, marshmallows, and everyone’s favorite peanut butter cups into a delightful campfire treat that’s surprisingly healthy and fun! This recipe offers a balanced approach to satisfying your sweet cravings while still prioritizing nutritious choices. We’ll focus on maximizing flavor while minimizing added sugars and unhealthy fats, making this a guilt-free indulgence perfect for your next outdoor adventure or cozy night in.
Why This Works
This recipe works because it cleverly balances sweet and savory flavors, offering a delightful textural contrast. The crunchy graham cracker cone provides a satisfying base, while the gooey marshmallow and rich Reese’s Peanut Butter Cups add layers of deliciousness. The simplicity of the recipe makes it incredibly accessible for anyone, regardless of their baking skills. Plus, it’s naturally portion-controlled, making it easier to manage your treat intake!
Key Ingredients
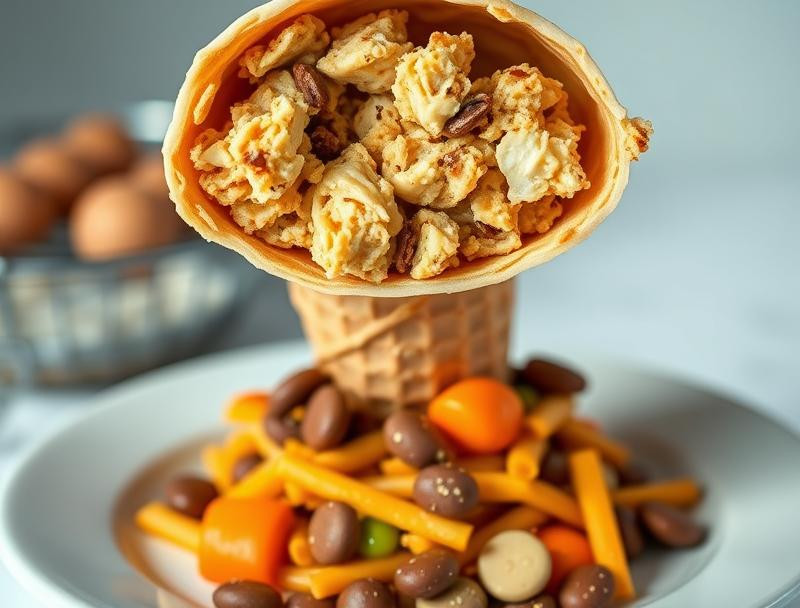
🍫 1 package (14.1 oz) graham crackers
🔥 1 bag (10 oz) large marshmallows
🥜 1 package (1.5 oz) Reese’s Peanut Butter Cups, mini
🍦 1/2 cup semi-sweet chocolate chips (optional)
Instructions
1️⃣ Prepare the Cones: Carefully separate graham crackers into individual squares. Gently roll each square around a heat-safe cone or a rolled piece of parchment paper to create a cone shape. Secure with a small amount of melted butter or honey to adhere. Alternatively, you can use pre-made ice cream cones.
2️⃣ Roast the Marshmallows: Over a campfire or using a kitchen torch, carefully roast marshmallows until golden brown and slightly gooey. If using a stovetop, use a low setting and gently turn them with tongs until melted.
3️⃣ Assemble the Treats: Fill each graham cracker cone with a roasted marshmallow. Place a mini Reese’s Peanut Butter Cup on top of the marshmallow.
4️⃣ Optional Chocolate Drizzle: Melt the semi-sweet chocolate chips (if using) and drizzle over the assembled cones for an extra touch of sweetness and decadence.
5️⃣ Cool and Enjoy: Allow the treats to cool slightly before enjoying. The slightly warm marshmallow enhances the flavors.
Handy Tips
- Use oven mitts or tongs when handling hot marshmallows to avoid burns.
- If you don’t have a campfire or torch, you can microwave the marshmallows on a plate for very short intervals, carefully watching them to avoid burning.
- For a neater look, gently melt a few chocolate chips and use them as an adhesive to secure the edges of the graham cracker cones.
Heat Control
Careful heat control is crucial when roasting marshmallows. Over-roasting will lead to burning and a bitter taste. Aim for a golden brown color, indicating a perfect level of gooeyness and flavor development. The low and slow method applied with a stovetop promotes even melting and avoids burning.
Crunch Factor
The contrast between the crunchy graham crackers, gooey marshmallow, and creamy Reese’s Peanut Butter Cups creates a wonderful textural experience. The “crunch” of the graham cracker provides a nice balance to the softer elements of the dessert.
Pro Kitchen Tricks
- For a sophisticated touch, use a piping bag filled with melted chocolate to create intricate designs on the cones.
- To add a touch of elegance, use high-quality, dark chocolate chips for the drizzle, complementing the peanut butter and marshmallow flavors.
- Try using different types of mini chocolate bars for variations on the classic Reese’s.
Storage Tips
Store leftover Reese’s Campfire Marshmallow Cones in an airtight container at room temperature for up to 2 days. For longer storage, freeze the cones individually wrapped in plastic wrap.
Gift Packaging Ideas
These treats are perfect for gifting! Package individual cones in cellophane bags and tie them with festive ribbons. You can also place several cones in a decorative tin or basket.
Flavor Variations
🌟 Salted Caramel: Add a drizzle of salted caramel sauce over the marshmallow before adding the Reese’s Peanut Butter Cup.
🌟 Mint Chocolate: Use mint chocolate chips instead of semi-sweet chocolate chips and add a crushed candy cane to each cone.
🌟 Spicy Chocolate: Incorporate a pinch of cayenne pepper into the melted chocolate drizzle for a spicy kick.
🌟 Nutty Delight: Add chopped nuts like pecans or walnuts to the melted chocolate drizzle for extra texture and flavor.
Troubleshooting
- Marshmallows burning: Reduce heat significantly when roasting marshmallows. Watch frequently to prevent burning. Use a lower heat setting and rotate frequently.
- Graham crackers breaking: Use a small amount of melted butter or honey to help the graham crackers adhere before rolling them into cones.
- Cones not holding shape: Ensure the graham crackers are tightly rolled and securely sealed using a binder like melted chocolate or honey.
FAQ
- Can I make these ahead of time? Yes, but assemble the cones and store them separately. Roast the marshmallows and assemble right before serving for optimal taste and texture.
- Are these gluten-free? No, these contain graham crackers which contain gluten. Look for gluten-free graham crackers to adapt the recipe.
- Can I use other types of chocolate? Absolutely! Experiment with different chocolate types to find your favorite combination.
- What if I don’t have a campfire or kitchen torch? You can use your oven’s broiler on a low setting. It may take more time and you’ll want to keep a close watch over them.
Conclusion
These Reese’s Campfire Marshmallow Cones offer a fun, customizable, and surprisingly balanced approach to indulging your sweet tooth. Share these delicious treats with your friends and family – they’re guaranteed to be a hit! Enjoy the deliciousness!
Healthy Reese's Inspired Campfire Cones: A Guilt-Free Sweet Treat
These campfire cones combine the delicious flavors of chocolate and peanut butter in a healthier way, perfect for satisfying your sweet tooth while enjoying the great outdoors.
Ingredients
- 4 whole wheat ice cream cones
- 1 cup natural peanut butter
- 1 cup mini dark chocolate chips
- 1 cup sliced bananas
- 1 cup mini marshmallows
- 4 tablespoons honey or maple syrup
- Aluminum foil
Instructions
- Preheat your campfire or grill to a medium heat.
- In each ice cream cone, layer the bottom with a tablespoon of peanut butter.
- Add a layer of mini dark chocolate chips, followed by sliced bananas and mini marshmallows.
- Drizzle a tablespoon of honey or maple syrup over the top of each cone.
- Wrap each cone tightly in aluminum foil, ensuring it's fully sealed.
- Place the wrapped cones near the campfire's edge or on the grill for about 10-15 minutes, turning occasionally until the chocolate and marshmallows are melted.
- Carefully unwrap the cones and enjoy while warm!
Tips
- For an extra crunch, consider adding some crushed nuts or granola to the filling.
- Make sure to monitor the cones closely while cooking to prevent burning.