Puff Pastry Danish Recipes | Easy & Flaky Cheese Danish
Introduction
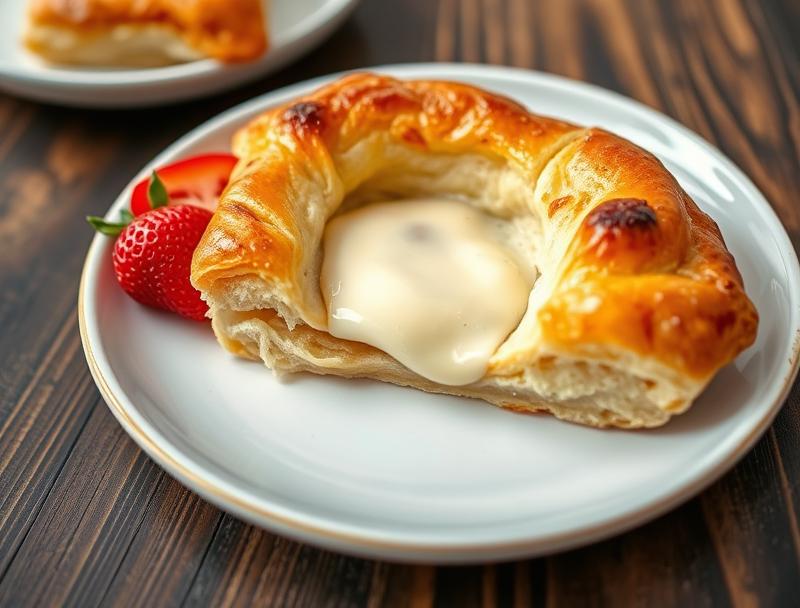
Imagine waking up to the aroma of freshly baked, flaky pastry, filled with a delicious blend of cheeses and perfectly balanced flavors. Our Puff Pastry Danish Recipes are designed to make your mornings brighter and your baking easier. With the ease of using everyday ingredients and the creativity to customize to your taste, these recipes are perfect for both beginners and experienced bakers. The beauty of these Danish pastries lies in their simplicity and the impressive results you can achieve with minimal effort, making them a great addition to your breakfast, brunch, or even as a snack.
Why This Works
- Flavor balance and ingredient accessibility: Our recipes ensure that each bite is a perfect balance of flavors, using ingredients that are easily found in most supermarkets.
- Ease of preparation: With straightforward instructions and minimal preparation time, you can have a delicious, homemade Danish pastry ready in no time.
- Impressive results with minimal effort: Despite the simplicity of the recipe, the end result is a beautifully flaky, cheesy pastry that looks and tastes like it was bought from a professional bakery.
Ingredients
- 1 package of puff pastry, thawed
- 1 cup of cream cheese, softened
- 1/2 cup of shredded mozzarella cheese
- 1/4 cup of grated Parmesan cheese
- 1/2 teaspoon of salt
- 1/4 teaspoon of black pepper
- 1 egg, beaten (for egg wash)
- 1 tablespoon of water
- Fresh parsley or dill, chopped (for garnish)
Instructions
- Step 1: Preheat your oven to 400°F (200°C). Line a baking sheet with parchment paper.
- Step 2: Roll out the puff pastry on a lightly floured surface to a thickness of about 1/8 inch. Transfer the pastry to the prepared baking sheet.
- Step 3: In a bowl, mix the cream cheese, mozzarella cheese, Parmesan cheese, salt, and pepper until well combined. Spread this mixture evenly over the center of the pastry, leaving a 1-inch border on each side.
- Step 4: Fold the 1-inch border of the pastry up over the filling, pressing gently to seal. Use a knife or pastry brush to create a decorative edge. Brush the egg wash over the pastry to give it a golden brown finish.
- Step 5: Bake the Danish for 25-30 minutes, or until the pastry is golden brown. Remove from the oven and let cool on a wire rack for a few minutes before serving. Garnish with chopped parsley or dill.
Handy Tips
- Make sure to thaw the puff pastry according to the package instructions to ensure it rolls out smoothly and evenly.
- Don’t overfill the pastry, as this can cause it to burst open during baking.
- Experiment with different types of cheese and herbs to find your favorite combination.
Heat Control
For baking the Danish, it’s crucial to maintain an oven temperature of 400°F (200°C). This ensures that the pastry cooks evenly and achieves the perfect golden brown color. Bake for 25-30 minutes, or until the pastry is golden and the cheese is melted and slightly puffed.
Crunch Factor
The flakiness of the puff pastry is what gives our Danish its crunch factor. To achieve this, make sure not to overwork the pastry when rolling it out, and keep the oven at the right temperature. The egg wash also helps in giving the pastry a nice golden brown crust.
Pro Kitchen Tricks
- Use high-quality puff pastry for the best results. Freshness and quality can significantly affect the flakiness and taste of the pastry.
- Keep the pastry and filling cold until baking, as this helps the pastry to puff up better in the oven.
- For an extra golden glaze, brush the pastry with a little bit of melted butter after baking.
Storage Tips
- Leftover Danish can be stored in an airtight container at room temperature for up to 2 days or frozen for up to 2 months.
- To reheat, place the Danish in the oven at 350°F (180°C) for about 10 minutes, or until warmed through.
- It’s best to freeze the Danish before baking. Simply place the prepared pastry on a baking sheet, freeze until solid, then transfer to a freezer-safe bag or container for storage.
Gift Packaging Ideas
If you’re considering gifting your homemade Danish pastry, a beautifully wrapped package can make it an even more thoughtful present. Consider placing the pastry in a decorative tin or a nicely wrapped box. Add a ribbon or a gift tag with a personal message for a touch of warmth. You could also include a packet of specialty coffee or a jar of homemade jam to complement the pastry.
Flavor Variations
- Different spices: Add a pinch of nutmeg or cinnamon to the cheese mixture for a unique twist.
- Creative toppings: Top your Danish with fresh fruits, such as strawberries or blueberries, for a sweet and savory combination.
- Ingredient swaps: Replace the cream cheese with mascarpone or goat cheese for a different flavor profile.
Troubleshooting
- Texture problems: If your pastry doesn’t puff as expected, check that your oven temperature is correct and that you didn’t overwork the dough.
- Ingredient replacements: If you’re looking to replace any ingredients, ensure that the substitutes have similar properties to maintain the pastry’s texture and flavor.
- Over/undercooking signs: Keep an eye on your pastry while it’s baking. It should be golden brown and firm to the touch. If it’s undercooked, it will be pale and soft; if overcooked, it will be dark brown and hard.
FAQs
- Can I freeze it? Yes, you can freeze the Danish before baking. Simply prepare the pastry, place it on a baking sheet, and freeze. Once frozen, transfer it to a freezer-safe bag or container.
- Is it gluten-free? Traditional puff pastry contains gluten. However, there are gluten-free puff pastry options available in the market that you can use as a substitute.
- Can I double the recipe? Yes, you can easily double or triple the recipe if you’re serving a larger crowd. Just ensure you have enough baking sheets and oven space.
Conclusion
Baking a Puff Pastry Danish is a fun and rewarding experience that can add a touch of warmth and love to any meal. With its easy preparation, impressive results, and the flexibility to customize, this recipe is sure to become a favorite. Whether you’re a seasoned baker or just starting out, don’t be afraid to experiment and make this recipe your own. Share your creations with friends and family, and enjoy the joy of baking and sharing delicious food together.
Puff Pastry Danish Recipes | Easy & Flaky Cheese Danish
A simple and delicious recipe for a flaky cheese Danish using puff pastry, perfect for breakfast or brunch.
🥘 Ingredients
👩🍳 Instructions
-
1Preheat oven to 400°F (200°C).
-
2Roll out puff pastry and transfer to a baking sheet.
-
3Mix cheese filling and spread over the center of the pastry.
-
4Fold the pastry border over the filling and brush with egg wash.
-
5Bake for 25-30 minutes or until golden brown.