Oven Baked Chicken Breast – Juicy, Tender, and Full of Flavor!
Introduction
Oven baked chicken breast is one of the most versatile and delicious dishes you can make, using everyday ingredients that are easily accessible. The beauty of this recipe lies in its simplicity and the ability to add your own creative twist, making it perfect for a quick weeknight dinner or a special occasion. With the right balance of flavors and a few expert tips, you can achieve a juicy, tender, and full-of-flavor chicken breast that will impress anyone. In this article, we’ll guide you through the process of making the perfect oven baked chicken breast, sharing our favorite ingredients, instructions, and handy tips to ensure your dish turns out nothing short of amazing.
Why This Works
- The combination of olive oil, lemon juice, garlic, and your choice of herbs creates a flavor balance that enhances the natural taste of the chicken without overpowering it.
- The ease of preparation is unparalleled, requiring minimal effort for maximum results. Simply mix your ingredients, season the chicken, and let the oven do the work.
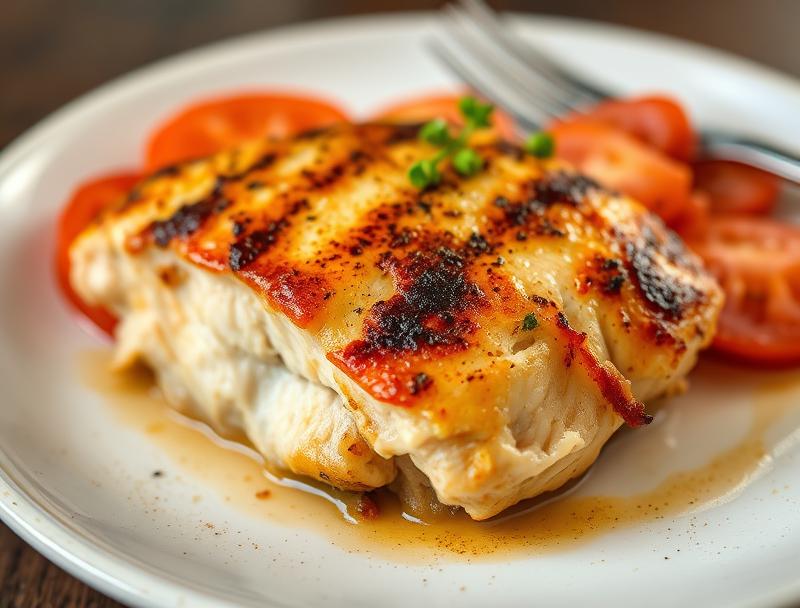
- Despite its simplicity, the end result is impressive. The chicken stays moist and juicy, with a crispy exterior that adds texture to each bite. It’s perfect for serving to guests or enjoying as a comforting meal.
Ingredients
- 4 boneless, skinless chicken breasts (about 6 oz each)
- 2 tablespoons olive oil
- 1 tablespoon freshly squeezed lemon juice
- 2 cloves garlic, minced
- 1 teaspoon dried thyme
- 1/2 teaspoon salt
- 1/4 teaspoon black pepper
- 1/4 teaspoon paprika (optional, for some smokiness)
- Fresh parsley or chives, chopped (for garnish)
Instructions
- Step 1: Preparation – Preheat your oven to 400°F (200°C). Rinse the chicken breasts and pat them dry with paper towels. This step is crucial for even cooking and to prevent the chicken from steaming instead of browning.
- Step 2: Seasoning – In a small bowl, mix together olive oil, lemon juice, garlic, thyme, salt, pepper, and paprika (if using). Brush the mixture evenly onto both sides of the chicken breasts, making sure they’re fully coated.
- Step 3: Baking – Place the seasoned chicken breasts on a baking sheet lined with parchment paper. Bake for 20-25 minutes or until the chicken reaches an internal temperature of 165°F (74°C). The cooking time may vary depending on the size and thickness of your chicken breasts.
- Step 4: Resting and Serving – Once cooked, remove the chicken from the oven and let it rest for 5-10 minutes. This step allows the juices to redistribute, making the chicken even more tender and juicy. Slice and serve hot, garnished with chopped parsley or chives.
Handy Tips
- Always use room temperature chicken for even cooking. If you’re taking the chicken straight from the refrigerator, let it sit at room temperature for about 30 minutes before cooking.
- Don’t overcrowd the baking sheet. Cook the chicken breasts one or two at a time, depending on their size, to ensure they have enough room to cook evenly.
- For an extra crispy exterior, broil the chicken for an additional 2-3 minutes after baking. Keep a close eye to prevent burning.
Heat Control
Maintaining the right temperature is crucial for achieving perfectly cooked chicken. Ensure your oven is at 400°F (200°C) before placing the chicken inside. For even cooking, it’s also important to not open the oven door too frequently. If you’re unsure about the doneness, check the internal temperature with a meat thermometer; it should read 165°F (74°C) for chicken breasts.
Crunch Factor
To achieve a nice crunch on the outside while keeping the inside juicy, make sure to not overcook the chicken. The initial baking at 400°F (200°C) helps in creating a crispy exterior. If desired, you can enhance this crunch by broiling the chicken for a couple of minutes at the end of the cooking time. Be cautious and keep an eye on it to avoid burning.
Pro Kitchen Tricks
- Pound the chicken breasts to an even thickness before cooking to ensure they cook uniformly. This step can significantly reduce cooking time and prevent overcooking.
- Marinate the chicken in your favorite seasonings for a few hours or overnight for added depth of flavor. Olive oil, lemon juice, and herbs like thyme or rosemary work well together.
- Let the chicken rest before slicing. This allows the juices to redistribute, making the chicken more tender and juicy.
Storage Tips
- Store cooked chicken in an airtight container in the refrigerator for up to 3 days. It’s best to cool the chicken to room temperature before refrigerating to prevent moisture buildup.
- For freezing, place the cooled chicken in a freezer-safe bag or container and store for up to 4 months. When you’re ready to eat it, thaw overnight in the fridge and reheat until warmed through.
- Reheat cooked chicken to an internal temperature of 165°F (74°C) to ensure food safety. You can reheat it in the oven, on the stovetop, or in the microwave, depending on your preference and the amount of time you have.
Gift Packaging Ideas
If you’re considering gifting oven-baked chicken breast, perhaps as part of a meal kit or a care package, you can package it in a decorative container or wrap it in aluminum foil with a gift tag. Adding a side of roasted vegetables or a salad can complement the gift nicely. For a more personalized touch, include a handwritten recipe card with your favorite seasoning combinations.
Flavor Variations
- Experiment with different herbs and spices, such as paprika for a smoky flavor, cumin for a Mexican twist, or Italian seasoning for a Mediterranean feel.
- Add some heat with red pepper flakes or slice up some jalapeños to add on top of the chicken before baking.
- For a creamy element, top the chicken with sour cream or Greek yogurt mixed with some lemon juice and herbs towards the end of the baking time.
Troubleshooting
- If the chicken turns out dry, it may have been overcooked. Check the internal temperature and adjust the cooking time as needed for future attempts.
- For texture issues, such as the chicken being too chewy, ensure it’s cooked to the right temperature and consider pounding it to an even thickness before cooking.
- If you’re experiencing issues with the chicken not browning, check your oven temperature and ensure the chicken has been patted dry before seasoning and baking.
FAQs
- Can I freeze oven-baked chicken breast? Yes, cooked chicken can be frozen for up to 4 months. Cool it to room temperature, then place it in a freezer-safe bag or container.
- Is this recipe gluten-free? Yes, the ingredients used in this recipe are gluten-free, making it suitable for individuals with gluten intolerance or sensitivity.
- Can I double the recipe? Absolutely, you can double or even triple the recipe depending on the number of servings you need. Just ensure you have enough space on your baking sheet for the chicken breasts to cook evenly.
Conclusion
Making oven-baked chicken breast is a straightforward process that yields delicious results with minimal effort. By following the steps and tips outlined in this recipe, you’ll be able to create a dish that’s not only flavorful but also tender and juicy. Feel free to experiment with different seasonings and ingredients to make the recipe your own, and don’t hesitate to reach out if you have any questions or need further guidance. Happy cooking, and enjoy the process of creating something truly special for yourself and your loved ones!
Oven Baked Chicken Breast – Juicy, Tender, and Full of Flavor!
A simple yet flavorful recipe for oven-baked chicken breast, resulting in a juicy and tender dish perfect for any occasion.
🥘 Ingredients
👩🍳 Instructions
-
1Preheat the oven to 400°F (200°C).
-
2Prepare the chicken by rinsing and patting it dry with paper towels.
-
3Mix the olive oil, lemon juice, garlic, thyme, salt, and pepper in a bowl.
-
4Brush the mixture onto both sides of the chicken breasts and bake for 20-25 minutes or until the chicken reaches an internal temperature of 165°F (74°C).
-
5Let the chicken rest for 5-10 minutes before slicing and serving.