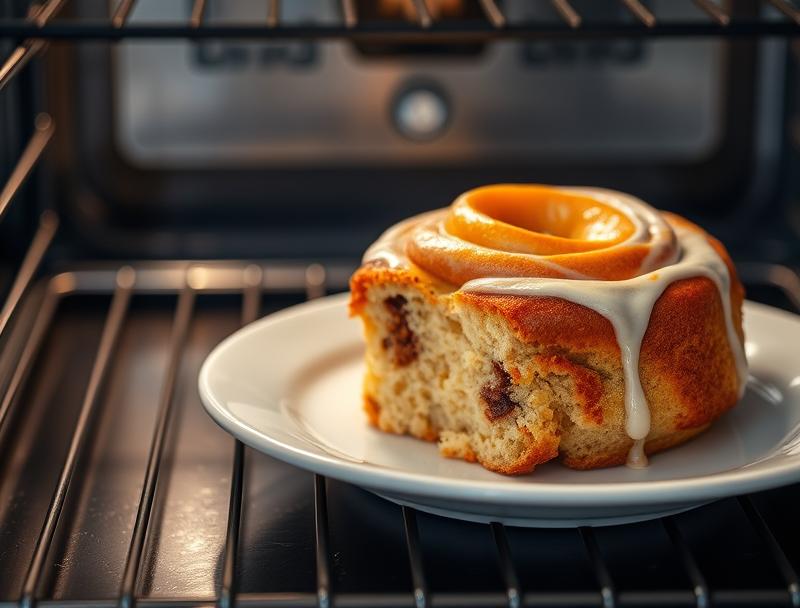
Cinna-bun Cake in the Oven
Introduction
Imagine waking up to the irresistible aroma of cinnamon and sweet dough wafting from your oven, signaling that a delicious Cinna-bun Cake is ready to be(devoured. This recipe is a game-changer for anyone who loves the classic cinnamon roll but wants to achieve that perfect blend of flavors and textures with minimal fuss. By using everyday ingredients and a straightforward method, you can create a mouthwatering cake that’s perfect for breakfast, brunch, or even as a sweet treat any time of the day. The best part? It’s incredibly easy to make and requires no special equipment, just your trusty oven.
Why This Works
- Flavor balance and ingredient accessibility: This recipe strikes a perfect balance between the warmth of cinnamon, the sweetness of sugar, and the richness of butter, all of which are readily available in most kitchens.
- Ease of preparation: Unlike traditional cinnamon rolls that require yeast and a lengthy rising time, this cake uses simple, quick-rising ingredients that get you from mixing to baking in no time.
- Impressive results with minimal effort: The layering of cinnamon sugar and the swirled pattern on top give this cake a visually appealing presentation that’s sure to impress, despite the simplicity of the preparation process.
Ingredients
- 2 cups all-purpose flour
- 1 teaspoon baking powder
- 1 teaspoon baking soda
- 1 teaspoon salt
- 1 cup granulated sugar
- 1/2 cup unsalted butter, softened
- 1 large egg
- 1/2 cup milk
- 2 teaspoons active dry yeast
- 1/2 cup cinnamon sugar (a mixture of granulated sugar and cinnamon)
- 1/4 cup brown sugar
- 1 teaspoon ground cinnamon
- Confectioners’ sugar for dusting (optional)
Instructions
- Step 1: Prepare the Dough – In a large mixing bowl, whisk together the flour, baking powder, baking soda, and salt. In another bowl, mix the sugar, softened butter, egg, and milk until well combined. Add the dry ingredients to the wet ingredients and mix until a smooth batter forms.
- Step 2: Add Yeast and Rest – Add the yeast to the batter and mix gently. Let the mixture rest in a warm place for about 10 minutes, or until it becomes frothy.
- Step 3: Layer the Cake – Pour half of the batter into a greased 9×13-inch baking dish. Mix the cinnamon sugar and brown sugar in a small bowl, then sprinkle half of this mixture evenly over the batter in the dish. Drizzle with half of the melted butter. Repeat the layers, starting with the remaining batter, then the rest of the cinnamon sugar mixture, and finally the rest of the melted butter.
- Step 4: Bake and Serve – Bake the cake in a preheated oven at 375°F (190°C) for about 35-40 minutes, or until a toothpick inserted into the center comes out clean. Let the cake cool for a few minutes before slicing and serving. Dust with confectioners’ sugar if desired.
Handy Tips
- For an extra crispy top, broil the cake for 1-2 minutes after baking. Keep an eye on it to avoid burning.
- Substitute the granulated sugar with brown sugar for a deeper flavor, or use a mixture of both for a balanced taste.
- Avoid overmixing the batter to prevent a dense cake. Mix wet and dry ingredients separately and gently fold them together.
Heat Control
To achieve the perfect bake, ensure your oven is at the correct temperature. For this recipe, 375°F (190°C) is ideal. The baking time may vary depending on your oven, so keep an eye on the cake after 30 minutes. It’s done when a toothpick inserted into the center comes out clean, and the top is golden brown.
Crunch Factor
The crunch factor in this cake comes from the cinnamon sugar topping. To enhance this, make sure to sprinkle the sugar mixture evenly and don’t overbake, as this can make the top too crispy. A light broil after baking can also add a nice crunch without drying out the cake.
Pro Kitchen Tricks
- To ensure the cake releases easily from the pan, grease it thoroughly with butter or cooking spray and dust it with flour, tapping out any excess.
- For a professional finish, let the cake cool completely in the pan before transferring it to a wire rack to cool completely. This helps prevent it from breaking apart.
Storage Tips
- Store the cake in an airtight container at room temperature for up to 3 days. It can also be frozen for up to 2 months. When freezing, wrap the cake tightly in plastic wrap or aluminum foil and place it in a freezer bag.
- To reheat, thaw the cake overnight in the fridge, then let it come to room temperature. Alternatively, you can reheat slices in the microwave for about 20-30 seconds each.
Gift Packaging Ideas
This cake makes a wonderful gift, especially for coworkers, neighbors, or as a housewarming present. Consider packaging it in a decorative tin or a nicely wrapped cardboard box. You can also add a personal touch with a handwritten note or a ribbon around the package. For a more rustic look, wrap the cake in parchment paper and tie it with twine.
Flavor Variations
- Different spices: Try adding a pinch of nutmeg or cardamom to the batter for a unique twist.
- Creative toppings: Before baking, sprinkle some chopped nuts or chocolate chips on top of the cake for added texture and flavor.
- Ingredient swaps: Replace the granulated sugar with honey or maple syrup for a different flavor profile. You can also use almond milk or soy milk instead of regular milk for a non-dairy version.
Troubleshooting
- Texture problems: If the cake turns out too dense, it might be due to overmixing. Try mixing the ingredients just until they come together, then stop.
- Ingredient replacements: If you’re out of an ingredient, look for substitutions online. For example, you can make a homemade baking powder by mixing baking soda and cream of tartar.
- Over/undercooking signs: Keep an eye on the cake while it’s baking. If the top starts to brown too quickly, cover it with foil. If it’s not done after the recommended time, check it every 5 minutes until a toothpick comes out clean.
FAQs
- Can I freeze it? Yes, the cake can be frozen for up to 2 months. Wrap it tightly and store it in a freezer bag.
- Is it gluten-free? No, this recipe contains all-purpose flour and is not suitable for a gluten-free diet. However, you can experiment with gluten-free flours as a substitute.
- Can I double the recipe? Yes, you can double the ingredients to make a larger cake. Just ensure you have a big enough baking dish and adjust the baking time accordingly.
Conclusion
Making a Cinna-bun Cake in the oven is a straightforward and rewarding process that yields a deliciously sweet and aromatic treat. With its simple ingredients and easy instructions, this recipe is perfect for beginners and experienced bakers alike. Feel free to experiment with different spices and toppings to make the cake your own, and don’t hesitate to share your creations with friends and family. Whether you’re baking for a special occasion or just a cozy Sunday morning, this Cinna-bun Cake is sure to become a favorite.
Cinna-bun Cake in the Oven
A sweet and aromatic cake that combines the flavors of cinnamon and sugar, perfect for breakfast or as a dessert.
🥘 Ingredients
👩🍳 Instructions
-
1Prepare the dough by mixing wet and dry ingredients separately and then combining them.
-
2Add yeast and let the mixture rest.
-
3Layer the cake with cinnamon sugar and butter.
-
4Bake the cake in a preheated oven at 375°F (190°C) for about 35-40 minutes.