Irresistible Salted Honey Pie
Introduction
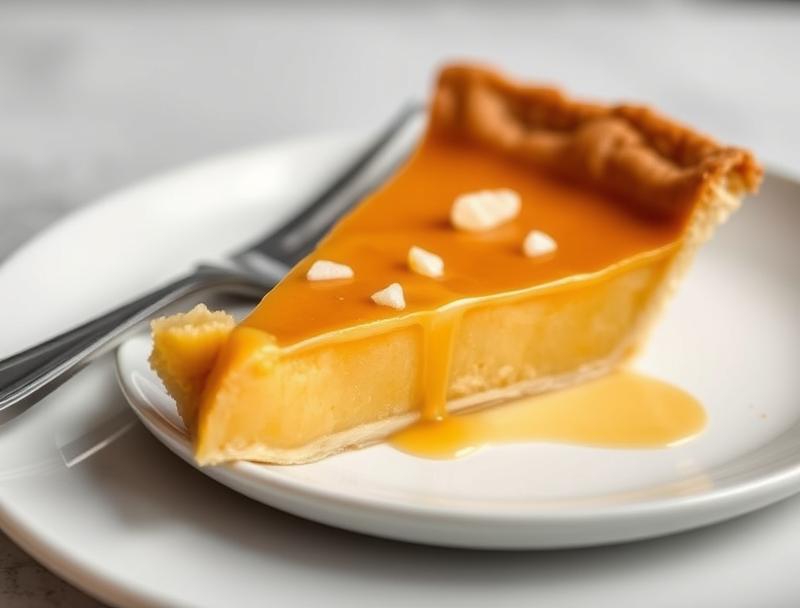
Imagine a dessert that combines the sweetness of honey, the crunch of a perfectly baked crust, and the touch of saltiness that elevates each bite to a whole new level of flavor. The Irresistible Salted Honey Pie is not just a dessert; it’s an experience that will leave you and your guests in awe. What makes this pie truly special is its accessibility – using everyday ingredients, it’s surprisingly easy to make, and the creativity it allows in terms of toppings and variations will keep you experimenting for months to come. Whether you’re a seasoned baker or a beginner looking to impress, this recipe is sure to become a staple in your repertoire.
Why This Works
- Flavor balance and ingredient accessibility: The combination of honey, salt, and the richness of the filling creates a perfect balance of flavors, and the best part is that you likely have most of the ingredients already in your pantry.
- Ease of preparation: Despite its impressive presentation, this pie is relatively easy to prepare. The steps are straightforward, and the ingredients are simple to work with, making it a great option for both beginners and experienced bakers.
- Impressive results with minimal effort: The end result is a beautifully presented pie that looks like it came from a professional bakery, all with minimal fuss and effort. It’s perfect for special occasions or as a centerpiece for any gathering.
Ingredients
- 1 1/2 cups all-purpose flour
- 1/2 cup cold unsalted butter, cut into small pieces
- 1/4 cup ice water
- 1/2 cup honey
- 1/4 cup granulated sugar
- 1/2 teaspoon salt
- 1/2 teaspoon vanilla extract
- 2 large eggs
- 1 cup heavy cream
- Fresh fruits or nuts for topping (optional)
Instructions
- Step 1: Begin by making the crust. In a large bowl, combine the flour and salt. Add the cold butter and use a pastry blender or your fingers to work it into the flour until the mixture resembles coarse crumbs. Gradually add the ice water, stirring with a fork until the dough comes together in a ball. Wrap in plastic and refrigerate for at least 30 minutes.
- Step 2: Preheat your oven to 375°F (190°C). On a lightly floured surface, roll out the chilled dough to a thickness of about 1/8 inch. Transfer the dough to a 9-inch pie dish and trim the edges to fit. Crimp the edges to form a decorative border.
- Step 3: In a large bowl, whisk together the honey, granulated sugar, and salt until well combined. Add the vanilla extract and whisk until smooth. Beat in the eggs until the mixture is creamy, then stir in the heavy cream until fully incorporated.
- Step 4: Pour the honey filling into the pie crust. Bake the pie for 40-45 minutes, or until the filling is set and the crust is golden brown. Allow the pie to cool completely on a wire rack before serving. If desired, top with fresh fruits or nuts for added texture and flavor.
Handy Tips
- For a perfectly baked crust, make sure it’s chilled before baking, and use a pie shield or foil to protect the edges from overbrowning.
- If you find that your honey is too thick, you can warm it slightly in the microwave or over a double boiler to make it easier to mix.
- Don’t overmix the filling, as this can lead to a pie that’s too dense. Stop mixing once the ingredients are just combined.
Heat Control
When baking the pie, it’s crucial to keep an eye on the temperature and the time. The ideal temperature is 375°F (190°C), and the pie should bake for 40-45 minutes. Check for doneness by gently jiggling the pie; if the center is set and doesn’t jiggle excessively, it’s ready. Also, keep an eye on the crust’s color; it should be golden brown but not overly dark.
Crunch Factor
The crunch factor in this pie comes from the perfectly baked crust and any additional toppings you might choose, such as nuts. To achieve a crunchy crust, make sure it’s baked until golden brown, and consider blind baking it for a few minutes before adding the filling. For toppings, nuts like almonds or pecans add a wonderful texture contrast to the smooth honey filling.
Pro Kitchen Tricks
- Use high-quality ingredients: The flavor of your honey and the freshness of your eggs will significantly impact the final taste of your pie.
- Don’t skip the chilling step: Chilling the dough will help the crust hold its shape and bake up flaky and tender.
- Experiment with flavors: Consider adding a pinch of salt or a teaspoon of spices like cinnamon or nutmeg to the filling for added depth of flavor.
Storage Tips
- The pie can be stored at room temperature for up to 2 days. If you don’t plan to serve it within this timeframe, consider refrigerating or freezing it.
- For refrigeration, cover the pie loosely with plastic wrap or aluminum foil and store in the refrigerator for up to 5 days.
- For freezing, wrap the pie tightly in plastic wrap or aluminum foil and place in a freezer-safe bag. Frozen pie can be stored for up to 3 months. To thaw, leave at room temperature or refrigerate overnight.
Gift Packaging Ideas
If you’re considering gifting this pie, presentation is key. Wrap the pie in a decorative towel or place it in a charming pie box. You could also add a personal touch with a handwritten note or a small bag of gourmet coffee or tea to enjoy alongside the pie. For a more rustic look, wrap the pie in parchment paper and twine, and don’t forget to include a sprinkle of fresh herbs or a few nuts on top for added visual appeal.
Flavor Variations
- Different spices: Consider adding a pinch of cinnamon, nutmeg, or cardamom to the filling for a unique twist.
- Creative toppings: Fresh fruits like strawberries or blueberries, nuts like almonds or pecans, or even a drizzle of chocolate can add a new dimension to the pie.
- Ingredient swaps: For a dairy-free version, you could substitute the heavy cream with a non-dairy alternative like coconut cream or almond milk.
Troubleshooting
- Texture problems: If your crust turns out too dense, it might be due to overworking the dough. Try to mix and roll out the dough just until it comes together.
- Ingredient replacements: If you’re out of a particular ingredient, don’t be afraid to get creative with substitutions. Just remember, the flavor and texture might vary slightly.
- Over/undercooking signs: Keep an eye on your pie while it’s baking. If the crust is getting too dark, cover the edges with foil. If the filling isn’t set, bake for a few more minutes and check again.
FAQs
- Can I freeze it? Yes, the pie can be frozen for up to 3 months. Wrap it tightly in plastic wrap or aluminum foil and place in a freezer-safe bag.
- Is it gluten-free? The crust in this recipe contains wheat flour, making it not gluten-free. However, you could experiment with gluten-free flours to create a gluten-free version.
- Can I double the recipe? Yes, you can double the recipe to make two pies. Just keep in mind that you’ll need to adjust the baking time slightly for two pies.
Conclusion
Making the Irresistible Salted Honey Pie is a journey of discovery, from the initial mixing of the crust to the final presentation of the beautifully baked pie. It’s a recipe that encourages creativity and flexibility, allowing you to make it your own with different toppings and flavor variations. Whether you’re a fan of sweet treats or just looking for a new dessert to impress your friends and family, this pie is sure to become a favorite. So, don’t be afraid to get baking, and remember, the most important ingredient in any recipe is love.
Irresistible Salted Honey Pie
A dessert pie that combines the sweetness of honey with the crunch of a perfectly baked crust and a touch of saltiness.
🥘 Ingredients
👩🍳 Instructions
-
1Make the crust by combining flour and salt, then adding cold butter and ice water.
-
2Roll out the dough, place it in a pie dish, and trim the edges.
-
3Prepare the filling by whisking together honey, sugar, salt, and vanilla extract, then beating in eggs and heavy cream.
-
4Pour the filling into the pie crust and bake until the filling is set and the crust is golden brown.