Tangy Baby Lemon Impossible Pies Recipe
Introduction
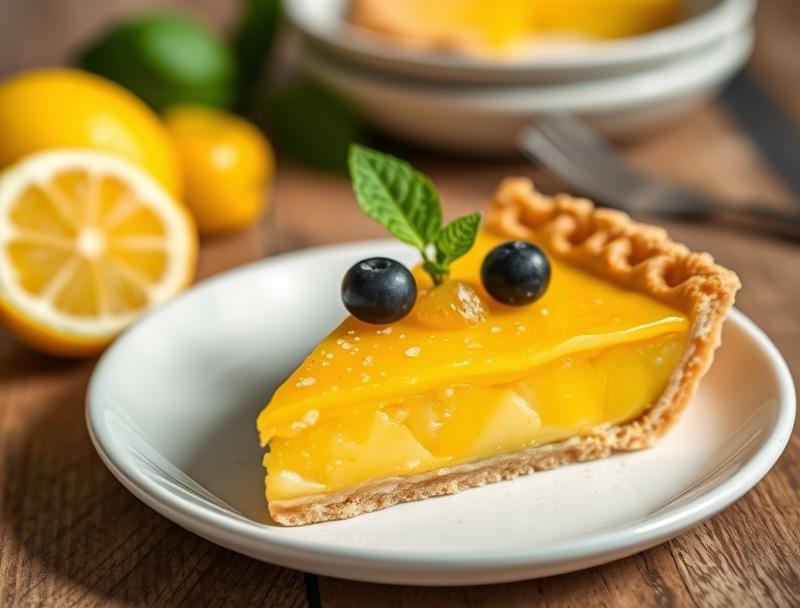
Imagine a dessert that combines the brightness of lemon, the simplicity of everyday ingredients, and the magic of a self-forming crust, all in one delightful package. Welcome to the world of Tangy Baby Lemon Impossible Pies, a recipe that will revolutionize your dessert game with its ease, flavor, and creativity. These pies are not just a treat for the taste buds but also a testament to the versatility and accessibility of baking. Using ingredients you likely have on hand, you can create individual servings of tangy, sweet, and incredibly satisfying desserts that are sure to impress both family and friends.
Why This Works
- Flavor balance and ingredient accessibility: The combination of lemon juice, sugar, eggs, and flour creates a perfectly balanced flavor profile that is both tangy and sweet, using ingredients that are readily available in most kitchens.
- Ease of preparation: The beauty of impossible pies lies in their simplicity. With a straightforward mixing process and no need to pre-bake crusts, these pies are a breeze to prepare, even for the most novice bakers.
- Impressive results with minimal effort: Despite the ease of preparation, the end result is nothing short of impressive. The self-forming crust and the creamy, lemony filling will make it seem like you spent hours in the kitchen, perfecting your craft.
Ingredients
- 1 1/2 cups granulated sugar
- 1/2 cup all-purpose flour
- 1/2 cup unsalted butter, melted
- 1/2 cup freshly squeezed lemon juice
- 1/2 cup milk
- 2 large eggs
- 1 teaspoon grated lemon zest
- 1/4 teaspoon salt
- 1/4 teaspoon ground nutmeg (optional)
- Confectioners’ sugar, for dusting (optional)
Instructions
- Step 1: Preheat your oven to 350°F (180°C). Ensure you have all ingredients measured and ready to go. This includes grating the lemon zest and squeezing the lemon juice.
- Step 2: In a large bowl, whisk together the sugar, flour, and salt. Add the melted butter, lemon juice, milk, eggs, and lemon zest. Whisk until the mixture is smooth and well combined.
- Step 3: Pour the mixture into 4 to 6 small baking dishes or ramekins, depending on the size you prefer for your pies. Place the dishes on a baking sheet lined with parchment paper.
- Step 4: Bake for 35-40 minutes, or until the edges are set, and the centers are just slightly jiggly. The pies will continue to set as they cool. Allow them to cool completely in the dishes before serving. Dust with confectioners’ sugar if desired.
Handy Tips
- For an extra burst of lemon flavor, don’t skip the lemon zest. It adds a depth and brightness that complements the lemon juice perfectly.
- If you find that your pies are not setting properly, check your oven temperature and ensure that you’re not overmixing the batter, as this can lead to a dense or soggy texture.
- Consider using different extracts (like almond or coconut) to create unique flavor variations of the impossible pies.
Heat Control
Maintaining the right oven temperature is crucial for the success of these pies. Ensure your oven is at a true 350°F (180°C), as overheating can cause the pies to cook too quickly on the outside before the centers are fully set. The ideal baking time will depend on the size of your pies, so keep an eye on them after the 30-minute mark, checking every 5 minutes thereafter until they’re done to your liking.
Crunch Factor
The beauty of impossible pies lies in their texture – a crunchy, golden crust giving way to a creamy, tender filling. To achieve this perfect contrast, avoid overmixing the batter, which can lead to a dense, uniform texture. Also, don’t overbake; the pies should still be slightly jiggly in the center when you remove them from the oven, as they will set further upon cooling.
Pro Kitchen Tricks
- For a professional finish, let the pies cool completely before serving. This allows the filling to set perfectly and makes them easier to handle and serve.
- Experiment with the recipe by adding different flavors like vanilla, nuts, or even cocoa powder to create entirely new desserts.
- Keep the pies in an airtight container in the fridge for up to 3 days. Let them come to room temperature or lightly warm them in the microwave before serving for the best texture and flavor.
Storage Tips
- Leftover pies can be stored in the refrigerator for up to 3 days. It’s best to let them cool completely before refrigerating to prevent moisture from accumulating and making the crust soggy.
- For longer storage, consider freezing the baked pies. Wrap each pie tightly in plastic wrap or aluminum foil and place them in a freezer-safe bag. Frozen pies can be thawed overnight in the fridge or reheated in the microwave.
- When reheating, be cautious not to overheat, as this can cause the filling to become too runny. A short burst in the microwave or a few minutes in a low-temperature oven should suffice.
Gift Packaging Ideas
If you’re considering gifting these delightful pies, presentation is key. Place each pie in a small gift box or a decorative tin, dust with confectioners’ sugar, and add a ribbon or a gift tag with a personal message. For a more rustic look, wrap each pie in parchment paper and twine. You can also include a small jar of whipped cream or a bag of shortbread cookies to complement the gift.
Flavor Variations
- Different spices: Add a pinch of cinnamon, nutmeg, or cardamom to the batter for a unique twist on the classic lemon flavor.
- Creative toppings: Top your pies with a dollop of whipped cream, a sprinkle of powdered sugar, or some fresh fruit to add color and extra flavor.
- Ingredient swaps: Substitute the lemon juice with lime or orange juice for a different citrus flavor profile. You can also use almond milk or another non-dairy milk for a vegan version.
Troubleshooting
- Texture problems: If your pies turn out too dense, it might be due to overmixing the batter. Try mixing the ingredients just until they come together for a lighter texture.
- Ingredient replacements: If you’re out of a specific ingredient, consider what you can substitute it with. For example, you can use melted coconut oil instead of butter for a different flavor.
- Over/undercooking signs: Keep an eye on your pies while they’re baking. If the edges start to brown too quickly, cover the tops with foil to prevent overcooking. Conversely, if the centers seem too jiggly after the recommended baking time, give them a few more minutes and check again.
FAQs
- Can I freeze it? Yes, you can freeze the pies after they’ve been baked. Wrap them tightly and store in a freezer-safe bag for up to 2 months.
- Is it gluten-free? The recipe as given contains flour, making it not gluten-free. However, you can experiment with gluten-free flour mixes to create a gluten-free version.
- Can I double the recipe? Absolutely! Simply double all the ingredients and adjust the baking time as needed. Keep in mind that larger pies may take longer to bake through.
Conclusion
The Tangy Baby Lemon Impossible Pies are a true delight, offering a perfect blend of tanginess, sweetness, and ease of preparation. Whether you’re a seasoned baker or just starting out, this recipe is sure to become a favorite. Feel free to experiment with different flavors and ingredients to make it your own, and don’t hesitate to share your creations with friends and family. The joy of baking lies not just in the process, but in the joy it brings to others. So go ahead, get baking, and spread a little lemony love!
Tangy Baby Lemon Impossible Pies Recipe
A tangy and sweet dessert recipe that combines lemon juice, sugar, eggs, and flour to create individual servings of impossible pies with a self-forming crust.
🥘 Ingredients
👩🍳 Instructions
-
1Preheat the oven to 350°F (180°C).
-
2Whisk together the sugar, flour, and salt. Add the melted butter, lemon juice, milk, eggs, and lemon zest. Mix until smooth.
-
3Pour the mixture into 4 to 6 small baking dishes or ramekins. Place the dishes on a baking sheet lined with parchment paper.
-
4Bake for 35-40 minutes, or until the edges are set and the centers are just slightly jiggly. Let cool completely before serving.