No-Bake Chocolate Oatmeal Cookie Bars You’ll Love
Introduction
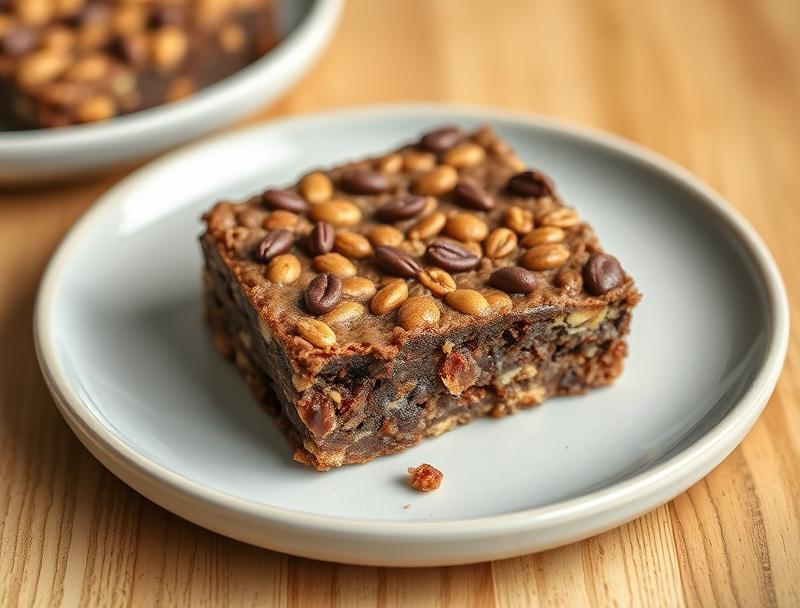
Imagine sinking your teeth into a deliciously chewy, chocolatey, and oat-filled treat that requires no baking whatsoever. These No-Bake Chocolate Oatmeal Cookie Bars are a dream come true for anyone with a sweet tooth and a penchant for easy, creative desserts. Using everyday ingredients, you can whip up a batch of these mouthwatering bars in no time, perfect for satisfying your cravings or impressing friends and family with your culinary skills. The best part? They’re incredibly simple to make, requiring minimal effort for maximum flavor and enjoyment.
Why This Works
- Flavor balance and ingredient accessibility: The combination of rolled oats, creamy peanut butter, and rich chocolate creates a perfect harmony of flavors that everyone will love. Plus, the ingredients are easily found in most kitchens, making it a convenient option for a quick dessert.
- Ease of preparation: The no-bake aspect of these cookie bars means you can skip the hassle of preheating the oven and monitoring baking times, making the preparation process swift and straightforward.
- Impressive results with minimal effort: Despite the simplicity of the recipe, the end result is a batch of beautifully layered, deliciously textured bars that look and taste like they required much more effort, perfect for potlucks, gatherings, or as a sweet treat any day of the week.
Ingredients
- 2 cups rolled oats
- 1 cup creamy peanut butter
- 1/2 cup unsalted butter, softened
- 1 1/2 cups confectioners’ sugar
- 1/2 cup brown sugar
- 1 teaspoon vanilla extract
- 1/2 teaspoon salt
- 1 cup semisweet chocolate chips
- Optional: Chopped nuts, dried cranberries, or coconut flakes for added texture and flavor
Instructions
- Step 1: In a large mixing bowl, combine the oats, peanut butter, and softened butter. Mix until well combined and a dough forms.
- Step 2: In a separate bowl, mix the confectioners’ sugar, brown sugar, vanilla extract, and salt. Add this sugar mixture to the oat mixture and mix until a uniform dough is achieved.
- Step 3: Press half of the dough mixture into a lined or greased 8×8-inch baking dish to form the base layer.
- Step 4: Melt the chocolate chips in a double boiler or in the microwave in 30-second increments, stirring between each interval until smooth. Spread the melted chocolate over the base layer in the baking dish.
- Step 5: Top the chocolate layer with the remaining dough, pressing gently to adhere. If using, sprinkle chopped nuts, dried cranberries, or coconut flakes on top for extra texture and flavor.
- Step 6: Refrigerate the bars for at least 30 minutes to set. Cut into bars and serve chilled.
Handy Tips
- For a firmer base, you can refrigerate the oat mixture for about 10 minutes before pressing it into the baking dish.
- Experiment with different types of chocolate or add-ins like caramel bits, candy pieces, or cocoa nibs to change up the flavor and texture.
- If the dough is too sticky, add a bit more oats. If it’s too dry, add a bit more peanut butter.
Heat Control
Since these bars are no-bake, heat control isn’t a concern. However, when melting the chocolate, be cautious not to overheat it, as this can cause the chocolate to seize up or lose its smooth texture. Melting in short intervals and stirring well between each heating cycle can help prevent this.
Crunch Factor
The crunch factor in these bars comes from the oats and any add-ins like nuts or coconut flakes. To achieve the perfect texture, press the dough firmly into the baking dish but avoid over-compressing, which can make the bars dense. The refrigeration step helps set the layers, ensuring each bite has a delightful combination of textures.
Pro Kitchen Tricks
- Use a high-quality chocolate for the best flavor. Dark, milk, or white chocolate can each provide a unique taste experience.
- Line the baking dish with parchment paper or aluminum foil for easy removal and cleanup.
- Consider making these bars in a variety of sizes by using different sized baking dishes or even muffin tins for bite-sized treats.
Storage Tips
- Store the bars in an airtight container in the refrigerator for up to 5 days.
- For longer storage, these bars can be frozen. Cut them first, then place the bars in a single layer in a freezer-safe container or bag. They can be frozen for up to 2 months. Allow to thaw at room temperature or refrigerate overnight.
- Keep the bars away from direct sunlight and heat sources to preserve the texture and freshness.
Gift Packaging Ideas
These no-bake chocolate oatmeal cookie bars are perfect for gifting. Consider packaging them in decorative tins, glass jars, or even cellophane bags tied with a ribbon. You can also add a personal touch with a handwritten note or a sprinkle of edible decorations on top. For a more rustic look, use parchment paper or a paper bag with a cute label. They’re ideal for coworker gifts, holiday exchanges, or as a sweet surprise for friends and family.
Flavor Variations
- Different spices: Add a pinch of cinnamon, nutmeg, or cardamom to the dough for a unique twist.
- Creative toppings: Before the chocolate sets, sprinkle with sea salt, chopped nuts, shredded coconut, or even candy pieces for added flavor and texture.
- Ingredient swaps: Use almond butter or cashew butter instead of peanut butter for a different nutty flavor, or try using dairy-free chocolate for a vegan version.
Troubleshooting
- Texture problems: If the bars are too soft, they may not have been refrigerated long enough. If they’re too hard, they might have been over-refrigerated or the dough was over-compressed.
- Ingredient replacements: Always try to use the ingredients listed for the best results, but in a pinch, similar ingredients can be substituted. Just be aware that flavor and texture might vary slightly.
- Over/undercooking signs: Since these are no-bake, the concern is more about the setting of the chocolate and the firmness of the bars. If the chocolate doesn’t set properly, it might not have been melted correctly or the bars weren’t refrigerated long enough.
FAQs
- Can I freeze it? Yes, these bars can be frozen for up to 2 months. It’s best to cut them first, then freeze.
- Is it gluten-free? Depending on the type of oats used, these bars can be gluten-free. Ensure that the oats and any add-ins are gluten-free for a gluten-free version.
- Can I double the recipe? Yes, you can easily double or even triple the recipe if you need more bars. Just adjust the size of your baking dish accordingly to ensure the bars are not too thick.
Conclusion
With their irresistible combination of chocolate, oats, and peanut butter, these No-Bake Chocolate Oatmeal Cookie Bars are sure to become a favorite. They’re perfect for a quick dessert fix, a potluck contribution, or as a gift for friends and family. Don’t be afraid to experiment with different flavors and add-ins to make the recipe your own. Whether you’re a seasoned baker or a beginner in the kitchen, these bars are a simple yet impressive treat that’s sure to please. So go ahead, get creative, and indulge in the delicious world of no-bake desserts!
No-Bake Chocolate Oatmeal Cookie Bars You’ll Love
Deliciously chewy, chocolatey, and oat-filled no-bake cookie bars that are easy to make and perfect for any occasion.
🥘 Ingredients
👩🍳 Instructions
-
1Combine oats, peanut butter, and softened butter in a large mixing bowl.
-
2Mix in confectioners' sugar, brown sugar, vanilla extract, and salt until a uniform dough forms.
-
3Press half of the dough into a lined or greased 8x8-inch baking dish.
-
4Melt chocolate chips and spread over the base layer.
-
5Top with the remaining dough and refrigerate until set.
-
6Cut into bars and serve chilled.