Cheesy Cauliflower and Broccoli Gratin Recipe
Introduction
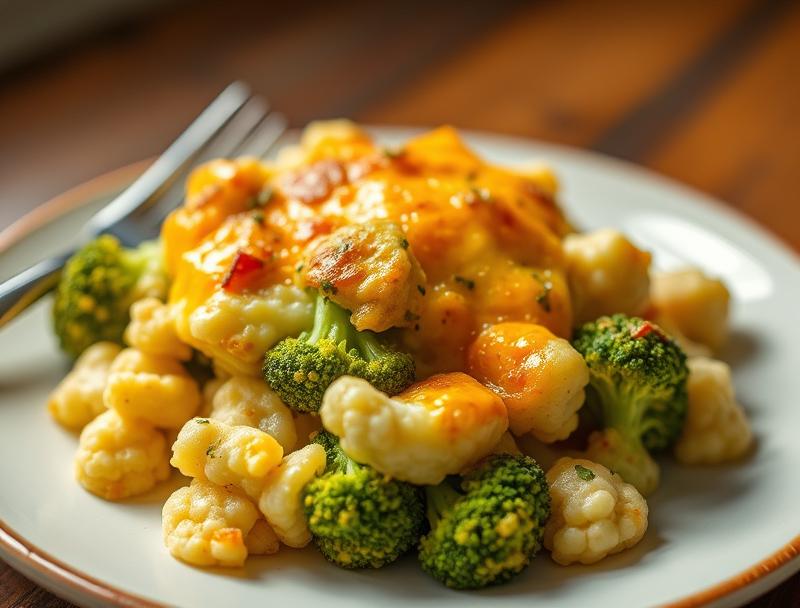
This Cheesy Cauliflower and Broccoli Gratin Recipe is a masterpiece of comfort food, blending the natural sweetness of cauliflower and broccoli with the richness of cheese and the crunch of a perfectly toasted crust. It’s a dish that’s both easy to make and impressive to serve, perfect for family dinners or special occasions. The best part? It’s made with everyday ingredients, requiring minimal effort for a result that’s sure to delight both kids and adults alike. Whether you’re a vegetarian looking for a satisfying main course or a parent seeking a creative way to get your family to eat more veggies, this recipe is a must-try.
Why This Works
- Flavor balance and ingredient accessibility: The combination of cauliflower, broccoli, and a blend of cheeses creates a harmonious balance of flavors that is both comforting and sophisticated. Plus, all the ingredients are easily found in most supermarkets.
- Ease of preparation: Despite its impressive presentation, this gratin is surprisingly simple to prepare. It involves basic cooking techniques and requires minimal supervision, making it perfect for busy weeknights or when you need a dish that can cook while you attend to other things.
- Impressive results with minimal effort: The layering of the vegetables with cheese and the final browning under the broiler transforms simple ingredients into a golden, bubbly masterpiece that looks like it came from a gourmet kitchen.
Ingredients
- 1 large head of cauliflower, broken into florets
- 1 large head of broccoli, broken into florets
- 2 tablespoons butter
- 1 medium onion, sliced
- 2 cloves garlic, minced
- 1 cup grated cheddar cheese
- 1/2 cup grated mozzarella cheese
- 1/4 cup grated parmesan cheese
- 1/2 cup heavy cream or whole milk
- Salt and pepper, to taste
- Fresh parsley or thyme, chopped (for garnish)
Instructions
- Step 1: Preparation – Preheat your oven to 375°F (190°C). In a large pot of boiling, salted water, blanch the cauliflower and broccoli florets for about 5 minutes, or until they start to soften. Drain well and set aside.
- Step 2: Sauté the Onion and Garlic – In a large skillet, melt 1 tablespoon of butter over medium heat. Add the sliced onion and cook, stirring occasionally, until it is softened and lightly caramelized, about 8-10 minutes. Add the minced garlic and cook for an additional minute, stirring constantly to prevent burning.
- Step 3: Assemble the Gratin – In a greased 9×13-inch baking dish, create a layer of the sautéed onion and garlic. Add a layer of the blanched cauliflower and broccoli on top. Sprinkle with a third of the cheddar, mozzarella, and parmesan cheese. Repeat this process two more times, ending with a layer of cheese on top. Pour the heavy cream or whole milk over the cheese to help it melt and bind the gratin together.
- Step 4: Baking and Serving – Cover the baking dish with aluminum foil and bake for 25 minutes. Remove the foil and continue baking for an additional 10-15 minutes, or until the top is golden brown and the gratin is heated through. Remove from the oven and let it rest for a few minutes before serving. Garnish with chopped fresh parsley or thyme.
Handy Tips
- For an extra crispy top, broil the gratin for 2-3 minutes after removing the foil, watching carefully to avoid burning.
- Consider adding some diced ham, bacon, or cooked chicken to make the dish more substantial.
- Don’t overcook the vegetables during the blanching step; they should still have some crunch to them.
Heat Control
It’s crucial to monitor the heat, especially when broiling, to achieve the perfect golden crust without burning. The ideal temperature for baking is 375°F (190°C), and when broiling, keep an eye on the gratin to ensure it doesn’t overbrown.
Crunch Factor
The crunch factor in this dish comes from the toasted top layer of cheese and possibly some added crunchy elements like breadcrumbs or chopped nuts. To achieve this, ensure the gratin is under the broiler for just the right amount of time and consider sprinkling some crunchy toppings before broiling.
Pro Kitchen Tricks
- Use a variety of cheeses for a deeper flavor profile. Mixing cheddar, mozzarella, and parmesan gives a nice balance of sharpness, creaminess, and saltiness.
- Don’t skip the step of caramelizing the onions; it adds a depth of flavor that elevates the entire dish.
- For easier serving, let the gratin rest for a few minutes before slicing and serving. This helps the cheese set and makes it easier to portion.
Storage Tips
- Leftovers can be stored in the refrigerator for up to 3 days. Reheat in the oven at 350°F (175°C), covered with foil, until warmed through.
- It’s not recommended to freeze the gratin after it’s been baked, as the texture of the cheese and vegetables may suffer. However, you can prepare the components (blanched vegetables, sautéed onion and garlic, cheese mixture) and freeze them separately before assembling and baking.
- Use airtight, shallow containers for storing leftovers to prevent moisture from accumulating and making the gratin soggy.
Gift Packaging Ideas
While this dish is best served fresh, if you’re looking to share it as a gift, consider baking it in individual portions in ramekins or small baking dishes. These can be cooled, covered, and refrigerated or frozen until ready to reheat and serve. Wrap each ramekin in a decorative towel or place in a gift basket with some crusty bread or a side salad for a complete meal gift.
Flavor Variations
- Different spices: Add some dried or fresh herbs like thyme, rosemary, or bay leaves to the cheese mixture for an aromatic twist.
- Creative toppings: Before broiling, top the gratin with some chopped nuts, seeds, or crispy breadcrumbs for added texture.
- Ingredient swaps: Use different types of cheese or add some grated carrot or zucchini to the vegetable mix for added color and nutrients.
Troubleshooting
- Texture problems: If the gratin turns out too soggy, it may be due to overcooking the vegetables or using too much cream. If it’s too dry, the cheese may not have melted properly or the dish may have been overbaked.
- Ingredient replacements: Feel free to substitute broccoli with other green vegetables like Brussels sprouts or kale, and use any combination of cheeses you like.
- Over/undercooking signs: The gratin is done when the top is golden brown, and the vegetables are tender but still crisp. Avoid overbaking, as this can dry out the dish.
FAQs
- Can I freeze it? It’s best to freeze the components separately before baking, as freezing the baked gratin can affect its texture.
- Is it gluten-free? Yes, this recipe is naturally gluten-free, making it a great option for those with gluten intolerance or sensitivity.
- Can I double the recipe? Absolutely, just ensure you have a large enough baking dish to accommodate the increased volume of ingredients.
Conclusion
This Cheesy Cauliflower and Broccoli Gratin Recipe is a versatile and delicious addition to any meal. Its ease of preparation, impressive presentation, and rich, comforting flavor make it perfect for both everyday meals and special occasions. Feel free to experiment with the ingredients and toppings to make it your own, and don’t hesitate to reach out if you have any questions or need further substitutions or variations. Happy cooking, and enjoy the delight of watching your family and friends savor each bite of this golden, cheesy masterpiece!
Cheesy Cauliflower and Broccoli Gratin Recipe
A comforting, cheesy gratin blending cauliflower, broccoli, and a mix of cheeses, perfect for family dinners or special occasions.
🥘 Ingredients
👩🍳 Instructions
-
1Preheat the oven to 375°F (190°C).
-
2Blanch the cauliflower and broccoli florets in boiling, salted water for about 5 minutes.
-
3Sauté the onion and garlic in butter until the onion is softened and lightly caramelized.
-
4Assemble the gratin by layering the sautéed onion and garlic, blanched vegetables, and cheese mixture in a baking dish, ending with a layer of cheese on top.
-
5Cover the dish with foil and bake for 25 minutes, then remove the foil and continue baking for an additional 10-15 minutes, or until the top is golden brown.