Easy Easter Dirt Cups Recipe with Colorful Pudding Layers
Introduction
Welcome to the most delightful and easy-to-make Easter dessert recipe: Easy Easter Dirt Cups with Colorful Pudding Layers. This creative treat is perfect for the Easter season, with its vibrant colors and fun presentation that resembles miniature gardens or “dirt cups.” The best part? It’s incredibly easy to make, requiring just a few ingredients and minimal preparation time. The combination of creamy pudding, crunchy cookies, and sweet whipped cream is a match made in heaven, and the colorful layers add an extra touch of festivity to your Easter celebrations. Whether you’re a seasoned baker or a beginner in the kitchen, this recipe is sure to impress your family and friends with its simplicity and flavor.
Why This Works
- The flavor balance in this recipe is perfect, with the sweetness of the pudding and whipped cream balanced by the earthiness of the crushed Oreos, simulating “dirt.”
- The ingredients are easily accessible and likely already stocked in your pantry, making it a convenient choice for last-minute Easter preparations.
- The ease of preparation is a significant advantage, as it requires no baking and can be assembled in a short amount of time, perfect for busy Easter schedules.
- The impressive results with minimal effort make this recipe a winner for anyone looking to make a statement at Easter gatherings without spending hours in the kitchen.
Ingredients
- 1 package of vanilla pudding mix
- 1 package of chocolate pudding mix
- 1 cup of milk
- 1/2 cup of heavy whipping cream
- 1 tablespoon of sugar
- 1 teaspoon of vanilla extract
- 1 cup of crushed Oreos for the “dirt”
- Food coloring (green, pastel colors)
- Gummy worms or Easter-themed candies for decoration
Instructions
- Step 1: Begin by preparing the pudding according to the package instructions using the milk. Divide the pudding mixture into two bowls, one for vanilla and one for chocolate. Add a few drops of green food coloring to the vanilla pudding to give it a grass-like color.
- Step 2: In a separate bowl, whip the heavy whipping cream with the sugar and vanilla extract until stiff peaks form. Set aside.
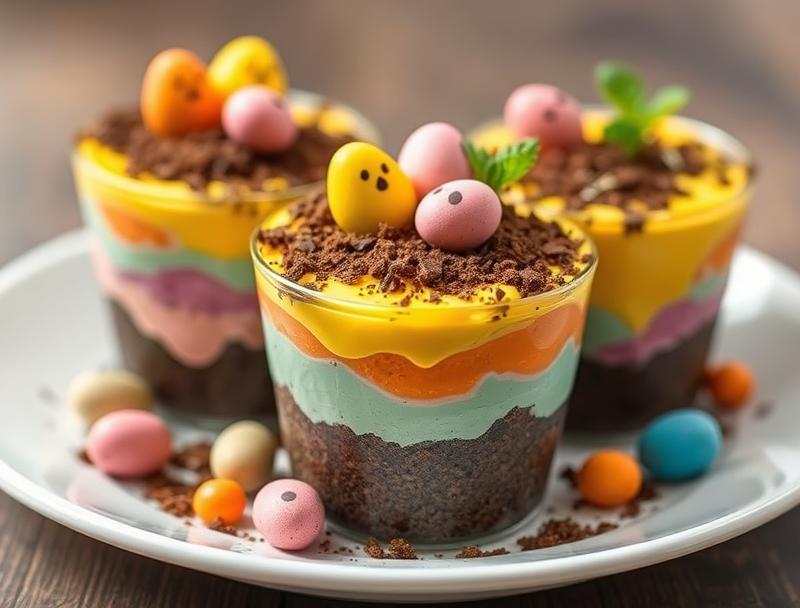
- Step 3: Layer the pudding, whipped cream, and crushed Oreos in small cups or glasses to resemble “dirt cups.” Start with a layer of chocolate pudding, followed by a layer of whipped cream, then a sprinkle of crushed Oreos. Repeat this process one more time, ending with a layer of green-colored vanilla pudding on top to resemble grass.
- Step 4: Decorate the top of each “dirt cup” with gummy worms or Easter-themed candies to look like they are coming out of the “dirt.” Refrigerate until ready to serve.
Handy Tips
- For a more vibrant green color, add a few more drops of food coloring to the vanilla pudding, but be cautious not to add too much, as it can become too dark.
- Experiment with different flavors of pudding mix for varied tastes, such as strawberry or lemon.
- Use low-fat or non-dairy milk alternatives for a lighter version of the dessert.
Heat Control
This recipe does not require any heat, as the pudding is prepared with cold milk. However, chilling the dessert in the refrigerator for at least 30 minutes before serving will help the flavors to meld together and the textures to set properly.
Crunch Factor
The crunch in this dessert comes from the crushed Oreos, which simulate the dirt. To achieve the perfect crunch, make sure not to over-crush the Oreos, as they can become too fine and lose their texture. A light crunch provides a pleasant contrast to the smooth pudding and whipped cream.
Pro Kitchen Tricks
- To make the dessert more stable and easier to serve, consider using small plastic or glass cups that can be easily picked up and eaten from.
- For a professional touch, garnish each serving with a sprig of edible flower or a small Easter pick.
- Prepare the components of the dessert ahead of time and assemble just before serving to ensure the whipped cream remains fluffy and the textures stay distinct.
Storage Tips
- Store the assembled dirt cups in the refrigerator for up to 24 hours before serving.
- Keep the whipped cream separate and whip just before assembling to prevent it from becoming flat.
- Use airtight containers to store any leftovers, making sure they are covered to prevent drying out.
Gift Packaging Ideas
These Easter dirt cups are perfectly giftable, especially for kids. Consider packaging them in small, clear plastic cups or containers and decorating the outside with Easter-themed stickers or ribbons. Adding a small bag of gummy worms or other Easter candies on the side can make the gift even more exciting.
Flavor Variations
- Try using different flavors of pudding mix, such as lemon, strawberry, or chocolate mint, for a unique twist on the classic recipe.
- Add a layer of fresh fruit, like raspberries or blueberries, for added flavor and nutrition.
- Experiment with various types of cookies for the “dirt,” such as chocolate sandwich cookies or wafers, for different textures and tastes.
Troubleshooting
- If the pudding becomes too thick, try adding a little more milk. If it’s too thin, refrigerate it for about 10 minutes to firm up.
- If the whipped cream becomes flat, whip it again just before serving.
- For uneven layers, try tapping the cups gently on the counter after adding each layer to settle the ingredients.
FAQs
- Can I freeze it? While it’s possible to freeze the components separately, it’s not recommended to freeze the assembled dessert, as the textures can become undesirable upon thawing.
- Is it gluten-free? Depending on the brand of pudding mix and cookies used, this dessert can be gluten-free. Always check the ingredient labels to ensure the products meet gluten-free standards.
- Can I double the recipe? Yes, simply double all the ingredients to make more servings. This recipe is easily scalable for larger gatherings or parties.
Conclusion
With its ease of preparation, vibrant colors, and delicious flavors, the Easy Easter Dirt Cups Recipe with Colorful Pudding Layers is a must-try for this Easter season. Whether you’re hosting a large Easter dinner or just looking for a fun dessert to enjoy with your family, this recipe is sure to delight both kids and adults alike. Don’t hesitate to get creative with the ingredients and make this dessert your own. Happy Easter and happy baking!
Easy Easter Dirt Cups Recipe with Colorful Pudding Layers
A fun and easy Easter dessert made with vanilla and chocolate pudding, whipped cream, and crushed Oreos, resembling miniature 'dirt cups' with gummy worms.
🥘 Ingredients
👩🍳 Instructions
-
1Prepare the pudding according to the package instructions using the milk. Divide the pudding mixture into two bowls, one for vanilla and one for chocolate.
-
2Add a few drops of green food coloring to the vanilla pudding to give it a grass-like color.
-
3In a separate bowl, whip the heavy whipping cream with the sugar and vanilla extract until stiff peaks form.
-
4Layer the pudding, whipped cream, and crushed Oreos in small cups or glasses to resemble 'dirt cups.'
-
5Decorate the top of each 'dirt cup' with gummy worms or Easter-themed candies to look like they are coming out of the 'dirt.'