Indulge Guilt-Free! My Healthy Homemade Butterfingers Recipe is Your New Favorite Sweet Treat!
Introduction
Who says you can’t have your cake and eat it too? Or in this case, who says you can’t indulge in a delicious, crunchy, and sweet Butterfinger treat without feeling guilty? With my healthy homemade Butterfingers recipe, you can satisfy your sweet tooth while still being mindful of your dietary goals. The best part? This recipe uses everyday ingredients and is incredibly easy to make, requiring minimal effort and creativity. Whether you’re a fan of the classic candy bar or just looking for a new sweet treat to add to your repertoire, this recipe is sure to become a favorite.
Why This Works
- Flavor balance and ingredient accessibility: The combination of peanut butter, honey, and oats provides a perfect balance of flavors and textures, while using ingredients that are easily found in most pantries.
- Ease of preparation: This recipe requires no baking and can be prepared in under 30 minutes, making it a great option for a quick dessert or snack.
- Impressive results with minimal effort: Despite its simplicity, this recipe yields a delicious and impressive treat that’s sure to wow friends and family.
Ingredients
- 1 cup creamy peanut butter
- 1/2 cup honey
- 1/4 cup rolled oats
- 1/4 cup chopped dark chocolate or chocolate chips
- 1/4 cup crushed peanuts or peanut butter chips
- 1/4 teaspoon salt
- 1 tablespoon vanilla extract
- 1/4 cup chopped butterfinger candy bars (optional)
Instructions
- Step 1: In a large mixing bowl, combine the peanut butter, honey, and vanilla extract. Mix until smooth and creamy.
- Step 2: Add the rolled oats, salt, and crushed peanuts to the peanut butter mixture. Mix until well combined.
- Step 3: Melt the chocolate chips in a double boiler or in the microwave in 30-second increments, stirring between each interval until smooth.
- Step 4: Pour the melted chocolate into the peanut butter mixture and stir until well combined. If using chopped butterfinger candy bars, fold them into the mixture at this stage.
- Step 5: Press the mixture into a lined or greased 8×8 inch baking dish. Refrigerate for at least 30 minutes to set.
- Step 6: Cut into bars and serve. Store in an airtight container in the refrigerator for up to 5 days.
Handy Tips
- For a crunchier texture, you can add more chopped peanuts or peanut butter chips to the mixture.
- To make this recipe more indulgent, you can drizzle the top with melted chocolate or caramel sauce.
- If you find the mixture too sticky, you can add a little more oats. If it’s too dry, you can add a little more honey.
Heat Control
Since this recipe doesn’t require baking, heat control is minimal. However, if you’re melting the chocolate in the microwave, be sure to stir between each interval to avoid burning the chocolate.
Crunch Factor
The crunch factor in this recipe comes from the chopped peanuts and peanut butter chips. If you prefer a chewier texture, you can reduce the amount of peanuts or omit them altogether.
Pro Kitchen Tricks
- To make the bars more uniform, you can use a cookie cutter to cut out shapes from the mixture before it sets.
- To add an extra layer of flavor, you can sprinkle a pinch of sea salt on top of the bars before serving.
Storage Tips
- Store the bars in an airtight container in the refrigerator for up to 5 days.
- For longer storage, you can freeze the bars for up to 2 months. Simply thaw at room temperature or in the refrigerator when you’re ready to serve.
Gift Packaging Ideas
If you want to give these bars as a gift, you can package them in a decorative tin or jar, or wrap them individually in plastic wrap or wax paper and tie with a ribbon. You can also add a personalized note or card to make it a more thoughtful gift.
Flavor Variations
- Try adding a teaspoon of cinnamon or nutmeg to the mixture for a warm and spicy flavor.
- Use different types of nuts, such as almonds or cashews, for a unique flavor and texture.
- Add a handful of dried cranberries or cherries to the mixture for a fruity twist.
Troubleshooting
- If the mixture is too sticky, try adding a little more oats. If it’s too dry, try adding a little more honey.
- If the bars are too crumbly, try adding a little more peanut butter to the mixture.
- If the chocolate is too hard, try melting it in the microwave for a few seconds to soften it.
FAQs
- Can I freeze it? Yes, you can freeze the bars for up to 2 months. Simply thaw at room temperature or in the refrigerator when you’re ready to serve.
- Is it gluten-free? Yes, this recipe is gluten-free, making it a great option for those with gluten intolerance or sensitivity.
- Can I double the recipe? Yes, you can easily double or triple the recipe to make more bars. Simply multiply the ingredients accordingly.
Conclusion
With this healthy homemade Butterfingers recipe, you can indulge in a delicious and satisfying sweet treat without feeling guilty. The combination of peanut butter, honey, and oats provides a perfect balance of flavors and textures, while the chopped peanuts and peanut butter chips add a satisfying crunch. Whether you’re a fan of the classic candy bar or just looking for a new sweet treat to add to your repertoire, this recipe is sure to become a favorite. So go ahead, get creative, and enjoy your guilt-free Butterfingers bars!
Indulge Guilt-Free! My Healthy Homemade Butterfingers Recipe is Your New Favorite Sweet Treat!
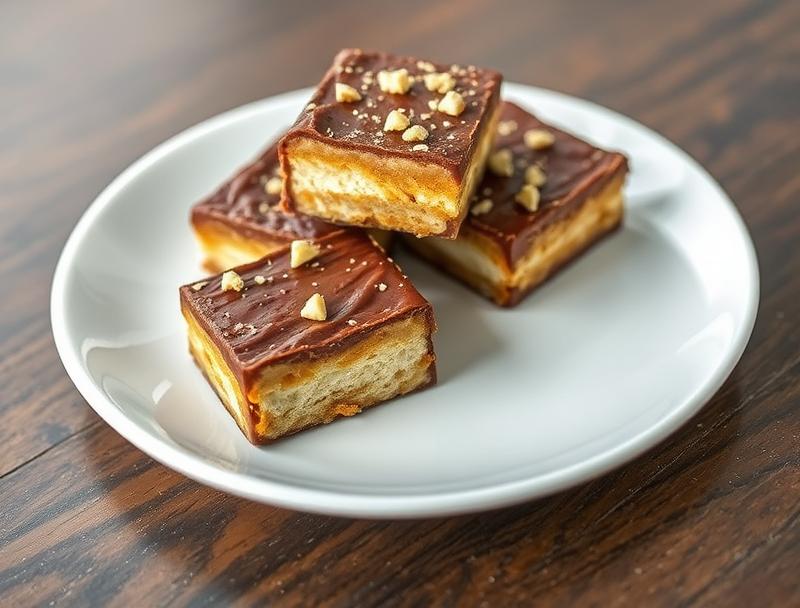
A healthy homemade version of the classic Butterfinger candy bar, made with peanut butter, honey, and oats.
🥘 Ingredients
👩🍳 Instructions
-
1In a large mixing bowl, combine the peanut butter, honey, and vanilla extract. Mix until smooth and creamy.
-
2Add the rolled oats, salt, and crushed peanuts to the peanut butter mixture. Mix until well combined.
-
3Melt the chocolate chips in a double boiler or in the microwave in 30-second increments, stirring between each interval until smooth.
-
4Pour the melted chocolate into the peanut butter mixture and stir until well combined.
-
5Press the mixture into a lined or greased 8x8 inch baking dish. Refrigerate for at least 30 minutes to set.
-
6Cut into bars and serve. Store in an airtight container in the refrigerator for up to 5 days.