Easy Espresso Brownies Recipe with Rich Chocolate Flavor
Introduction
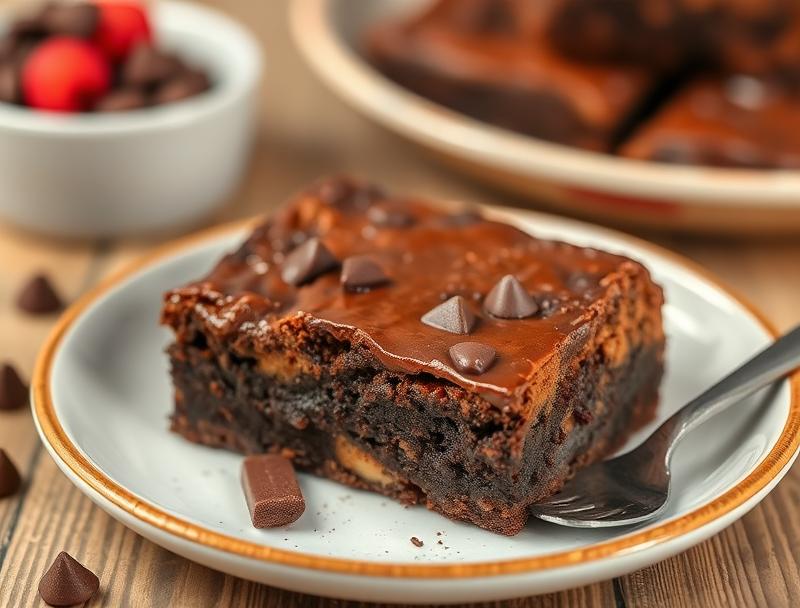
Indulge in the decadence of rich, fudgy brownies infused with the deep flavor of espresso, all made easy with everyday ingredients. This recipe is perfect for chocolate lovers and coffee aficionados alike, combining the best of both worlds in a simple yet impressive dessert. With its ease of preparation and minimal effort required, it’s a great way to satisfy your cravings or impress your guests. The creativity in this recipe comes from the balance of flavors and textures, making it a standout among traditional brownie recipes.
Why This Works
- The balance of bitter espresso and sweet chocolate creates a depth of flavor that elevates these brownies beyond the ordinary.
- The use of accessible ingredients means you can whip up a batch without needing to visit specialty stores.
- The simplicity of the recipe belies the impressive results, making it perfect for both novice bakers and experienced cooks looking for a quick dessert solution.
Ingredients
- 1 and 1/2 sticks of unsalted butter (12 tablespoons), plus more for greasing the pan
- 2 cups of sugar
- 4 large eggs
- 1/2 cup of unsweetened cocoa powder
- 1 teaspoon of vanilla extract
- 1 and 1/4 cups of all-purpose flour
- 1 teaspoon of salt
- 1 cup of semi-sweet chocolate chips
- 2 teaspoons of instant espresso powder (or 1-2 shots of strong brewed espresso)
- Chopped nuts or espresso beans for garnish (optional)
Instructions
- Step 1: Preheat your oven to 350°F (180°C). Grease an 8-inch square baking pan with butter and line it with parchment paper, leaving some overhang for easy removal.
- Step 2: In a medium bowl, whisk together flour, salt, and cocoa powder. Set aside.
- Step 3: In a large bowl, use an electric mixer to beat together the butter and sugar until light and fluffy, about 2 minutes. Beat in the eggs one at a time, followed by the vanilla extract.
- Step 4: Gradually mix in the flour mixture until just combined, being careful not to overmix. Melt the chocolate chips in a double boiler or in the microwave in 30-second increments, stirring between each interval until smooth. Allow the chocolate to cool slightly, then fold it into the batter until well combined. Stir in the espresso powder or brewed espresso.
- Step 5: Pour the batter into the prepared baking pan and smooth the top. If desired, garnish with chopped nuts or a sprinkle of espresso powder.
- Step 6: Bake for 25-30 minutes or until a toothpick inserted into the center comes out with a few moist crumbs attached. Avoid overbaking, as this will result in dry brownies.
- Step 7: Remove the brownies from the oven and let them cool completely in the pan. Once cooled, lift the brownies out of the pan using the parchment paper and cut into squares.
Handy Tips
- For a more intense chocolate experience, use dark or bittersweet chocolate chips instead of semi-sweet.
- Don’t overmix the batter, as this can lead to dense brownies. Stop mixing as soon as the ingredients are combined.
- If using brewed espresso, make sure it’s cooled down before adding it to the batter to avoid cooking the eggs prematurely.
Heat Control
Controlling the heat is crucial when baking brownies. The ideal temperature is 350°F (180°C), and baking time should be between 25-30 minutes. The brownies are done when a toothpick inserted into the center comes out with a few moist crumbs. Overbaking will result in dry, crumbly brownies, so keep an eye on them during the last 5 minutes of baking.
Crunch Factor
Achieving the right texture is key to great brownies. For fudgy brownies, take them out of the oven when they are still slightly underbaked in the center. For a crunchier top, bake for an additional 2-3 minutes, but be cautious not to overcook. Adding nuts or espresso beans on top before baking can also enhance the crunch factor.
Pro Kitchen Tricks
- Use high-quality chocolate for the best flavor. While it may be more expensive, the difference in taste is noticeable.
- Don’t skip the step of cooling the brownies completely in the pan. This helps them set properly and makes them easier to cut.
- For an extra-decadent treat, top the brownies with a scoop of vanilla ice cream or whipped cream and a drizzle of chocolate sauce.
Storage Tips
- Store the brownies in an airtight container at room temperature for up to 3 days. They can also be refrigerated for up to 5 days or frozen for up to 2 months.
- When freezing, cut the brownies into individual portions, wrap each tightly in plastic wrap, and place them in a freezer-safe bag. Thaw at room temperature or reheat in the microwave.
- For the freshest flavor, consume the brownies within a day or two of baking. However, they remain delicious for several days when stored properly.
Gift Packaging Ideas
These brownies make a wonderful gift, especially for coworkers, friends, and family members who love chocolate. Consider packaging them in decorative tins, jars, or gift boxes lined with parchment paper or wax paper. You can also wrap individual brownies in cellophane bags and tie them with a ribbon for a more personalized touch. Adding a packet of gourmet coffee or a bag of specialty teas alongside the brownies can enhance the gift.
Flavor Variations
- Try adding different types of nuts (walnuts, pecans, hazelnuts) for added texture and flavor.
- Experiment with various spices like cinnamon, nutmeg, or cayenne pepper to give the brownies a unique twist.
- Swap out the semi-sweet chocolate chips for milk chocolate, white chocolate, or a combination of different chocolates for a varied flavor profile.
Troubleshooting
- If your brownies turn out too dry, they may have been overbaked. Try reducing the baking time by a few minutes next time.
- If the brownies are too dense, it could be due to overmixing the batter. Mix wet and dry ingredients separately and gently fold them together.
- If you encounter issues with the brownies not setting properly, ensure your oven is at the correct temperature and that you’re not opening the oven door too frequently during baking.
FAQs
- Can I freeze the brownies? Yes, they can be frozen for up to 2 months. Wrap them tightly in plastic wrap or aluminum foil and place in a freezer-safe bag.
- Is this recipe gluten-free? As written, the recipe contains flour and is not gluten-free. However, you can substitute the all-purpose flour with a gluten-free flour blend to make it gluten-free.
- Can I double the recipe? Yes, you can double the recipe to make a larger batch of brownies. Just ensure you have a large enough baking pan, such as a 9×13-inch pan, and adjust the baking time accordingly.
Conclusion
This easy espresso brownies recipe is a game-changer for anyone looking to indulge in a rich, chocolatey dessert with a mocha twist. With its straightforward instructions and minimal ingredients, it’s perfect for a quick dessert fix or a special occasion. Feel free to experiment with different flavors and toppings to make the recipe your own, and don’t hesitate to share your creations with friends and family. Happy baking!