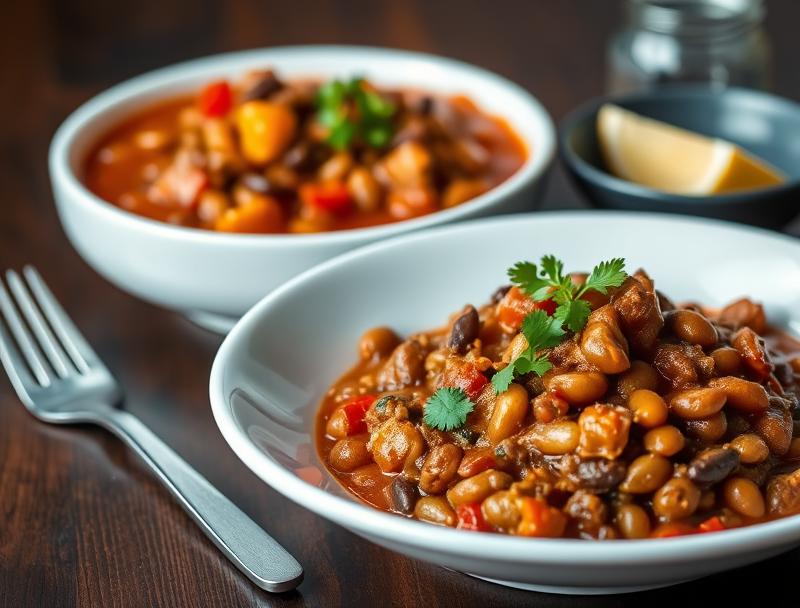
Hearty Beef Chili Recipe with Beans and Tomatoes
Introduction
This hearty beef chili recipe is a perfect blend of flavors, textures, and warmth, ideal for chilly evenings or casual gatherings. It’s surprisingly easy to make, requiring minimal effort for a dish that’s packed with flavor and nutrients. The best part? It’s made with everyday ingredients that are likely already in your pantry, making it a creative and accessible option for any home cook. Whether you’re a chili aficionado or just looking for a comforting meal, this recipe is sure to become a favorite.
Why This Works
- Flavor balance and ingredient accessibility: This recipe strikes a perfect balance between the richness of beef, the earthiness of beans, and the tanginess of tomatoes, all of which are readily available in most supermarkets.
- Ease of preparation: Despite its hearty nature, this chili is surprisingly straightforward to prepare. It involves simple steps like browning the beef, sautéing the onions, and then letting everything simmer together.
- Impressive results with minimal effort: The slow cooking process allows the flavors to meld together beautifully, resulting in a deep, satisfying taste that belies the simplicity of its preparation.
Ingredients
- 1 lb ground beef
- 1 large onion, diced
- 3 cloves of garlic, minced
- 2 cups of chopped fresh tomatoes (or 1 can of diced tomatoes)
- 1 can of red kidney beans, drained and rinsed
- 1 can of black beans, drained and rinsed
- 1 tablespoon chili powder
- 1 teaspoon ground cumin
- 1/2 teaspoon cayenne pepper (optional)
- Salt and pepper, to taste
- 2 tablespoons olive oil
- Fresh cilantro, chopped (for garnish)
Instructions
- Step 1: Prepare the Ingredients – Begin by chopping the onion and mincing the garlic. If using fresh tomatoes, chop them as well.
- Step 2: Brown the Beef – In a large pot or Dutch oven, heat 1 tablespoon of olive oil over medium-high heat. Add the ground beef and cook until browned, breaking it into small pieces as it cooks.
- Step 3: Soften the Onions and Add Spices – Once the beef is browned, remove it from the pot and set it aside. Reduce the heat to medium, add the remaining 1 tablespoon of olive oil, and sauté the diced onion until it’s translucent. Add the minced garlic and cook for another minute. Then, add the chili powder, cumin, and cayenne pepper (if using) and stir to combine, letting the spices cook for about 1 minute.
- Step 4: Combine and Simmer – Add the browned beef back into the pot, along with the chopped tomatoes, red kidney beans, black beans, salt, and pepper. Stir well to combine, then bring the mixture to a simmer. Reduce the heat to low and let the chili simmer, covered, for at least 30 minutes to allow the flavors to meld together.
- Step 5: Serve – Taste and adjust the seasoning as needed. Serve the chili hot, garnished with chopped fresh cilantro.
Handy Tips
- For a thicker chili, reduce the amount of tomatoes or add a little tomato paste. For a thinner consistency, add a bit of water or broth.
- Consider using different types of beans or adding other vegetables like bell peppers or carrots to vary the texture and flavor.
- If you prefer a spicier chili, increase the amount of cayenne pepper or add in diced jalapeños.
Heat Control
Maintaining the right heat is crucial for developing the flavors in your chili. After bringing the mixture to a simmer, reduce the heat to low (around medium-low heat) and let it cook slowly. This slow cooking process helps to break down the connective tissues in the meat and meld the flavors together. Ideally, you want to keep the chili at a gentle simmer, where you can see small bubbles rising to the surface occasionally.
Crunch Factor
The crunch factor in this chili comes from the fresh cilantro used as a garnish and any additional crunchy toppings you might choose, such as diced onions, shredded cheese, or crushed tortilla chips. The beans and the slight firmness of the cooked tomatoes also provide texture, but if you’re looking for an extra crunch, consider adding some crispy bacon bits or a dollop of sour cream on top.
Pro Kitchen Tricks
- Use a mixture of ground meats for added depth of flavor. For example, combining ground beef with some ground pork or lamb can enhance the overall taste.
- Acidity, like a splash of vinegar or a squeeze of fresh lime juice, can help balance the richness of the chili.
- Letting the chili rest overnight in the refrigerator can significantly improve its flavor, as the ingredients have time to meld together more thoroughly.
Storage Tips
- Leftover chili can be stored in the refrigerator for up to 3 days. Reheat it gently over low heat, adding a bit of water if it’s become too thick.
- For longer storage, chili can be frozen for up to 3 months. It’s best to freeze it in airtight, moisture-proof containers or freezer bags. When you’re ready to eat it, thaw the chili overnight in the fridge and then reheat it.
- Consider portioning the chili into individual servings before freezing for easier reheating and meal planning.
Gift Packaging Ideas
If you’re considering gifting this chili, perhaps for a potluck or as a care package, there are several creative ways to package it. You could fill mason jars with the hot chili, seal them, and let them cool before refrigerating or freezing. Add a decorative touch with a ribbon around the lid and a gift tag with serving instructions. Alternatively, you could package the chili in microwave-safe containers for easy reheating.
Flavor Variations
- Different spices: Experiment with smoked paprika for a smoky flavor, or add a bit of cinnamon for a unique twist.
- Creative toppings: Offer a variety of toppings such as shredded cheese, sour cream, diced onions, tortilla chips, or sliced jalapeños to let everyone customize their chili.
- Ingredient swaps: Use ground turkey, chicken, or vegetarian options like mushrooms or lentils for a different protein source.
Troubleshooting
- Texture problems: If the chili becomes too thick, add a bit of water. If it’s too thin, reduce the heat and let it simmer with the lid off to evaporate some of the liquid.
- Ingredient replacements: Don’t have a specific spice? Look for substitutes or omit it if necessary. Missing a type of bean? Use what you have or add another vegetable.
- Over/undercooking signs: The chili is done when the flavors have melded together and the meat is fully cooked. If it’s overcooked, it might become too dry; undercooked chili might not have fully developed flavors.
FAQs
- Can I freeze it? Yes, the chili can be frozen for up to 3 months. It’s best to freeze it in airtight containers or freezer bags.
- Is it gluten-free? This recipe is naturally gluten-free, making it a great option for those with gluten intolerance or sensitivity.
- Can I double the recipe? Absolutely, this recipe can be easily doubled or tripled for larger gatherings or to have more leftovers.
Conclusion
This hearty beef chili recipe with beans and tomatoes is a versatile and delicious addition to any meal repertoire. Its ease of preparation, depth of flavor, and comforting warmth make it perfect for family dinners, casual gatherings, or as a satisfying meal prep option. Feel free to experiment with the ingredients and spices to make it your own, and don’t hesitate to share your creations with friends and family. Happy cooking!