Introduction
🌱 Transforming everyday ingredients into something truly delightful is at the heart of healthy, nutritious cooking. On our journey to balanced diets, we often seek recipes that are not only quick and easy to make but also packed with flavor and nutrients. Today, we’re going to dive into a dish that embodies all these qualities: Crispy Salt and Pepper Shrimp. This recipe is a perfect blend of spicy, savory, and sweet, all coming together in just 15 minutes. Whether you’re a seafood lover or just looking for a new addition to your meal prep routine, this dish is sure to become a favorite. 🍴
Why This Works
🌟 What makes Crispy Salt and Pepper Shrimp truly special is its balance of flavors and textures, combined with its ease of preparation. This dish is all about enhancing the natural sweetness of the shrimp with a crispy, spicy exterior, achieved through a simple yet effective seasoning and cooking process. It’s accessible, quick, and perfectly suited for a weeknight dinner or a weekend brunch. The best part? It requires minimal ingredients, making it a staple for any kitchen looking to whip up something delicious without the fuss. 🍽️
Key Ingredients
🦐 1 pound large shrimp, peeled and deveined
🧂 1 teaspoon salt
❗️ 1/2 teaspoon black pepper
🌶️ 1/4 teaspoon red pepper flakes (optional, for some heat)
🥖 1/2 cup all-purpose flour
🥚 1 egg, lightly beaten
🌿 1/4 cup panko breadcrumbs
🧈 2 tablespoons unsalted butter, melted
🌸 2 cloves garlic, minced
🌿 1 tablespoon chopped fresh parsley
🍋 1 tablespoon freshly squeezed lemon juice
Instructions
1️⃣ Start by preparing your shrimp. Rinse them under cold water, pat dry with paper towels, and set aside.
2️⃣ In a medium bowl, mix together the flour, salt, black pepper, and red pepper flakes (if using).
3️⃣ In a separate bowl, beat the egg lightly.
4️⃣ In another bowl, place the panko breadcrumbs.
5️⃣ Dip each shrimp into the flour mixture, coating lightly, then into the egg, making sure it’s fully coated, and finally into the panko breadcrumbs, pressing the crumbs gently onto the shrimp to ensure they stick.
6️⃣ Heat about 1/2 inch of melted butter in a large skillet over medium-high heat. Once hot, add the garlic and cook for 1 minute until fragrant.
7️⃣ Add the coated shrimp to the skillet. Cook for about 2-3 minutes on each side, until they turn pink and the coating is golden brown and crispy.
8️⃣ Remove the shrimp from the skillet and place them on a paper towel-lined plate to drain any excess oil.
9️⃣ Serve the shrimp hot, garnished with parsley and a squeeze of lemon juice.
Handy Tips
👨🍳 For an extra crispy coating, make sure the shrimp are completely dry before coating.
📝 Keep the oil hot; this helps the coating to crisp up nicely.
🌿 Don’t overcook the shrimp; they should be just cooked through and still tender.
Heat Control
🔥 The key to achieving that perfect crispy exterior without overcooking the shrimp is heat control. Keep your skillet at a medium-high heat, and don’t overcrowd it. Cook the shrimp in batches if necessary, to ensure each one has enough room to cook evenly.
Crunch Factor
🌮 The crunch factor in this recipe comes from the panko breadcrumbs. These Japanese-style breadcrumbs are lighter and crisper than regular breadcrumbs, making them perfect for creating a delicate, crunchy exterior on the shrimp.
Pro Kitchen Tricks
🔍 For an added layer of flavor, you can sprinkle a pinch of paprika or dried herbs over the shrimp before serving.
🌟 To make this dish more substantial, serve the shrimp with a side of quinoa or brown rice and steamed vegetables.
📈 Experiment with different types of breadcrumbs, such as whole wheat or gluten-free, to cater to various dietary needs.
Storage Tips
📦 If you have leftovers, store them in an airtight container in the refrigerator for up to a day. Reheat gently in the oven or a non-stick skillet.
🥘 For longer storage, you can freeze the cooked shrimp for up to 2 months. Simply thaw and reheat when needed.
Gift Packaging Ideas
🎁 While Crispy Salt and Pepper Shrimp is typically a dish to enjoy immediately, if you’re looking to give it as a gift, consider packaging it in a beautiful, reusable container with a side of homemade sauce or a fresh salad.
🌿 Add a personal touch with a handwritten recipe card or a small bag of gourmet ingredients.
Flavor Variations
🌟 Try adding a pinch of cumin for a smoky flavor.
🌟 Substitute the black pepper with white pepper for a slightly different flavor profile.
🌟 Add some chopped chili peppers to the flour mixture for an extra spicy kick.
🌟 Mix some grated Parmesan cheese into the breadcrumbs for an Italian twist.
Troubleshooting
🤔 Shrimp not crispy: Ensure the oil is hot enough before adding the shrimp, and don’t overcrowd the skillet.
🤔 Shrimp overcooked: Cook the shrimp for less time, and check for doneness frequently.
🤔 Breadcrumbs not sticking: Make sure the shrimp are dry before coating, and press the breadcrumbs gently onto the shrimp.
FAQ
📝 Q: Can I use frozen shrimp for this recipe?
A: Yes, just thaw them first and pat dry before using.
📝 Q: Is this recipe suitable for gluten-free diets?
A: Yes, simply substitute the all-purpose flour with a gluten-free flour mix.
📝 Q: Can I bake the shrimp instead of frying?
A: Yes, bake in a preheated oven at 400°F (200°C) for about 8-10 minutes, until pink and cooked through.
📝 Q: How do I prevent the shrimp from sticking to the skillet?
A: Ensure the skillet is hot before adding the shrimp, and use a non-stick skillet if possible.
Conclusion
🌟 Cooking Crispy Salt and Pepper Shrimp in 15 minutes is not just about preparing a meal; it’s about creating an experience. It’s about taking a few simple ingredients and turning them into something truly special. Whether you’re cooking for one or for a crowd, this recipe is sure to delight. So go ahead, give it a try, and don’t forget to share your creations with us on https://a.ratemyrecipes.com. Happy cooking! 🍳
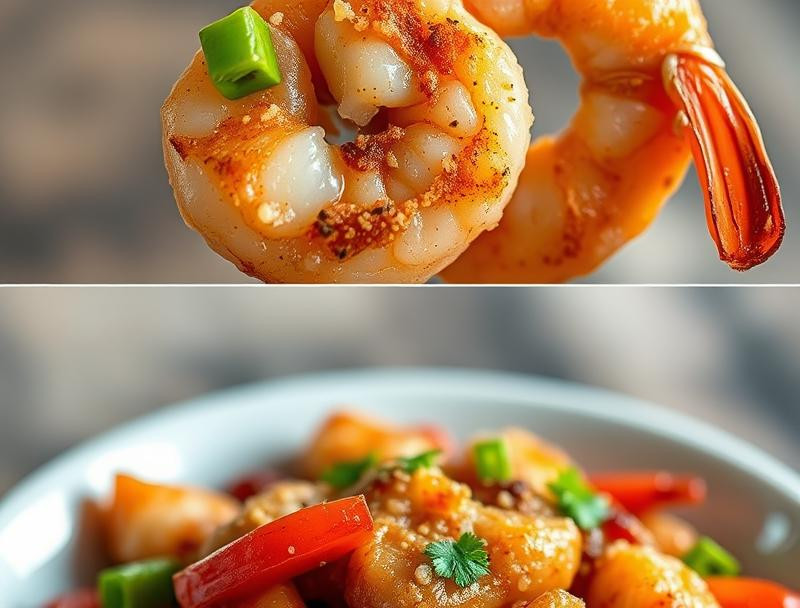
Crispy Salt and Pepper Shrimp
A quick and nutritious meal option that boosts your metabolism with flavorful crispy shrimp seasoned with salt and pepper.
Ingredients
- 1 pound large shrimp, peeled and deveined
- 1 cup cornstarch
- 1 tablespoon salt
- 1 tablespoon black pepper
- 1 teaspoon garlic powder
- 1 teaspoon onion powder
- 2 tablespoons vegetable oil
- 1 tablespoon chopped fresh parsley for garnish
- Lemon wedges for serving
Instructions
- In a mixing bowl, combine cornstarch, salt, black pepper, garlic powder, and onion powder.
- Toss the shrimp in the cornstarch mixture until evenly coated.
- Heat vegetable oil in a large skillet over medium-high heat.
- Add the shrimp in batches, ensuring not to overcrowd the pan, and cook for 2-3 minutes on each side until golden and crispy.
- Remove the shrimp from the skillet and drain on paper towels.
- Garnish with chopped parsley and serve with lemon wedges.
Tips
- For extra crunch, double coat the shrimp by dipping them back in the egg wash and then the cornstarch again.
- Serve with a side of steamed vegetables or a fresh salad for a complete meal.