Introduction
🌟 Transforming everyday ingredients into something truly delightful is at the heart of great cooking, and today, we’re going to elevate a classic: crispy salt and pepper chicken. This dish is not just about the ingredients; it’s about balance, wellness, and the joy of creating something healthier that’s still indulgent in flavor. On https://a.ratemyrecipes.com, we believe in balanced diets that nourish both body and soul, and this recipe embodies that spirit. By making a few simple tweaks to traditional methods, we can enjoy our favorite foods with a clear conscience, knowing we’re feeding our bodies the best. So, let’s dive into the magic of turning simple chicken into a crispy, flavorful masterpiece that’s better than takeout!
Why This Works
👌 This recipe stands out for several reasons: it’s incredibly easy to make, requiring minimal ingredients and effort; it’s accessible to everyone, regardless of dietary restrictions, with simple substitutions for gluten or allergens; and most importantly, it achieves that elusive perfect balance of flavors and textures. The combination of crispy exterior and juicy interior, seasoned with just the right amount of salt, pepper, and a hint of other spices, makes this dish truly special. It’s a testament to how less can be more when it comes to cooking, focusing on enhancing the natural flavors of the ingredients rather than overpowering them.
Key Ingredients
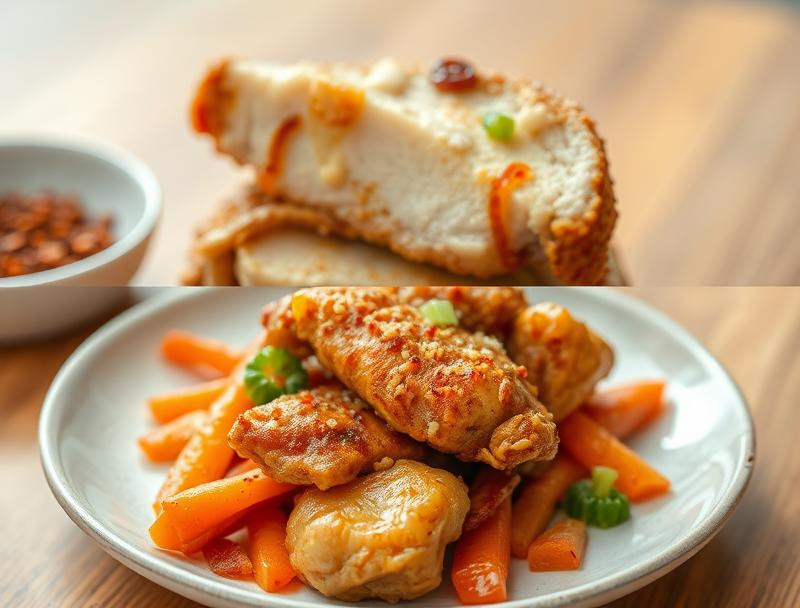
🍗 2 lbs chicken pieces (breast, thighs, drumsticks), skin removed
🧂 1 tsp salt
♨️ 1 tsp black pepper
🌿 1 tsp garlic powder
🌸 1 tsp onion powder
🌻 1 tsp paprika
🥖 1 cup all-purpose flour
🥛 1 cup buttermilk
🍟 Vegetable oil for frying
🌶 Optional: 1-2 tsp red pepper flakes for some heat
Instructions
1️⃣ Preparation: In a large bowl, whisk together flour, salt, black pepper, garlic powder, onion powder, and paprika.
2️⃣ Marination: Pour buttermilk into a separate large bowl. Add the chicken pieces and let them marinate for at least 30 minutes to an hour. This step is crucial for tenderizing the chicken.
3️⃣ Coating: Remove the chicken from the buttermilk, letting any excess liquid drip off. Then, toss the chicken pieces in the flour mixture to coat evenly. Place the coated chicken on a plate or tray.
4️⃣ Frying: Heat about 1/2-inch of vegetable oil in a large skillet over medium-high heat until it reaches 350°F. Carefully place 3-4 pieces of the coated chicken into the hot oil. Do not overcrowd the skillet.
5️⃣ Cooking: Fry for 5-7 minutes on each side or until the chicken is golden brown and the internal temperature reaches 165°F. Repeat with the remaining chicken pieces.
6️⃣ Drain: Once cooked, place the chicken on a paper towel-lined plate to drain any excess oil.
7️⃣ Serve: Serve hot and enjoy! You can accompany it with your favorite sides, such as mashed potatoes, coleslaw, or a fresh salad.
Handy Tips
👍 Always use room temperature ingredients for better coating and even cooking.
📝 Pat dry the chicken with paper towels before coating to ensure the flour sticks well.
🥘 For an extra crispy coating, you can chill the coated chicken in the refrigerator for 30 minutes before frying.
Heat Control
⚠️ The right temperature is key to achieving that perfect crisp. If the oil is too hot, the outside will burn before the inside is fully cooked. If it’s too cool, the chicken will absorb too much oil. Using a thermometer can help you maintain the ideal frying temperature.
Crunch Factor
🌮 The crunch of the crispy chicken is a highlight of this dish. To enhance it, ensure the oil is at the right temperature, and don’t overcrowd the skillet, as this can lower the oil temperature and result in a softer coating.
Pro Kitchen Tricks
🔥 For an extra crispy coating, try adding a teaspoon of cornstarch or panko breadcrumbs to your flour mixture.
🌟 Experiment with different seasonings in your flour mixture, like dried herbs or spices, to give your chicken a unique flavor.
📚 Keep it simple but flavorful by focusing on a few high-quality ingredients rather than a multitude of spices.
Storage Tips
📦 If you have leftovers, store them in an airtight container in the refrigerator for up to 3 days. For longer storage, consider freezing. When reheating, do so in the oven to maintain crispiness.
Gift Packaging Ideas
🎁 If you’re considering gifting this dish, perhaps for a potluck or as a care package, package it in a decorative basket lined with paper towels to keep it crispy. Include a side of your favorite dipping sauce for an extra-special touch.
Flavor Variations
🌟 Korean-Style: Add 1 tsp of Gochujang to your flour mixture for a spicy kick.
🌟 Italian-Style: Mix in some dried oregano and basil into the flour for a Mediterranean twist.
🌟 Mexican-Style: Add a sprinkle of cumin and chili powder to the flour mixture for a fiesta in your mouth.
🌟 Indian-Style: Blend some curry powder into the flour for an exotic flavor experience.
Troubleshooting
🤔 Chicken not crispy: This could be due to overcrowding the skillet or not having the oil at the right temperature. Try frying in batches and check your thermometer.
🤔 Chicken too oily: Pat dry the chicken thoroughly before coating, and don’t overload the skillet.
🤔 Coating falls off: Ensure the chicken is completely coated in flour and gently place it in the oil to prevent the coating from coming off.
FAQ
🤓 Q: Can I bake this chicken instead of frying?
A: Yes, you can. Simply place the coated chicken on a baking sheet lined with parchment paper and bake in a preheated oven at 400°F for about 20-25 minutes, or until cooked through.
🤓 Q: Is this recipe gluten-free?
A: It can be, with a simple substitution of gluten-free flour for the all-purpose flour.
🤓 Q: Can I use this recipe for chicken tenders or nuggets?
A: Absolutely. Just cut the chicken into strips or nugget-sized pieces before marinating and coating.
Conclusion
🌈 Creating delicious, healthy meals doesn’t have to be complicated. With this crispy salt and pepper chicken recipe, you’ve got a dish that’s not only mouth-wateringly good but also better for you than takeout. Remember, the key to great cooking is balance, freshness, and a bit of love. Share this recipe with your friends and family, and enjoy the process of cooking and savoring together. Happy cooking from https://a.ratemyrecipes.com! 🍴
Boost Your Wellness with Crispy Salt and Pepper Chicken
A nutritious alternative to takeout, this crispy salt and pepper chicken is packed with flavor and health benefits.
Ingredients
- 500g chicken breast, cut into bite-sized pieces
- 2 cups brown rice, cooked
- 1 tablespoon cornstarch
- 1 tablespoon olive oil
- 1 teaspoon salt
- 1 teaspoon black pepper
- 1 teaspoon garlic powder
- 1 teaspoon onion powder
- 1 teaspoon paprika
- 1/2 teaspoon cayenne pepper (optional)
- 2 green onions, sliced
- 1 red bell pepper, sliced
- 1 cup broccoli florets
Instructions
- Preheat the oven to 200u00b0C (400u00b0F).
- In a large bowl, mix the chicken pieces with cornstarch, olive oil, salt, black pepper, garlic powder, onion powder, paprika, and cayenne pepper until evenly coated.
- Spread the chicken on a baking sheet lined with parchment paper in a single layer.
- Bake in the preheated oven for 25-30 minutes, turning halfway through, until the chicken is crispy and cooked through.
- While the chicken is baking, heat a pan over medium heat and stir-fry the broccoli and bell pepper for about 5-7 minutes until tender.
- Serve the crispy chicken over the cooked brown rice, topped with stir-fried vegetables and sliced green onions.
Tips
- For extra crispiness, you can air fry the chicken instead of baking it.
- Feel free to add your favorite vegetables to the stir-fry for more nutrition.