Handmade Chocolate Marshmallow Swirl Cookies Recipe
Introduction
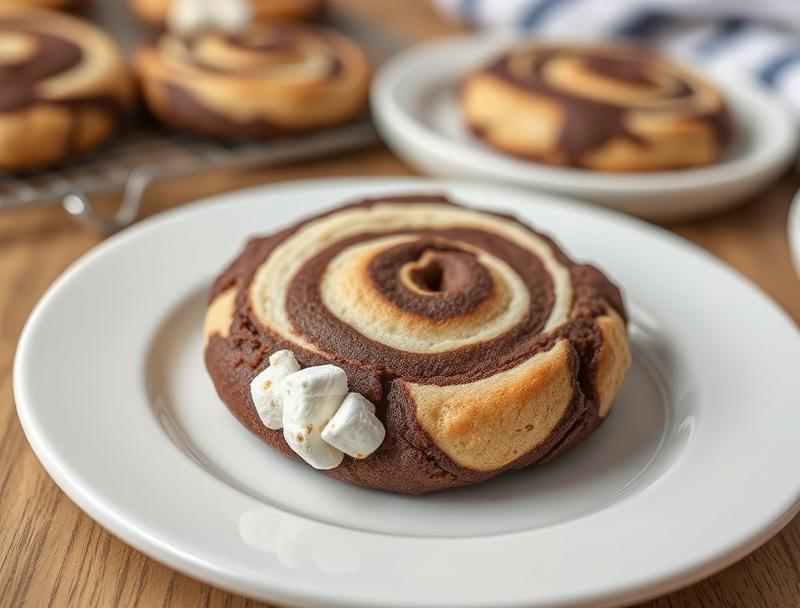
Indulge in the richness of handmade cookies that combine the velvety smoothness of chocolate with the fluffy sweetness of marshmallows. This Handmade Chocolate Marshmallow Swirl Cookies Recipe is a masterpiece of textures and flavors, perfect for satisfying your sweet tooth or gifting to loved ones. The best part? It’s incredibly easy to make, using everyday ingredients that you might already have in your pantry. With this recipe, you’ll discover how a few simple steps can transform basic ingredients into a culinary masterpiece that’s sure to impress.
Why This Works
- Flavor balance and ingredient accessibility: The combination of dark chocolate and marshmallows creates a perfect balance of bitter and sweet, while using readily available ingredients makes it convenient for anyone to try.
- Ease of preparation: Despite the impressive results, the preparation and baking process is straightforward and easy to follow, making it accessible to bakers of all skill levels.
- Impressive results with minimal effort: The swirl design and the contrast between the gooey marshmallow and the crispy edges of the cookie make for a visually appealing treat that looks like it came from a professional bakery, all with minimal fuss.
Ingredients
- 2 1/4 cups all-purpose flour
- 1 tsp baking soda
- 1 tsp salt
- 1 cup unsalted butter, at room temperature
- 3/4 cup white granulated sugar
- 3/4 cup brown sugar
- 2 large eggs
- 2 teaspoons pure vanilla extract
- 1 cup semi-sweet chocolate chips
- 1 cup mini marshmallows
- Confectioners’ sugar, for dusting (optional)
Instructions
- Step 1: Preheat and Prep – Preheat your oven to 375°F (190°C). Line a baking sheet with parchment paper or a silicone mat. In a medium bowl, whisk together the flour, baking soda, and salt. Set aside.
- Step 2: Mix the Dough – In a large bowl, use an electric mixer to cream together the butter and sugars until light and fluffy, about 2-3 minutes. Beat in the eggs one at a time, followed by the vanilla extract. Gradually mix in the dry ingredients (flour mixture) until just combined, being careful not to overmix.
- Step 3: Add Chocolate and Marshmallows – Stir in the chocolate chips and mini marshmallows.
- Step 4: Scoop and Bake – Scoop tablespoon-sized balls of dough onto the prepared baking sheet, leaving about 2 inches of space between each cookie. Bake for 12-14 minutes or until the edges are lightly golden brown. The marshmallows will be toasted and the cookies will be set.
- Step 5: Cool and Enjoy – Allow the cookies to cool on the baking sheet for 5 minutes before transferring them to a wire rack to cool completely. Dust with confectioners’ sugar if desired.
Handy Tips
- For an extra gooey marshmallow center, press a few additional mini marshmallows into the top of each cookie immediately after baking, before they cool.
- Consider using a combination of dark and semi-sweet chocolate chips for a deeper flavor profile.
- If you find that your cookies are spreading too much, try chilling the dough for 30 minutes before baking to help them retain their shape.
Heat Control
The ideal baking temperature for these cookies is 375°F (190°C). It’s crucial to keep an eye on them during the baking time, as the marshmallows can quickly go from perfectly toasted to burnt. The cookies are done when the edges are lightly golden and the centers are set. If you prefer a chewier cookie, bake for 10-11 minutes. For a crisper cookie, bake for 14-15 minutes.
Crunch Factor
The crunch factor in these cookies comes from the toasted marshmallows and the crispy edges, which provide a delightful contrast to the chewy center. To enhance the crunch, ensure that you don’t overbake the cookies, as this can make them too hard. Also, chilling the dough before baking can help in achieving a better texture.
Pro Kitchen Tricks
- Use a cookie scoop to ensure uniform cookie sizes, which helps in even baking and a more professional look.
- Chill the baking sheet in the freezer for a few minutes before adding the cookie dough. This can help the cookies retain their shape better during baking.
- For easier cleanup, line your baking sheet with parchment paper or a silicone mat. This will prevent the cookies from sticking and make removing them much simpler.
Storage Tips
- These cookies are best stored in an airtight container at room temperature for up to 5 days. If you prefer a softer cookie, you can store them in an airtight container in the fridge for up to a week and let them come to room temperature before serving.
- For longer storage, consider freezing the cookies. Place them in a single layer in a freezer-safe bag or container and freeze for up to 2 months. To thaw, leave at room temperature or reheat in the microwave for a few seconds.
Gift Packaging Ideas
These cookies make wonderful gifts, especially during holidays or special occasions. Consider packaging them in decorative jars, tin cans, or gift boxes lined with parchment paper or decorative tissue paper. You can also wrap individual cookies in cellophane bags and tie with a ribbon for a more personalized touch. Adding a handwritten note or a small gift card can make the gift even more special.
Flavor Variations
- Different spices: Add a pinch of cinnamon, nutmeg, or sea salt to the dough for a unique twist.
- Creative toppings: Before baking, press additional toppings like chopped nuts, candy pieces, or shaved chocolate into the top of the cookies for extra flavor and texture.
- Ingredient swaps: Use dairy-free chocolate or substitute the marshmallows with another type of candy for a different flavor profile.
Troubleshooting
- Texture problems: If your cookies turn out too hard, they might have been overbaked. Try reducing the baking time. If they’re too soft, they might not have been baked long enough.
- Ingredient replacements: Always try to use the ingredients called for in the recipe for the best results. However, if you need to make substitutions, choose ingredients with similar properties (e.g., brown sugar for white sugar, but keep in mind the flavor will be different).
- Over/undercooking signs: Keep an eye on your cookies while they’re baking. Overcooked cookies will be dark brown and hard, while undercooked ones will be pale and soft to the touch.
FAQs
- Can I freeze the dough? Yes, you can freeze the cookie dough for up to 2 months. Simply scoop the dough into balls, place them on a baking sheet lined with parchment paper, and put the sheet in the freezer until the dough balls are frozen solid. Then, transfer them to a freezer-safe bag or container. Bake frozen dough balls for an additional 1-2 minutes.
- Is this recipe gluten-free? No, this recipe contains all-purpose flour and is not gluten-free. However, you can experiment with gluten-free flours, keeping in mind that the texture and flavor may vary.
- Can I double the recipe? Yes, you can easily double or even triple this recipe if you’re making cookies for a large group. Just remember to use multiple baking sheets to avoid overcrowding, which can affect the cookies’ texture and baking time.
Conclusion
Making handmade cookies is a rewarding experience that allows you to share love, care, and delicious flavors with those around you. The Handmade Chocolate Marshmallow Swirl Cookies Recipe is a versatile and enjoyable project that can be adapted to your tastes and preferences. Whether you’re a seasoned baker or just starting out, this recipe is sure to become a favorite. So go ahead, get creative, and indulge in the joy of baking and sharing these scrumptious treats with others.