Crispy Asian Glazed Chicken Fingers for Easy Dinner
Introduction
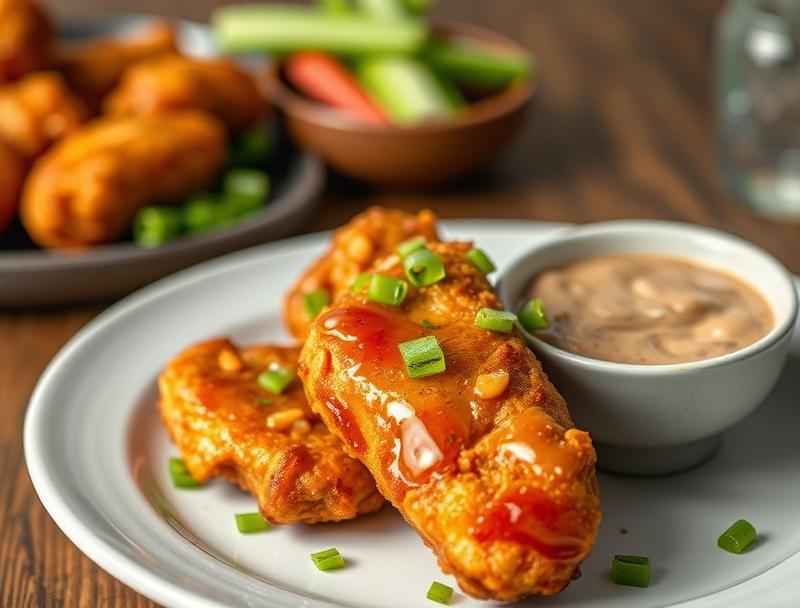
Looking for a dinner idea that’s both easy to make and packed with flavor? Crispy Asian Glazed Chicken Fingers are the perfect solution. This dish combines the simplicity of chicken fingers with the bold, savory flavors of Asia, all in one delicious and easy-to-make package. Using everyday ingredients, you can create a meal that’s not only impressive but also quick to prepare, making it ideal for busy weeknights or special occasions. The best part? It’s incredibly versatile, allowing you to get creative with the ingredients and make it your own.
Why This Works
- The balance of sweet, sour, and umami flavors in the glaze creates a depth of taste that elevates the dish beyond simple chicken fingers.
- The ingredients are easily accessible in most supermarkets, making this a practical choice for anyone.
- The preparation is straightforward, requiring minimal effort for such an impressive result. This makes it perfect for both beginners and experienced cooks looking for a quick, yet satisfying meal.
Ingredients
- 1 pound boneless, skinless chicken breasts, cut into finger-shaped strips
- 1/2 cup all-purpose flour
- 1 teaspoon paprika
- 1/2 teaspoon garlic powder
- 1/2 teaspoon salt
- 1/4 teaspoon black pepper
- 1/4 teaspoon cayenne pepper (optional)
- 2 eggs
- 1 cup panko breadcrumbs
- 1/4 cup grated Parmesan cheese
- 1/2 cup Asian glaze (see below for glaze ingredients)
- Vegetable oil for frying
Asian Glaze Ingredients
- 1/2 cup honey
- 1/4 cup soy sauce
- 2 tablespoons rice vinegar
- 2 tablespoons Gochujang (Korean chili paste)
- 1 tablespoon grated fresh ginger
- 2 cloves garlic, minced
- 1 tablespoon sesame oil
- Sesame seeds and chopped scallions for garnish (optional)
Instructions
- Step 1: Prepare the Chicken – In a shallow dish, mix together the flour, paprika, garlic powder, salt, black pepper, and cayenne pepper (if using). In another dish, beat the eggs. In a third dish, mix the panko breadcrumbs and Parmesan cheese.
- Step 2: Coat the Chicken – Dip each chicken strip into the flour mixture, coating lightly, then into the eggs, making sure they’re fully coated, and finally into the breadcrumb mixture, pressing the crumbs gently onto the chicken to help them stick.
- Step 3: Fry the Chicken – Heat about 1/2 inch of vegetable oil in a large skillet over medium-high heat. When the oil is hot, add a few of the coated chicken strips (do not overcrowd) and fry until golden brown and cooked through, about 5-6 minutes per side. Repeat with the remaining chicken.
- Step 4: Glaze the Chicken – While the chicken is frying, prepare the Asian glaze by whisking all the glaze ingredients together in a small saucepan. Bring the glaze to a simmer over medium heat and cook until it thickens slightly, stirring occasionally. Once the chicken is done, place it on a paper towel-lined plate to drain excess oil, then brush the Asian glaze over the chicken fingers.
Handy Tips
- For an extra crispy coating, you can chill the coated chicken strips in the refrigerator for 30 minutes before frying.
- If you want to bake the chicken instead of frying, preheat your oven to 400°F (200°C) and bake for about 20-25 minutes, or until cooked through, flipping halfway. Then, brush with the glaze and return to the oven for an additional 2-3 minutes, or until the glaze is caramelized.
- Experiment with different seasonings in the breadcrumb mixture for unique flavors, such as dried herbs or grated cheese.
Heat Control
When frying, it’s crucial to maintain the right temperature. The ideal temperature for frying chicken is between 350°F and 375°F (175°C to 190°C). If the oil is too hot, the outside will burn before the inside is fully cooked. If it’s too cold, the chicken will absorb too much oil. For baking, ensure your oven is preheated to the correct temperature to achieve even cooking.
Crunch Factor
The crunch factor in this dish comes from the panko breadcrumbs, which provide a lighter, crisper coating than regular breadcrumbs. To achieve the perfect crunch, make sure the oil is at the right temperature when frying, and don’t overcrowd the skillet. For baked chicken, a short broil after glazing can enhance the crunch and caramelize the glaze.
Pro Kitchen Tricks
- Use a thermometer to ensure the oil has reached the safe frying temperature.
- Don’t stir the chicken too much while it’s frying. Let it develop a nice crust on one side before turning.
- For easier cleanup, line your work surface with parchment paper or a silicone mat when preparing the breading station.
Storage Tips
- Leftover chicken fingers can be stored in an airtight container in the refrigerator for up to 3 days. Reheat in the oven or microwave until warmed through.
- For longer storage, consider freezing the coated but unfried chicken strips on a baking sheet, then transferring them to a freezer-safe bag or container for up to 2 months. Fry or bake from frozen, adjusting cooking time as needed.
Gift Packaging Ideas
If you’re considering gifting these crispy treats, consider packaging them in decorative paper cones or small gift boxes lined with parchment paper. You could also include a side of your favorite dipping sauce in a decorative container. For a more substantial gift, pair the chicken fingers with a selection of gourmet sides, such as coleslaw or pickles, and include a bottle of wine or sparkling juice.
Flavor Variations
- Spicy Korean-Style: Add more Gochujang to the glaze for an extra spicy kick.
- Mediterranean Twist: Mix some oregano and lemon zest into the breadcrumb mixture and use a lemon-herb butter as an alternative glaze.
- Indian-Inspired: Use garam masala and cumin in the breadcrumb mixture and serve with a side of mango chutney.
Troubleshooting
- Texture Problems: If your chicken is not crispy, it might be due to the wrong oil temperature or insufficient drying time after coating. If it’s too dry, it could be overcooked.
- Ingredient Replacements: For gluten-free, use gluten-free flour and ensure your soy sauce or alternative is gluten-free. For dairy-free, replace the Parmesan cheese with a dairy-free alternative.
- Over/Undercooking: Always check the internal temperature of the chicken to ensure it reaches 165°F (74°C). If it’s undercooked, return it to the heat source. If overcooked, try adjusting your cooking time or temperature for the next batch.
FAQs
- Can I freeze it? Yes, you can freeze the chicken fingers before frying. Simply coat them as instructed, place them on a baking sheet lined with parchment paper, and put the sheet in the freezer. Once frozen, transfer them to a freezer-safe bag or container for storage.
- Is it gluten-free? The recipe can be adapted to be gluten-free by using gluten-free flour and ensuring the soy sauce (or alternative) and any other ingredients are gluten-free.
- Can I double the recipe? Yes, you can easily double or triple this recipe for a larger crowd. Just be sure to fry in batches to avoid overcrowding the skillet.
Conclusion
Crispy Asian Glazed Chicken Fingers are a versatile and delicious addition to any meal, whether you’re serving a family dinner or hosting a party. With its balance of flavors and textures, this dish is sure to please a variety of tastes. Feel free to experiment with the recipe, adjusting the glaze and seasonings to suit your preferences. Don’t hesitate to reach out with questions or share your own variations and tips. Happy cooking, and enjoy the delightful flavors of Asia in the comfort of your own home!
Crispy Asian Glazed Chicken Fingers for Easy Dinner
A crispy and flavorful chicken finger recipe glazed with an Asian-inspired sauce, perfect for easy dinners or parties.
🥘 Ingredients
👩🍳 Instructions
-
1Prepare the chicken by cutting it into finger-shaped strips.
-
2Coat the chicken strips in flour, then eggs, and finally panko breadcrumbs mixed with Parmesan cheese.
-
3Fry the chicken in hot oil until golden brown and cooked through.
-
4Glaze the fried chicken with the Asian glaze and serve hot.