Cheesy Beef Balls with a Crunchy Fried Twist
Introduction
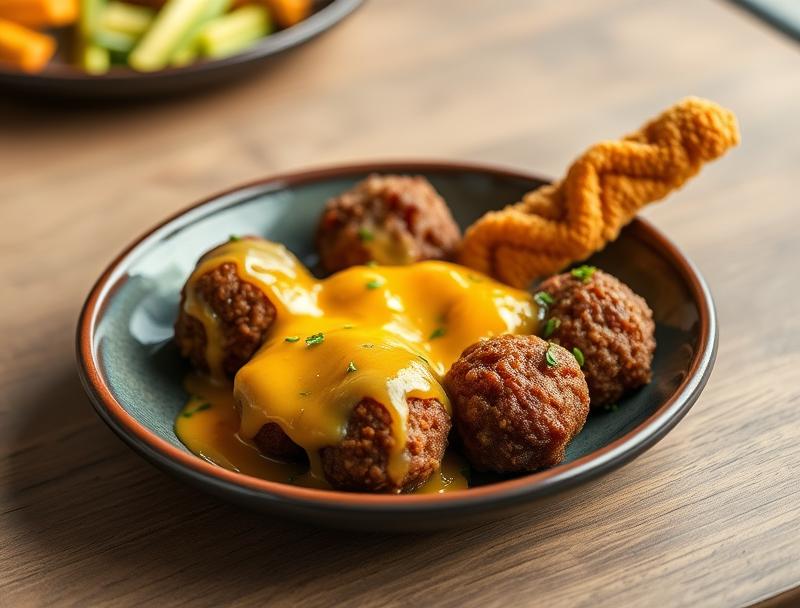
Imagine a dish that combines the richness of beef, the creaminess of cheese, and the satisfying crunch of a perfectly fried exterior. Cheesy Beef Balls with a Crunchy Fried Twist are not just a meal, they’re an experience. Using everyday ingredients and a simple, straightforward method, you can create a culinary masterpiece that will impress your family and friends. This recipe is all about ease, flavor, and creativity, making it perfect for a quick weeknight dinner or a special occasion. The best part? It’s incredibly easy to make and requires minimal effort for such an impressive outcome.
Why This Works
- Flavor balance and ingredient accessibility: The combination of beef, cheese, and a crunchy coating creates a flavor balance that is hard to resist. Plus, all the ingredients are easily accessible in most supermarkets.
- Ease of preparation: Despite the impressive result, the preparation is surprisingly simple. It involves mixing the beef and cheese mixture, shaping it into balls, and then frying them until crispy.
- Impressive results with minimal effort: The dish looks and tastes like it was made in a professional kitchen, but the truth is, it can be prepared and cooked in under an hour, making it perfect for those with busy schedules.
Ingredients
- 500g ground beef
- 1 cup grated cheddar cheese
- 1/2 cup grated mozzarella cheese
- 1 egg, lightly beaten
- 1/2 cup breadcrumbs
- 1/4 cup finely chopped onion
- 2 cloves garlic, minced
- 1 tablespoon olive oil
- Salt and pepper, to taste
- 1 cup all-purpose flour
- Vegetable oil, for frying
- Fresh parsley, chopped (for garnish)
Instructions
- Step 1: Begin by preheating your oven to 200°C (400°F). In a large bowl, combine the ground beef, cheddar cheese, mozzarella cheese, egg, breadcrumbs, onion, garlic, salt, and pepper. Mix well with your hands or a wooden spoon until just combined. Be careful not to overmix.
- Step 2: Use your hands to shape the mixture into small balls, about 1 1/2 inches (3.8 cm) in diameter. You should end up with around 20-25 balls.
- Step 3: Pour the flour into a shallow dish. Roll each beef ball in the flour to coat, shaking off excess. This step helps the coating adhere to the beef balls.
- Step 4: Heat about 1/2 inch (1 cm) of vegetable oil in a large frying pan over medium-high heat until it reaches 180°C (350°F). Fry the beef balls in batches until they are golden brown on all sides, about 3-4 minutes per batch. Drain the fried balls on paper towels.
- Step 5: For an extra crunchy coating, you can chill the fried beef balls in the refrigerator for 30 minutes and then fry them again until they are golden brown. Alternatively, you can bake them in the preheated oven for about 10-12 minutes, or until heated through.
- Step 6: Serve the Cheesy Beef Balls hot, garnished with chopped fresh parsley. They can be served as an appetizer, main course, or even as a snack. Enjoy with your favorite dipping sauce.
Handy Tips
- Make sure not to overmix the beef mixture, as this can make the beef balls dense and heavy.
- Don’t overcrowd the frying pan. Fry the beef balls in batches to ensure they have enough room to cook evenly.
- If you want to make the dish healthier, you can bake the beef balls instead of frying them. Simply place them on a baking sheet lined with parchment paper and bake in a preheated oven at 200°C (400°F) for about 15-20 minutes, or until cooked through.
Heat Control
Heat control is crucial when frying the beef balls. The ideal temperature for frying is between 175°C to 180°C (347°F to 356°F). If the oil is too hot, the outside will burn before the inside is fully cooked. If it’s too cold, the beef balls will absorb too much oil and be greasy. Use a thermometer to ensure the correct temperature. Also, do not leave the frying pan unattended, as the oil can quickly become too hot.
Crunch Factor
Achieving the perfect crunch on the outside while keeping the inside juicy is key to this dish. The initial frying gives the beef balls a nice crust. For an extra crunchy coating, chilling and then re-frying or baking can enhance the texture. Make sure not to overcook, as this can make the beef balls dry and less appealing.
Pro Kitchen Tricks
- Use a mixture of cheddar and mozzarella for the best flavor combination. The sharpness of the cheddar pairs well with the creaminess of the mozzarella.
- Don’t skip the step of coating the beef balls in flour before frying. This helps the coating adhere and creates a crunchier exterior.
- For easier cleanup, line your baking sheet with parchment paper if you decide to bake the beef balls.
Storage Tips
- Leftover beef balls can be stored in an airtight container in the refrigerator for up to 3 days. Reheat them in the oven or microwave until hot and crispy.
- For longer storage, you can freeze the beef balls after they have been fried and cooled. Place them in a single layer in a freezer-safe bag or container and store for up to 2 months. Reheat frozen beef balls in the oven until crispy and hot.
- Always check the beef balls for any signs of spoilage before consuming, especially if they have been stored for a while.
Gift Packaging Ideas
If you’re considering gifting these cheesy beef balls, a decorative tin or a nicely wrapped box with a clear plastic window would be perfect. You can also include a side of marinara sauce or a dipping sauce of your choice in a small jar. Add a ribbon or a gift tag with cooking instructions for a personal touch.
Flavor Variations
- Different spices: Try adding some dried oregano, basil, or thyme to the beef mixture for an Italian twist. For a spicy version, add some minced jalapeños or red pepper flakes.
- Creative toppings: Serve the beef balls with a variety of toppings such as marinara sauce, melted mozzarella cheese, chopped parsley, or grated parmesan cheese.
- Ingredient swaps: You can swap the beef with ground turkey, chicken, or pork for a different flavor profile. Also, experiment with different types of cheese for unique tastes.
Troubleshooting
- Texture problems: If your beef balls turn out too dense, it might be because the mixture was overmixed. Try mixing the ingredients just until they come together for a lighter texture.
- Ingredient replacements: If you don’t have certain ingredients, feel free to substitute them with similar alternatives. For example, you can use panko breadcrumbs instead of regular breadcrumbs for a lighter coating.
- Over/undercooking signs: Make sure to check the beef balls frequently while they’re cooking. If they’re undercooked, they will feel soft and squishy. If they’re overcooked, they will be dry and hard. Adjust the cooking time as needed.
FAQs
- Can I freeze it? Yes, you can freeze the beef balls after they have been fried and cooled. They can be stored in the freezer for up to 2 months.
- Is it gluten-free? The recipe as stated is not gluten-free due to the breadcrumbs. However, you can easily make it gluten-free by using gluten-free breadcrumbs.
- Can I double the recipe? Yes, you can double or even triple the recipe if you’re serving a large crowd. Just make sure to fry the beef balls in batches to avoid overcrowding the pan.
Conclusion
Cheesy Beef Balls with a Crunchy Fried Twist are a delicious and impressive dish that can elevate any meal. With their perfect balance of flavors and textures, they’re sure to become a favorite. Don’t be afraid to experiment with different ingredients and spices to make the recipe your own. Whether you’re a seasoned chef or a beginner in the kitchen, this dish is sure to impress. So go ahead, give it a try, and enjoy the delightful combination of cheesy, beefy goodness with a satisfying crunch.