Best Crispy Cheddar Chicken
Introduction
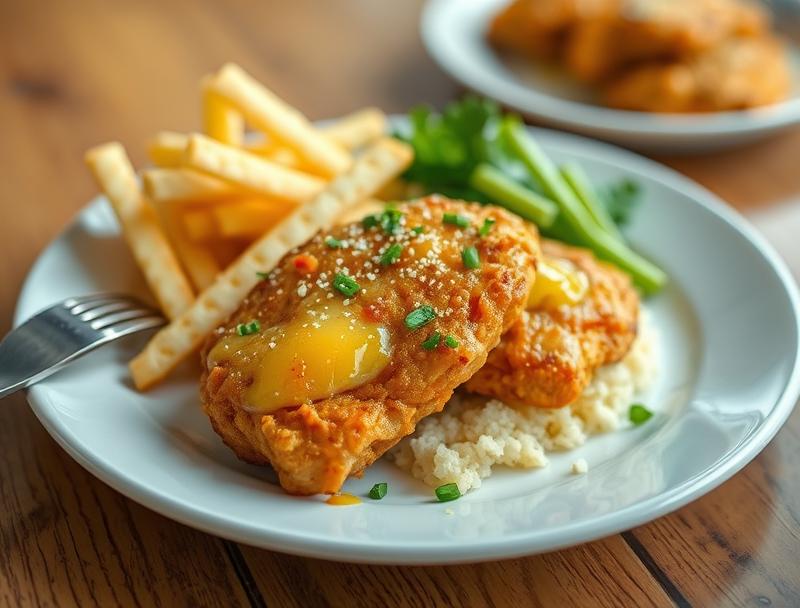
Imagine sinking your teeth into a juicy chicken breast, coated in a crispy, golden-brown crust, infused with the rich flavor of cheddar cheese. This Best Crispy Cheddar Chicken recipe is not only a treat for your taste buds, but it’s also incredibly easy to make, requiring minimal effort and using everyday ingredients. The combination of tender chicken, crunchy exterior, and melted cheddar is a match made in heaven, perfect for a quick weeknight dinner or a special occasion. Whether you’re a beginner in the kitchen or a seasoned chef, this recipe is sure to impress, and the best part is that it can be customized to your liking with various toppings and sides.
Why This Works
- Flavor balance and ingredient accessibility: The recipe strikes a perfect balance between the savory flavor of chicken, the sharpness of cheddar, and the crunch of the breading, all made with easily accessible ingredients.
- Ease of preparation: Despite its impressive outcome, the dish is surprisingly simple to prepare, with straightforward steps that require minimal cooking skills.
- Impressive results with minimal effort: The combination of a crispy exterior and a juicy interior, along with the melted cheddar cheese, makes for a dish that looks and tastes like it was made in a professional kitchen, all with less than 30 minutes of active cooking time.
Ingredients
- 4 boneless, skinless chicken breasts (about 6 oz each)
- 1 cup all-purpose flour
- 1 tsp paprika
- 1 tsp garlic powder
- 1 tsp onion powder
- 1 tsp salt
- 1/2 tsp black pepper
- 1 cup panko breadcrumbs
- 1/2 cup grated cheddar cheese
- 2 large eggs
- 1 cup buttermilk
- Vegetable oil for frying
- Fresh parsley or chives, chopped (for garnish)
Instructions
- Step 1: Preparation – In a shallow dish, mix together the flour, paprika, garlic powder, onion powder, salt, and pepper. In another dish, beat the eggs. In a third dish, mix the panko breadcrumbs and cheddar cheese. Pour the buttermilk into a fourth dish.
- Step 2: Coating the Chicken – Dip each chicken breast first in the flour mixture, coating both sides evenly, then in the buttermilk, making sure it’s fully coated, and finally in the breadcrumb mixture, pressing the crumbs onto the chicken to ensure they stick. Place the coated chicken on a plate or tray.
- Step 3: Frying the Chicken – Heat about 1/2 inch of vegetable oil in a large skillet over medium-high heat until it reaches 350°F. Carefully place 2-3 chicken breasts in the hot oil (do not overcrowd). Fry for about 5-6 minutes on each side or until golden brown and the internal temperature reaches 165°F. Repeat with the remaining chicken breasts.
- Step 4: Final Touches – Once the chicken is cooked, place it on a paper towel-lined plate to drain excess oil. Serve hot, garnished with chopped parsley or chives. You can serve it with your favorite sides, such as mashed potatoes, coleslaw, or a fresh salad.
Handy Tips
- For an extra crispy coating, you can chill the coated chicken breasts in the refrigerator for 30 minutes before frying.
- Do not overcrowd the skillet, as this can lower the oil temperature, resulting in greasy or undercooked chicken.
- If you want to bake the chicken instead of frying, you can do so in a preheated oven at 400°F for about 20-25 minutes, or until cooked through and crispy.
Heat Control
Maintaining the right temperature is crucial for achieving the perfect crispiness. For frying, the ideal temperature is between 350°F to 375°F. If the oil is too hot, the exterior will burn before the interior is fully cooked. If it’s too cold, the chicken will absorb too much oil and be greasy. When baking, ensure your oven is preheated to the correct temperature, and consider using a thermometer to ensure accuracy.
Crunch Factor
The crunch factor in this recipe comes from the panko breadcrumbs and the cheddar cheese. To enhance the crunch, make sure the breadcrumbs are freshly opened and not stale. Also, don’t overcoat the chicken with the breadcrumb mixture, as this can make it heavy and less crispy. For an extra crunchy exterior, you can also try adding some grated Parmesan cheese to the breadcrumb mixture.
Pro Kitchen Tricks
- Use a thermometer: Whether frying or baking, a thermometer ensures you’re cooking at the right temperature, which is crucial for safety and quality.
- Don’t skip the resting time: After coating the chicken, letting it rest for a few minutes can help the coating adhere better, resulting in a crunchier exterior.
- Pat dry the chicken: Before coating, gently pat the chicken dry with paper towels to remove excess moisture. This helps the coating stick better and prevents a soggy exterior.
Storage Tips
- Leftover chicken can be stored in an airtight container in the refrigerator for up to 3 days. Reheat in the oven or microwave until warmed through.
- For longer storage, you can freeze the cooked chicken for up to 2 months. When reheating from frozen, make sure it reaches an internal temperature of 165°F to ensure food safety.
- When storing, it’s best to keep the chicken in a single layer to prevent the coating from getting soggy.
Gift Packaging Ideas
If you’re considering gifting this dish, perhaps for a potluck or as a meal for a friend, you can package it in a variety of ways. For a more rustic look, consider a wooden crate or a basket lined with a checkered cloth. For a modern touch, a sleek, microwave-safe container with a clear lid can showcase the dish while keeping it fresh. Don’t forget to include a side, like coleslaw or biscuits, and a personalized note to make it a thoughtful gift.
Flavor Variations
- Different spices: Try adding some cayenne pepper for a spicy kick or smoked paprika for a smoky flavor.
- Creative toppings: Once the chicken is cooked, you can top it with a variety of ingredients like diced bacon, caramelized onions, or a drizzle of honey for added flavor and texture.
- Ingredient swaps: For a lighter version, you can use less oil or try baking instead of frying. You can also experiment with different types of cheese or breadcrumbs for varying flavors.
Troubleshooting
- Texture problems: If your chicken turns out too greasy, it might be because the oil wasn’t hot enough. If it’s too dry, it could be overcooked. Adjusting the cooking time and temperature can help achieve the perfect texture.
- Ingredient replacements: If you’re out of buttermilk, you can make a substitute by mixing 1 cup of milk with 1 tablespoon of white vinegar or lemon juice. Let it sit for 5-10 minutes before using.
- Over/undercooking signs: Always check the internal temperature of the chicken to ensure it reaches 165°F. If you don’t have a thermometer, you can check for doneness by cutting into the thickest part of the breast; it should be white and juicy, not pink.
FAQs
- Can I freeze it? Yes, you can freeze the cooked chicken for up to 2 months. When reheating, make sure it reaches an internal temperature of 165°F.
- Is it gluten-free? The recipe as stated is not gluten-free due to the all-purpose flour. However, you can substitute the flour with a gluten-free alternative to make it suitable for gluten-free diets.
- Can I double the recipe? Yes, you can easily double or triple the recipe for a larger crowd. Just ensure you have enough oil in the skillet and cook the chicken in batches if necessary to prevent overcrowding.
Conclusion
This Best Crispy Cheddar Chicken recipe is a versatile and delicious addition to any meal. With its crunchy exterior, juicy interior, and flavorful cheddar cheese, it’s sure to become a favorite. Remember, the key to success lies in the details – from the temperature of the oil to the freshness of the breadcrumbs. Don’t be afraid to experiment with different seasonings and toppings to make the dish your own. Whether you’re a cooking novice or an experienced chef, this recipe is a must-try. So go ahead, get creative, and enjoy the process of cooking up something truly special.