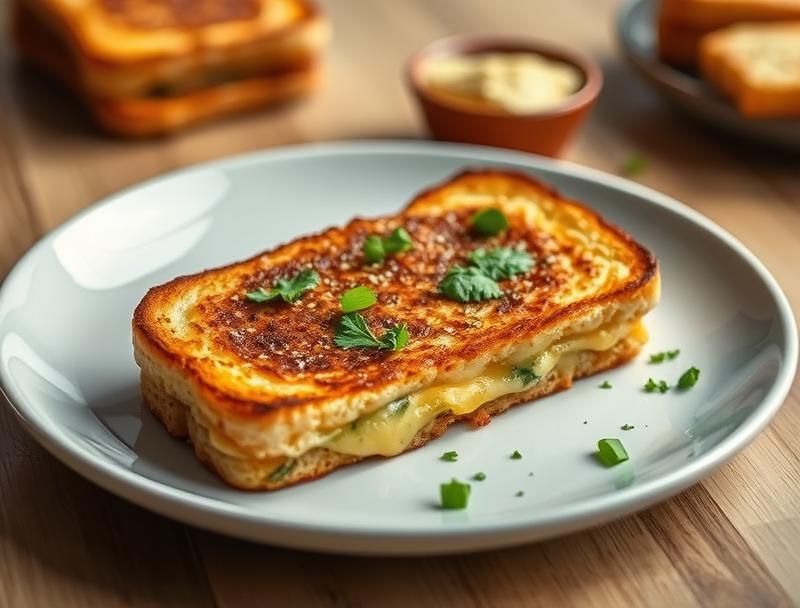
Crispy Garlic Grilled Cheese
Introduction
Imagine a dish that combines the simplicity of a grilled cheese with the aromatic depth of garlic, all wrapped up in a crispy, golden package. The Crispy Garlic Grilled Cheese is not just a meal; it’s an experience that elevates everyday ingredients into something truly special. With its perfect balance of flavors and textures, this dish is sure to become a favorite, whether you’re a busy parent looking for a quick lunch idea or an enthusiastic home cook seeking to impress. The best part? It’s incredibly easy to make, requiring minimal effort for maximum impact.
Why This Works
- Flavor balance and ingredient accessibility: The combination of melted cheese, crispy bread, and the pungency of garlic creates a flavor profile that is both comforting and sophisticated. Plus, the ingredients are readily available in most supermarkets.
- Ease of preparation: Despite its impressive results, the Crispy Garlic Grilled Cheese requires very little preparation time. It’s perfect for those nights when you need something delicious but don’t have hours to spend in the kitchen.
- Impressive results with minimal effort: The dish looks and tastes like it was made in a professional kitchen, but the secret is that it’s actually quite simple. The key is in the technique and the quality of the ingredients you use.
Ingredients
- 2 tablespoons unsalted butter, softened
- 4 slices of bread (preferably a crusty bread or baguette slices)
- 3 cloves of garlic, minced
- 2 cups grated cheese (such as cheddar, mozzarella, or a blend)
- 1/2 teaspoon salt
- 1/4 teaspoon black pepper
- 1/4 teaspoon paprika (optional, for some extra flavor and color)
- Fresh parsley or thyme, chopped (for garnish)
Instructions
- Step 1: Preparation – Begin by preparing your garlic butter. In a small bowl, mix the softened butter with the minced garlic until well combined. Season with salt, pepper, and paprika if using.
- Step 2: Assemble the Sandwich – Butter one side of each slice of bread with the garlic butter. Place one slice, buttered side down, in a skillet or griddle over medium heat. Top with a slice of cheese (or a combination of cheeses for a blend of flavors). Place the second slice of bread, buttered side up, on top of the cheese.
- Step 3: Cook the Sandwich – Cook for about 2-3 minutes or until the bread is golden brown and the cheese starts to melt. Carefully flip the sandwich over and cook for another 2-3 minutes, until the other side is also golden brown and the cheese is melted.
- Step 4: Serve – Remove the sandwich from the skillet and let it cool for a minute or two. Slice in half and serve immediately, garnished with chopped parsley or thyme.
Handy Tips
- For an extra crispy crust, you can grill the sandwich in a panini press or under the broiler for a few seconds. Keep an eye on it to avoid burning.
- Experiment with different types of cheese and bread to find your favorite combination. Some cheeses, like mozzarella, will melt more easily and provide a stretchy texture, while others, like cheddar, will give a sharper flavor.
- Don’t overfill the sandwich with cheese, as it can make the bread soggy and difficult to flip.
Heat Control
Maintaining the right heat is crucial for achieving the perfect crispiness without burning the bread. Medium heat is usually ideal, as it allows for a gradual melting of the cheese and browning of the bread. If you notice the bread browning too quickly, reduce the heat slightly. The goal is to have the cheese fully melted and the bread golden brown by the time you’re done cooking.
Crunch Factor
The crunch factor in this dish comes from the crispy bread, which is achieved by cooking the sandwich in a skillet until it’s golden brown. To enhance the crunch, make sure the bread is toasted well on both sides, and consider adding some crispy elements on top, like chopped nuts or crispy fried onions, for added texture.
Pro Kitchen Tricks
- Use a thermometer to ensure your skillet is at the right temperature. This can help you achieve a consistent cook and prevent burning.
- Don’t press down on the sandwich while it’s cooking, as this can push out the cheese and make the bread dense. Instead, let it cook undisturbed for the first couple of minutes on each side.
- Keep your ingredients at room temperature before cooking. This can help the cheese melt more evenly and the bread cook more consistently.
Storage Tips
- The Crispy Garlic Grilled Cheese is best served immediately, but if you need to store it, it’s best to keep it in an airtight container in the refrigerator for up to a day. Reheat it in a toaster oven or skillet until crispy and hot.
- Avoid storing it at room temperature for too long, as the bread can become soggy and the cheese can spoil.
- Consider making the garlic butter ahead of time and storing it in the fridge for up to a week. This can be a handy shortcut for future meals.
Gift Packaging Ideas
If you’re considering gifting this dish, perhaps as part of a picnic basket or a care package, you can wrap the sandwiches individually in parchment paper or aluminum foil and place them in a decorative basket or box. Adding some garnishes like fresh herbs, a side of soup, or a salad can make the gift even more special.
Flavor Variations
- Different spices: Consider adding some dried or fresh herbs like basil, oregano, or thyme to the garlic butter for an Italian twist.
- Creative toppings: Add some sliced meats like ham or turkey, or some caramelized onions and bell peppers for added flavor and texture.
- Ingredient swaps: Use different types of cheese or bread to change up the flavor profile. For example, a brie and fig jam grilled cheese can offer a sweet and savory twist.
Troubleshooting
- Texture problems: If your bread is turning out too dense or soggy, check that you’re not overfilling the sandwich or pressing down on it while it cooks.
- Ingredient replacements: If you don’t have garlic, you can substitute it with another aromatic like onion or shallot. Just be sure to adjust the amount according to taste.
- Over/undercooking signs: Keep an eye on the color of the bread and the melt of the cheese. If the bread is too dark, it’s likely overcooked. If the cheese isn’t melted, it may need a bit more time.
FAQs
- Can I freeze it? – While it’s possible to freeze the components of the dish (like the garlic butter or the bread), it’s not recommended to freeze the assembled sandwich. The texture of the bread and cheese can become unpleasant after thawing.
- Is it gluten-free? – This depends on the type of bread you use. If you use a gluten-free bread, the dish can be gluten-free. However, be aware of potential cross-contamination if you’re cooking in a kitchen that also handles gluten.
- Can I double the recipe? – Absolutely. Simply multiply all the ingredients by two (or more, depending on how many sandwiches you want to make). Just be sure you have a large enough skillet or griddle to cook them all at once, or cook them in batches.
Conclusion
The Crispy Garlic Grilled Cheese is a versatile and delicious dish that can be enjoyed at any time of day. With its simple ingredients and easy preparation method, it’s perfect for both beginners and experienced cooks. Don’t be afraid to experiment with different flavors and ingredients to make the dish your own, and enjoy the process of creating something truly special from everyday components. Whether you’re cooking for yourself or for a crowd, this recipe is sure to please, offering a satisfying blend of crunch, flavor, and comfort in every bite.