Ultimate Charcuterie Board Idea
Introduction
Creating the ultimate charcuterie board is an art form that combines ease, flavor, and creativity, using everyday ingredients to impress your guests. Whether you’re hosting a party, a casual gathering, or just a quiet night in, a well-crafted charcuterie board can elevate any occasion. The beauty of a charcuterie board lies in its versatility and the freedom to experiment with a variety of flavors and textures, making it perfect for both beginners and seasoned entertainers. In this guide, we’ll explore the essentials of building an ultimate charcuterie board that will delight your senses and leave a lasting impression on your guests.
Why This Works
- Flavor balance and ingredient accessibility: A good charcuterie board strikes a balance between sweet, savory, salty, and tangy flavors, using ingredients that are readily available and easy to work with.
- Ease of preparation: One of the most appealing aspects of a charcuterie board is how effortless it is to prepare. Most items can be arranged and served without needing to cook, making it a stress-free option for hosts.
- Impressive results with minimal effort: Despite the ease of preparation, a charcuterie board can look incredibly impressive and sophisticated, making it perfect for special occasions or when you want to make a good impression without spending hours in the kitchen.
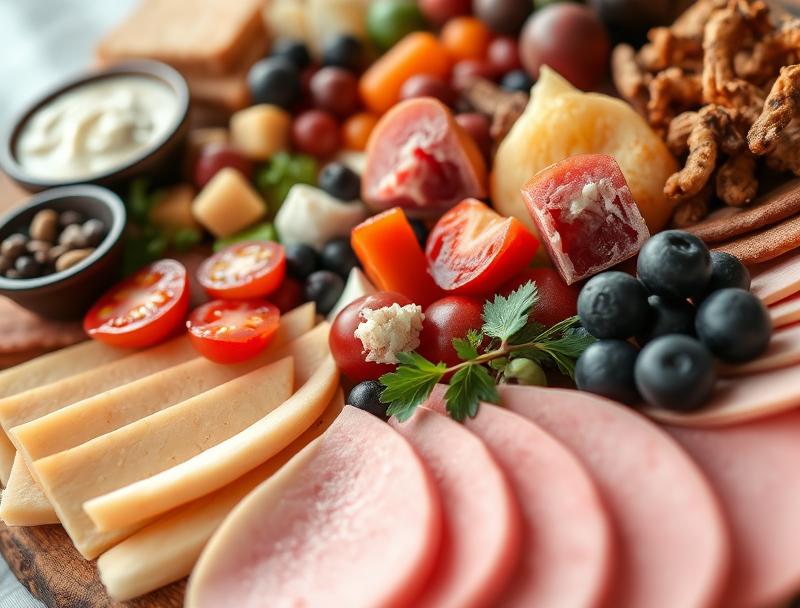
Ingredients
- Cured meats (prosciutto, salami, ham)
- Cheeses (soft-ripened, hard, blue cheese)
- Fresh fruits (grapes, berries, apples, pears)
- Nuts (almonds, walnuts, pecans)
- Pickled or marinated items (artichoke hearts, olives, pepperoncini)
- Crackers and bread (baguette slices, crostini, water crackers)
- Spreads and jams (chutney, honey, mustard)
- Fresh herbs (rosemary, thyme, parsley)
- Chocolates or other sweet treats
Instructions
- Step 1: Begin by preparing your ingredients. Slice the meats and cheeses, wash and dry the fruits, and open any packages of nuts, pickled items, crackers, and spreads.
- Step 2: Arrange the larger items on the board first, such as the cheeses, meats, and bowls of spreads or pickled items. This will help you visualize the space and plan where the smaller items will go.
- Step 3: Add the fruits, nuts, and smaller bowls or ramekins of items like olives or chutney. Try to create a visually appealing arrangement by varying the heights and textures.
- Step 4: Finish with garnishes like fresh herbs, edible flowers, or pomegranate seeds to add pops of color and freshness to the board.
Handy Tips
- Consider your guests’ dietary restrictions when selecting items for the board. Offer gluten-free crackers, vegan cheeses, or nuts for those with common allergies.
- Don’t overcrowd the board. Leave some space between items to make it easy for guests to serve themselves and to prevent the board from looking cluttered.
- Experiment with different themes or color schemes to match the occasion or your personal style. For example, a summer board might feature lighter colors and fresher flavors, while a winter board could be richer and more decadent.
Heat Control
Since a charcuterie board typically doesn’t require cooking, heat control isn’t a major concern. However, if you’re including cooked items like roasted nuts or warmed spreads, make sure to cool them to room temperature before adding them to the board to prevent moisture from building up and making the other items soggy.
Crunch Factor
Achieving a good crunch factor on your charcuterie board can add texture and interest. Include a variety of crunchy items like fresh apples, carrots, or bell pepper slices, and crunchy nuts. For softer items like cheeses or spreads, consider serving them with crackers or breadsticks to provide a satisfying crunch.
Pro Kitchen Tricks
- Use a variety of shapes and sizes of bowls, plates, and boards to add visual interest to your charcuterie board.
- Label the different items on your board, either with small signs or by using edible markers to write directly on the board. This can be especially helpful for guests with dietary restrictions or preferences.
- Prepare as much as you can ahead of time, but assemble the board just before serving to ensure everything looks fresh and appealing.
Storage Tips
- Store leftover items from your charcuterie board in airtight containers in the refrigerator to keep them fresh.
- Consume cured meats, cheeses, and other perishable items within a few days of opening.
- Freeze items like nuts or dried fruits if you won’t be using them immediately to prevent them from going stale.
Gift Packaging Ideas
If you’re putting together a charcuterie board as a gift, consider packaging items in decorative baskets, wooden crates, or elegant boxes. You can also include accompaniments like wine, gourmet jams, or specialty crackers to make the gift even more special. Wrap items individually in paper or cloth to add a personal touch, and don’t forget to include a handwritten note or card with suggestions for how to enjoy the items.
Flavor Variations
- Different spices: Add a pinch of paprika, a sprinkle of dried herbs, or a few grinds of pepper to give your cheeses and meats a boost of flavor.
- Creative toppings: Offer unique toppings like fig jam, honey, or chutney to pair with your cheeses and meats.
- Ingredient swaps: Substitute different types of cheese, meats, or spreads to create a unique flavor profile each time you assemble a charcuterie board.
Troubleshooting
- Texture problems: If items on your board are becoming soggy or stale, adjust your storage methods or the types of items you’re including to find a better balance.
- Ingredient replacements: Don’t be afraid to substitute items if you can’t find a specific type of cheese or meat. The flexibility of a charcuterie board is part of its charm.
- Over/undercooking signs: Since most items on a charcuterie board are served raw or pre-cooked, focus on ensuring that any cooked items are cooled properly before serving.
FAQs
- Can I freeze it? Yes, many items like meats, cheeses, and nuts can be frozen, but it’s best to assemble the board fresh for the best flavor and texture.
- Is it gluten-free? Depending on the items you choose, a charcuterie board can easily be made gluten-free by selecting gluten-free crackers and being mindful of the ingredients in your spreads and meats.
- Can I double the recipe? Since a charcuterie board is more about assembly than cooking, you can easily scale up or down depending on the number of guests you’re hosting.
Conclusion
Creating the ultimate charcuterie board is a fun and creative process that allows you to express your personal style and cater to the tastes of your guests. With a little planning and experimentation, you can craft a board that is both visually stunning and delicious, perfect for any occasion. Remember, the key to a great charcuterie board is variety, so don’t be afraid to try new items and arrangements until you find the combination that works best for you. Happy hosting!
Ultimate Charcuterie Board Idea
A guide to creating the ultimate charcuterie board with cured meats, cheeses, fruits, nuts, and spreads.
🥘 Ingredients
👩🍳 Instructions
-
1Prepare ingredients by slicing meats and cheeses, washing fruits, and opening packages of nuts and spreads.
-
2Arrange larger items on the board, then add smaller items and garnishes.
-
3Finish with fresh herbs or edible flowers for a pop of color and freshness.
-
4Serve and enjoy!