Crispy Strawberry Cheesecake Tacos Recipe for Easy Dessert
Introduction
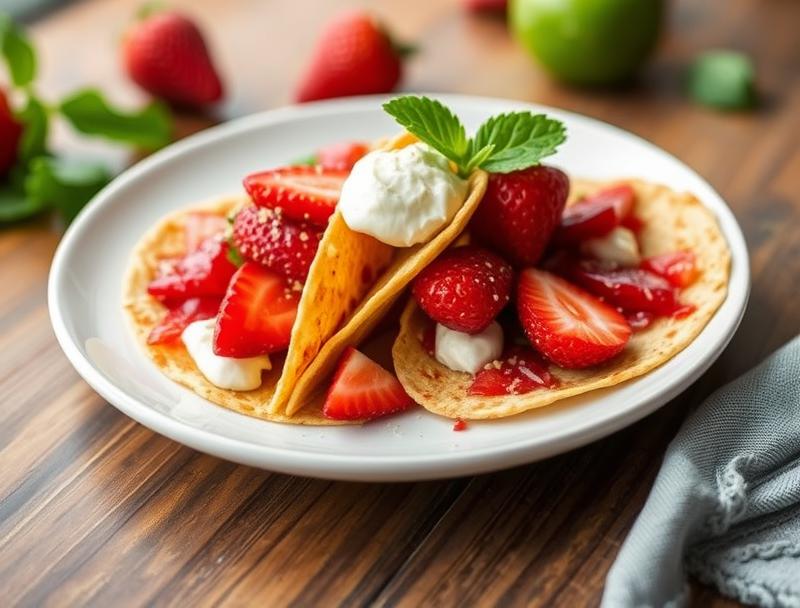
Imagine a dessert that combines the crunch of a taco shell with the creamy richness of cheesecake and the sweet burst of fresh strawberries. This unique dessert, Crispy Strawberry Cheesecake Tacos, is not only a flavor sensation but also surprisingly easy to make. Using everyday ingredients and a few clever tricks, you can create a show-stopping dessert that will impress your family and friends. The best part? It’s incredibly simple and requires minimal effort, making it perfect for those looking for an easy yet impressive dessert solution.
Why This Works
- Flavor balance and ingredient accessibility: This recipe strikes a perfect balance between sweet and tangy, using ingredients that are easily found in most supermarkets.
- Ease of preparation: Despite its impressive presentation, this dessert is quick to prepare, with most of the work involving simple mixing and assembly.
- Impressive results with minimal effort: The combination of crispy taco shells filled with creamy cheesecake and topped with fresh strawberries creates a dessert that looks and tastes like it was made by a professional, but requires very little effort.
Ingredients
- 12-15 taco shells (preferably the kind that can be baked for crispiness)
- 16 ounces cream cheese, softened
- 1/2 cup granulated sugar
- 2 large eggs
- 1 teaspoon vanilla extract
- 1 cup sour cream
- 1 cup sliced strawberries
- 1/4 cup honey or strawberry sauce for drizzling (optional)
- Whipped cream for topping (optional)
Instructions
- Step 1: Preheat your oven to 375°F (190°C). If your taco shells are not the bakeable kind, you can skip this step or find an alternative method to crisp them, such as using a toaster oven or frying them briefly in oil.
- Step 2: Prepare the cheesecake filling. In a large mixing bowl, beat the cream cheese until smooth. Add the granulated sugar and beat until combined. Beat in the eggs one at a time, followed by the vanilla extract. Stir in the sour cream until well combined.
- Step 3: Fill the taco shells. Spoon about 1-2 tablespoons of the cheesecake mixture into each shell, depending on their size. You can fill them just before baking or fill and bake them immediately if using bakeable shells.
- Step 4: Bake the filled taco shells for about 10-12 minutes, or until the edges are lightly golden and the cheesecake is set. Keep an eye on them to prevent overcooking. If not baking, proceed to the assembly step.
- Step 5: Assemble the desserts. Allow the cheesecake-filled tacos to cool slightly. Top each taco with sliced strawberries. Drizzle with honey or strawberry sauce if desired, and top with whipped cream for an extra-special treat.
Handy Tips
- For an extra crispy shell, bake the empty taco shells for a few minutes before filling. Keep an eye on them to prevent burning.
- Substitute the sour cream with Greek yogurt for a tangier cheesecake.
- Avoid overfilling the tacos, as the cheesecake will set and could overflow when baked.
Heat Control
If you’re baking your taco shells, the ideal temperature is 375°F (190°C), and the timing will depend on whether you’re baking them filled or empty. For empty shells, 5-7 minutes should suffice, while filled shells will take about 10-12 minutes. The shells are done when they’re lightly golden and the cheesecake is set. Always keep an eye on them to prevent overcooking.
Crunch Factor
The crunch in this dessert comes from the taco shells. To achieve the perfect crunch, bake the shells according to the package instructions or your preference. If you prefer a softer shell, you can skip the baking step. The contrast between the crunchy shell and the soft, creamy cheesecake, along with the freshness of the strawberries, creates a delightful texture experience.
Pro Kitchen Tricks
- Use high-quality ingredients, especially the strawberries, for the best flavor.
- Consider making the cheesecake mixture ahead of time and refrigerating it until you’re ready to assemble the tacos.
- For a shortcut, use pre-made cheesecake or a cheesecake mix, following the package instructions for preparation.
Storage Tips
- Store any leftover cheesecake mixture in an airtight container in the refrigerator for up to 3 days.
- Assembled tacos are best served fresh, but you can store them in the refrigerator for a few hours before serving. Allow them to come to room temperature for the best texture.
- Do not freeze assembled tacos, as the texture of the cheesecake and the crunch of the shell may be compromised. However, you can freeze the cheesecake mixture for up to 2 months and thaw it when needed.
Gift Packaging Ideas
If you’re looking to gift these unique desserts, consider packaging them in decorative boxes or bags. You can place each taco in a small paper bag or wrap it in plastic wrap and then in colorful tissue paper. Adding a ribbon or a gift tag with a personal message can make it a thoughtful and visually appealing gift. For a more rustic look, use small wooden crates or baskets lined with parchment paper.
Flavor Variations
- Different fruits: Try using blueberries, raspberries, or a mix of berries for a different flavor profile.
- Creative toppings: Add some chopped nuts, caramel sauce, or even candy pieces on top of the strawberries for extra flavor and texture.
- Ingredient swaps: Use different types of cheese or add a teaspoon of liqueur (like Grand Marnier or Amaretto) to the cheesecake mixture for a grown-up twist.
Troubleshooting
- Texture problems: If your cheesecake is too runny, it might not have baked long enough. If it’s too dense, you might have overmixed the batter.
- Ingredient replacements: If you don’t have sour cream, you can substitute it with Greek yogurt or even a mixture of milk and butter for a different flavor.
- Over/undercooking signs: Keep an eye on your tacos while they’re baking. If the edges of the shells start to brown too quickly, cover them with foil to prevent burning.
FAQs
- Can I freeze it? While you can freeze the cheesecake mixture, it’s not recommended to freeze the assembled tacos due to texture changes.
- Is it gluten-free? Depending on the type of taco shells you use, this dessert can be gluten-free. Look for gluten-free taco shells to accommodate dietary restrictions.
- Can I double the recipe? Yes, you can easily double or triple this recipe for larger gatherings. Just be sure to adjust the baking time slightly if you’re making a large batch.
Conclusion
Crispy Strawberry Cheesecake Tacos offer a fun twist on traditional desserts, combining flavors and textures in a unique and exciting way. With its ease of preparation, impressive presentation, and delicious taste, this recipe is perfect for anyone looking to try something new and exciting. Feel free to experiment with different flavors and toppings to make it your own, and don’t hesitate to share your creations with friends and family. Happy baking, and enjoy the delightful experience of Crispy Strawberry Cheesecake Tacos!
Crispy Strawberry Cheesecake Tacos Recipe for Easy Dessert
A unique dessert combining crispy taco shells with creamy cheesecake and fresh strawberries, perfect for an easy yet impressive dessert solution.
🥘 Ingredients
👩🍳 Instructions
-
1Preheat the oven to 375°F (190°C).
-
2Prepare the cheesecake filling by beating the cream cheese, then adding sugar, eggs, vanilla extract, and sour cream.
-
3Fill the taco shells with the cheesecake mixture and bake for 10-12 minutes or until lightly golden.
-
4Allow the tacos to cool slightly, then top with sliced strawberries and drizzle with honey or strawberry sauce if desired.
-
5Serve immediately and enjoy!