Easy Homemade Yellow Squash Pickles Recipe
Introduction
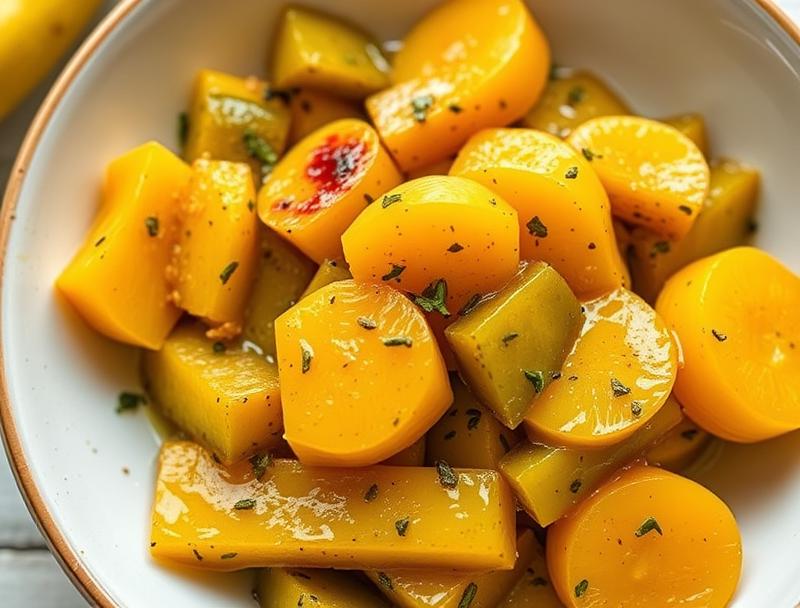
There’s something truly special about homemade pickles, and when it comes to utilizing the bounty of summer, few recipes shine as brightly as our Easy Homemade Yellow Squash Pickles. This delightful and easy-to-make recipe transforms the humble yellow squash into a tangy, flavorful, and crunchy delight that’s perfect for snacking, adding to sandwiches, or serving as a side dish. The beauty of this recipe lies in its simplicity, using everyday ingredients to create a truly impressive and delicious condiment. Whether you’re a seasoned cook or just starting out, this recipe is sure to become a favorite, offering a great way to enjoy the freshness of summer all year round.
Why This Works
- The balance of sweet, sour, and spicy flavors creates a pickle that’s both refreshing and addictive, making it a great accompaniment to a variety of dishes.
- The ease of preparation is a significant advantage, as it requires minimal cooking and can be ready in no time, perfect for a quick snack or meal prep.
- Despite the simplicity, the results are impressive, with a texture and flavor that rivals store-bought pickles, making it a great option for those looking for a homemade alternative.
Ingredients
- 2 large yellow squash, sliced into 1/4-inch thick rounds
- 1 large onion, thinly sliced
- 2 cloves of garlic, minced
- 1 cup (250 ml) of white vinegar
- 1/2 cup (125 ml) of water
- 1 tablespoon of pickling salt
- 1 tablespoon of granulated sugar
- 1 teaspoon of whole black peppercorns
- 1/4 teaspoon of red pepper flakes (optional, for some heat)
- Fresh dill, chopped (for garnish)
Instructions
- Step 1: Prepare the Squash and Onion – In a large bowl, combine the sliced yellow squash and onion. Sprinkle with salt to draw out moisture and let it sit for about 30 minutes. After 30 minutes, rinse the squash and onion slices thoroughly to remove excess salt and pat them dry with paper towels to remove excess moisture.
- Step 2: Create the Pickling Liquid – In a medium saucepan, combine the vinegar, water, pickling salt, sugar, black peppercorns, and red pepper flakes (if using). Bring the mixture to a boil over medium-high heat, stirring until the sugar and salt are dissolved. Reduce the heat to medium-low and simmer for about 10 minutes.
- Step 3: Pack the Pickles – Pack the prepared squash and onion slices into a clean, hot jar, leaving about 1/2 inch of space at the top. Pour the hot pickling liquid over the squash, making sure that all the pieces are covered. If necessary, add a bit more vinegar or water to cover.
- Step 4: Seal and Store – Remove any air bubbles by running a non-metallic utensil, such as a plastic spatula, around the inside of the jar. Wipe the rim with a clean, damp cloth and apply the lid and ring. Let the pickles cool to room temperature, undisturbed, then store them in the refrigerator. The pickles will be ready to eat within a few hours and will keep, refrigerated, for several weeks.
Handy Tips
- For a crunchier pickle, you can add a few cloves of garlic or a few sprigs of fresh dill to the jar before sealing.
- Always use fresh and clean equipment to avoid contamination and ensure the pickles last longer.
- Keep an eye on the pickles’ acidity level, as it might affect their texture and flavor over time.
Heat Control
When creating the pickling liquid, it’s essential to bring it to a boil to ensure that the sugar and salt dissolve properly and to kill off any bacteria that might be present. However, once boiling, reduce the heat to medium-low to simmer, as high heat can cause the liquid to evaporate too quickly, concentrating the flavors more than desired.
Crunch Factor
The crunch of the pickles comes from the freshness of the yellow squash and the process of salting and rinsing before pickling. To maintain the crunch, it’s crucial not to overprocess the squash and to ensure that the pickling liquid covers all the pieces evenly. Adding garlic or dill can also enhance the texture and flavor.
Pro Kitchen Tricks
- Use a mandoline to slice the squash and onion for uniform thickness, which helps in achieving evenly pickled pieces.
- For a clearer pickling liquid, you can strain it through a cheesecloth or a fine-mesh sieve before pouring it over the squash.
- Experiment with different spices and seasonings in the pickling liquid to create unique flavor profiles.
Storage Tips
- Store the pickles in the refrigerator at a temperature of 40°F (4°C) or below to slow down the fermentation process and keep them fresh for a longer period.
- Always check the pickles for signs of spoilage before consuming, such as off smells, slimy texture, or mold growth.
- For longer storage, consider canning the pickles using a water bath canner, following safe canning practices to ensure the pickles are properly sterilized and sealed.
Gift Packaging Ideas
These homemade yellow squash pickles make a wonderful gift, especially when packaged in decorative jars with a ribbon and a gift tag. Consider adding a few recipe ideas or serving suggestions to the gift tag for the recipient to enjoy their pickles fully. For a more rustic look, you can wrap the jar in a piece of cloth or paper and tie it with twine, adding a homemade touch to the gift.
Flavor Variations
- Spicy Pickles: Add more red pepper flakes or sliced jalapeños to the pickling liquid for an extra kick of heat.
- Dill Pickles: Increase the amount of fresh dill or add dill seeds to the pickling liquid for a more pronounced dill flavor.
- Sweet Pickles: Add a bit more sugar to the pickling liquid or use honey for a different flavor profile.
Troubleshooting
- Soft or Mushy Pickles: This could be due to over-processing the squash before pickling or not storing the pickles at the right temperature. Try adjusting the salting time or checking the refrigerator temperature.
- Too Salty: If the pickles turn out too salty, try rinsing them with fresh water before serving or diluting the pickling liquid with a bit more water or vinegar.
- Not Sour Enough: If the pickles lack the desired sourness, you can add a bit more vinegar to the pickling liquid next time or let the pickles ferment for a longer period.
FAQs
- Can I freeze the pickles? – While it’s possible to freeze pickles, it’s not recommended as it can affect their texture and flavor. Refrigeration is the best way to store pickles.
- Are these pickles gluten-free? – Yes, this recipe does not include any gluten-containing ingredients, making it suitable for those with gluten intolerance or sensitivity.
- Can I double or triple the recipe? – Absolutely, you can easily scale up the recipe to make more pickles. Just ensure you have enough jars and storage space for the finished pickles.
Conclusion
Making your own pickles at home is a rewarding experience that allows you to control the ingredients, the level of sourness, and the crunch. With this Easy Homemade Yellow Squash Pickles recipe, you’re not only creating a delicious condiment but also preserving the freshness of summer for months to come. Feel free to experiment with different flavors and ingredients to make the recipe your own, and don’t hesitate to share your creations with friends and family. Happy pickling!