No-Knead Bread – Crusty, Easy & Foolproof Homemade Loaf!
Introduction
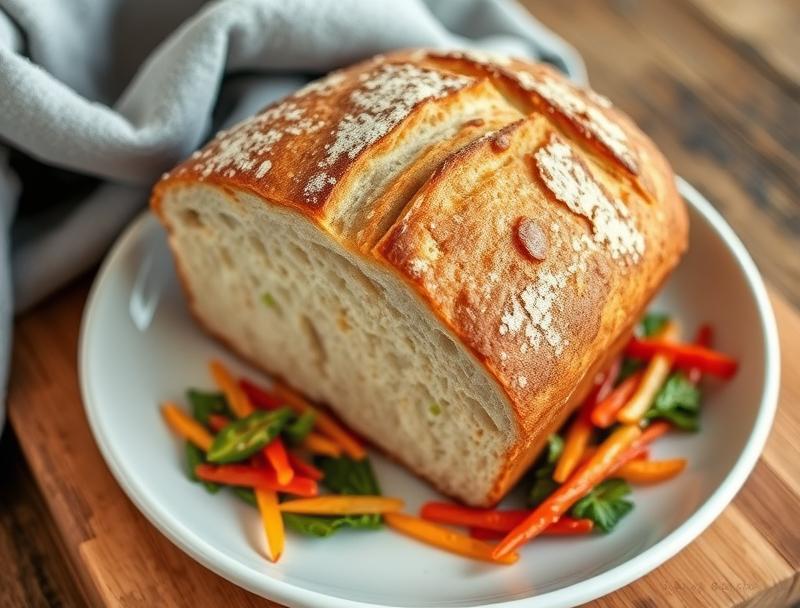
Imagine sinking your teeth into a warm, crusty loaf of bread, fresh from your own oven, with minimal effort and using everyday ingredients. The no-knead bread recipe is a game-changer for anyone who loves the aroma and taste of homemade bread but thinks it’s too complicated or time-consuming to make. This recipe simplifies the process, requiring only a few ingredients and almost no physical effort, making it accessible to bakers of all skill levels. The result is a deliciously crusty outside and a soft, airy inside that will make you wonder how something so simple can taste so good.
Why This Works
- Flavor balance and ingredient accessibility: This recipe uses basic ingredients like flour, water, yeast, and salt, which are easy to find in most kitchens. The combination of these ingredients creates a perfectly balanced flavor that is both savory and slightly sweet.
- Ease of preparation: The no-knead method eliminates the need for lengthy kneading sessions, making it incredibly easy to prepare. Just mix the ingredients together, let the dough rest, and bake.
- Impressive results with minimal effort: Despite the simplicity of the recipe, the end result is a beautifully crusty and delicious loaf of bread that looks and tastes like it came from a professional bakery.
Ingredients
- 3 cups of all-purpose flour
- 1 teaspoon of salt
- 1 teaspoon of sugar
- 1 packet (2 1/4 teaspoons) of active dry yeast
- 1 1/2 cups of water
Instructions
- Step 1: In a large mixing bowl, combine the flour, salt, sugar, and yeast. Whisk the dry ingredients together to ensure they are well mixed.
- Step 2: Add the water to the dry ingredients and mix until a shaggy dough forms. The dough should be sticky and rough at this stage.
- Step 3: Cover the bowl with plastic wrap or a damp towel and let the dough rest in a warm, draft-free place for 12 to 24 hours. This long resting period allows the yeast to ferment the sugars in the dough, developing the flavor and texture of the bread.
- Step 4: After the resting period, the dough should have doubled in size and have a bubbly appearance. Flour a work surface and gently turn the dough out onto it. Fold the dough over itself several times until it becomes smooth and elastic. Be careful not to overwork the dough.
- Step 5: Form the dough into a round or oblong shape. Place the dough onto a piece of parchment paper or a lightly floured pizza peel, if you have one. Cover it with plastic wrap or a clean towel and let it rise for another 1 to 2 hours, or until it has doubled in size again.
- Step 6: Preheat your oven to 450°F (230°C) with a Dutch oven or a heavy-bottomed pot with a lid inside. If you don’t have either, you can use a regular oven, but the crust might not be as crispy. Place the dough into the preheated pot or onto a baking sheet. Cover the pot with the lid or use foil to cover the baking sheet.
- Step 7: Bake for 25 to 30 minutes with the lid on, then remove the lid and continue baking for an additional 10 to 15 minutes, or until the bread is golden brown and sounds hollow when tapped on the bottom.
- Step 8: Remove the bread from the oven and let it cool on a wire rack for at least 30 minutes before slicing. This cooling period is crucial for the bread to set properly and for the crust to retain its crispiness.
Handy Tips
- Use a digital thermometer to ensure your water is not too hot for the yeast, as this can kill it. The ideal temperature for mixing is between 100°F and 110°F.
- Don’t overmix the dough, as this can lead to a dense bread. Mix just until the ingredients come together in a shaggy mass.
- Keep the environment consistent for the rise. Too much draft or sudden changes in temperature can affect the yeast’s activity.
- For a more crusty bread, bake it in a steamy environment. The Dutch oven or covered pot helps to create this steam.
Heat Control
Heat control is crucial in baking no-knead bread. The initial high heat (450°F or 230°C) helps to create a crust quickly, a process known as the “oven spring.” After removing the lid, the continued baking at the same temperature browns the crust and dries it out slightly, contributing to its crunchiness. It’s essential to follow the temperature and timing guidelines to achieve the perfect crust.
Crunch Factor
Achieving the right crunch factor in no-knead bread is largely about controlling the baking environment and time. The steam created by baking the bread in a covered pot helps to create a crispy crust. The initial baking with the lid on traps the steam, and the subsequent baking without the lid allows the crust to dry and brown. This two-step process is key to a crunchy outside and a soft inside.
Pro Kitchen Tricks
- Use a pizza stone in your oven to enhance the crust’s crispiness. The stone absorbs moisture and distributes heat evenly.
- For an extra crispy crust, try baking the bread at a very high temperature (500°F or 260°C) for the first 10 to 15 minutes, then reduce the heat to 425°F (220°C) for the remainder of the baking time.
- Experiment with different types of flour, like whole wheat or rye, to create variations in flavor and texture.
Storage Tips
- Store cooled bread in an airtight container at room temperature for up to 3 days. It’s best consumed fresh, but it can be stored for longer periods.
- For longer storage, consider freezing the bread. Cool the bread completely, then wrap it tightly in plastic wrap or aluminum foil and place it in a freezer bag. Frozen bread can be stored for up to 2 months. To thaw, leave it at room temperature or reheat it in the oven.
- Reheating can be done in the oven or toaster. Wrap the bread in foil and heat it in a preheated oven at 350°F (180°C) for about 10 minutes, or until warmed through.
Gift Packaging Ideas
No-knead bread makes a wonderful gift, especially when presented nicely. Consider wrapping the cooled bread in a rustic paper bag or a linen cloth and tying it with twine. You can also include a small jar of homemade jam or honey and a packet of artisanal coffee for a complete gift basket. For a more personalized touch, attach a handwritten note with the recipe and baking tips.
Flavor Variations
- Different spices: Try adding some dried herbs like rosemary or thyme to the dough for a herby flavor, or some red pepper flakes for a spicy kick.
- Creative toppings: Before baking, brush the top of the bread with olive oil and sprinkle with coarse salt, sesame seeds, or poppy seeds for added texture and flavor.
- Ingredient swaps: Substitute some of the all-purpose flour with whole wheat flour for a nuttier flavor, or use beer instead of water for a deeper, richer taste.
Troubleshooting
- Texture problems: If your bread turns out too dense, it might be due to overmixing the dough or not letting it rise long enough. If it’s too dry, the oven might have been too hot or the bread was overbaked.
- Ingredient replacements: If you’re out of yeast, you can try making a sourdough starter, though this will significantly extend the preparation time. For flour substitutions, keep in mind that different types of flour have different protein contents, which can affect the bread’s structure and rise.
- Over/undercooking signs: An undercooked bread will sound dull when tapped on the bottom and might feel soft. An overcooked bread will be excessively dark and hard. Adjust your baking time accordingly based on your oven’s performance.
FAQs
- Can I freeze it? Yes, no-knead bread can be frozen. Cool it completely, then wrap it tightly and place it in a freezer bag. It can be stored for up to 2 months.
- Is it gluten-free? No, this recipe uses all-purpose flour, which contains gluten. However, you can experiment with gluten-free flours, though the results may vary.
- Can I double the recipe? Yes, you can double the recipe, but be aware that the rising and baking times might be slightly longer. Keep an eye on the bread as it bakes, and adjust the time as necessary.
Conclusion
Making no-knead bread is a rewarding experience that combines simplicity with impressive results. With its crusty exterior and soft interior, this bread is perfect for sandwiches, toast, or just enjoying on its own. Don’t be afraid to experiment with different flavors and ingredients to make the recipe your own. Whether you’re a seasoned baker or just starting out, this no-knead bread recipe is sure to become a favorite. So go ahead, give it a try, and share your creations with friends and family. Happy baking!
No-Knead Bread – Crusty, Easy & Foolproof Homemade Loaf!
A simple recipe for homemade no-knead bread that yields a crusty, delicious loaf with minimal effort.
🥘 Ingredients
👩🍳 Instructions
-
1Mix dry ingredients together in a large bowl.
-
2Add water and mix until a shaggy dough forms.
-
3Let the dough rest for 12 to 24 hours.
-
4Fold the dough and let it rise for another 1 to 2 hours.
-
5Preheat oven to 450°F (230°C) and bake for 25 to 30 minutes with the lid on, then 10 to 15 minutes without the lid.