Make Easy Homemade California Sushi Rolls Today
Introduction
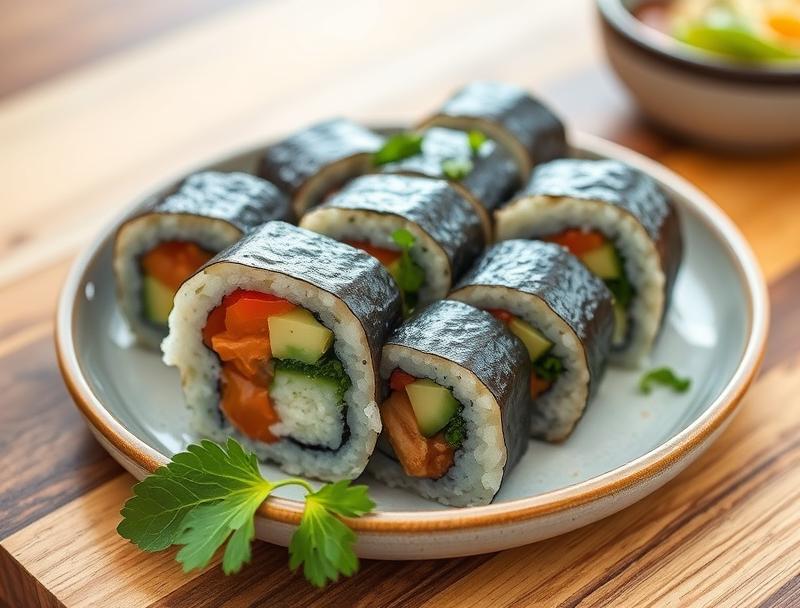
Welcome to the world of sushi making, where creativity knows no bounds and flavors blend in perfect harmony. Making homemade California sushi rolls is easier than you think, and with a few everyday ingredients, you can create a dish that’s not only delicious but also visually stunning. The California roll, a classic favorite, combines the sweetness of crab, the crunch of cucumber, and the creaminess of avocado, all wrapped in a delicate layer of sushi rice and nori seaweed. In this article, we’ll guide you through the process of making easy homemade California sushi rolls, perfect for a quick lunch, a dinner party, or even a fun family activity.
Why This Works
- Flavor balance and ingredient accessibility: The combination of ingredients in a California roll offers a well-balanced flavor profile that’s both refreshing and satisfying. Moreover, the ingredients are easily accessible in most supermarkets, making it convenient to prepare.
- Ease of preparation: Despite the intimidating nature of sushi, making California rolls at home is surprisingly easy. With a few simple tools and some practice, you can achieve professional-looking rolls.
- Impressive results with minimal effort: The beauty of making sushi at home lies in the impressive results you can achieve with relatively minimal effort. Your guests will be amazed by your culinary skills, and you’ll enjoy the process of creating something so delightful.
Ingredients
- 1 cup of Japanese short-grain rice (sushi rice)
- 1/2 cup of water
- 1/4 cup of rice vinegar
- 1 tablespoon of sugar
- 1 teaspoon of salt
- 1/2 avocado, sliced
- 1/2 cucumber, sliced
- 1/2 cup of imitation crab meat (or real crab if preferred)
- 1 sheet of nori seaweed
- Sesame seeds and soy sauce for serving (optional)
Instructions
- Step 1: Prepare the Sushi Rice – Rinse the rice thoroughly and cook it according to the package instructions. Typically, it’s a 1:1 ratio with water. Once cooked, allow the rice to cool down to room temperature. In a small saucepan, combine the rice vinegar, sugar, and salt. Heat the mixture over low heat, stirring until the sugar and salt dissolve. Allow the vinegar mixture to cool, then gently fold it into the cooled rice with a wooden spoon.
- Step 2: Prepare the Fillings – Slice the avocado and cucumber into thin pieces. If using imitation crab meat, you can slice it into strips as well. Lay a bamboo sushi mat flat. If you don’t have a bamboo mat, you can use a piece of parchment paper or a clean tea towel.
- Step 3: Assemble the Roll – Lay a sheet of nori flat on the mat. Spread a thin layer of sushi rice onto the nori, leaving about 1 inch of space at the top. Place your fillings in the middle of the rice. Roll the sushi using the mat, applying gentle pressure to form a compact roll. Repeat with the remaining ingredients.
- Step 4: Slice and Serve – Once the rolls are made, place them in the refrigerator for at least 30 minutes to set. Slice the rolls into 8 equal pieces using a sharp knife. Serve with soy sauce, wasabi, and pickled ginger if desired.
Handy Tips
- Use short-grain Japanese rice, as it’s stickier and better suited for sushi.
- Handle the sushi rice gently when mixing it with the vinegar solution to avoid mashing the grains.
- Keep your hands and utensils moist with water or rice vinegar to prevent the rice from sticking.
- Experiment with different fillings to create your unique sushi rolls.
Heat Control
When cooking the sushi rice, it’s essential to use the right amount of water and heat to achieve the perfect texture. Typically, Japanese short-grain rice is cooked in a 1:1 ratio with water. Bring the water to a boil, then reduce the heat to low, cover, and simmer for about 15-20 minutes, or until the water is absorbed and the rice is tender.
Crunch Factor
The crunch in a California roll comes from the cucumber and sometimes from toasted sesame seeds or chopped nuts added on top. To achieve the right crunch, make sure your cucumber is fresh and sliced just before assembling the roll. You can also toast some sesame seeds in a pan for a few minutes until they’re lightly browned and fragrant, then sprinkle them on top of the roll for added crunch and flavor.
Pro Kitchen Tricks
- Use a sharp knife to slice the fillings and the roll itself, as it will help in achieving clean cuts and preventing the ingredients from tearing.
- Keep a bowl of water handy to dip your fingers in before handling the rice, which will prevent the rice from sticking to your hands.
- For a perfectly round roll, apply even pressure while rolling and make sure the fillings are evenly distributed.
Storage Tips
- After making the sushi, it’s best to consume it within a day for optimal freshness and food safety.
- If you need to store it, place the sushi in an airtight container in the refrigerator at a temperature below 40°F (4°C).
- Avoid freezing sushi as the texture of the rice and the fillings can become unappealing after thawing.
Gift Packaging Ideas
If you’re considering gifting your homemade sushi, you can make it look appealing by placing the rolls in a decorative box or on a platter, garnished with sliced daikon, shiso leaves, or edible flowers. You can also include a small bottle of soy sauce, wasabi, and pickled ginger for a complete sushi experience.
Flavor Variations
- Different spices: Add some heat with diced jalapeños or serrano peppers, or introduce a smoky flavor with a sprinkle of smoked paprika.
- Creative toppings: Try adding toasted sesame seeds, chopped scallions, or grated carrot for added texture and flavor.
- Ingredient swaps: Replace crab meat with cooked and shredded chicken, or use mango instead of avocado for a sweet twist.
Troubleshooting
- Texture problems: If your sushi rice is too sticky, it might be due to overmixing with the vinegar solution. If it’s too dry, you might not have used enough water during cooking.
- Ingredient replacements: If you can’t find imitation crab meat, you can substitute it with real crab, shrimp, or even tofu for a vegan option.
- Over/undercooking signs: Sushi rice should be tender but not mushy. If it’s undercooked, it will be hard and crunchy. If it’s overcooked, it becomes mushy and sticky.
FAQs
- Can I freeze it? – It’s not recommended to freeze sushi due to the texture changes in the rice and fillings after thawing.
- Is it gluten-free? – Most ingredients in a traditional California roll are gluten-free, but always check the ingredients of the soy sauce and any store-bought fillings.
- Can I double the recipe? – Yes, you can easily double or triple the recipe. Just make sure you have enough nori sheets and fillings for the additional rolls.
Conclusion
Making easy homemade California sushi rolls is a fun and rewarding experience that allows you to explore your creativity in the kitchen. With these simple steps and tips, you’re well on your way to becoming a sushi master. Don’t be afraid to experiment with different fillings and toppings to make your sushi rolls truly unique. Share your sushi-making adventures with friends and family, and enjoy the delightful experience of savoring your homemade creations. Happy rolling!
Make Easy Homemade California Sushi Rolls Today
A short summary of making delicious and easy homemade California sushi rolls with accessible ingredients and simple steps.
🥘 Ingredients
👩🍳 Instructions
-
1Prepare the sushi rice according to the package instructions and mix it with a vinegar solution.
-
2Prepare the fillings by slicing the avocado, cucumber, and crab meat.
-
3Assemble the roll by spreading the sushi rice onto nori, adding the fillings, and rolling it with a bamboo sushi mat.
-
4Slice the roll into 8 equal pieces and serve with soy sauce, wasabi, and pickled ginger if desired.