Fluffy Russian Blini Stuffed Pancakes Recipe
Introduction
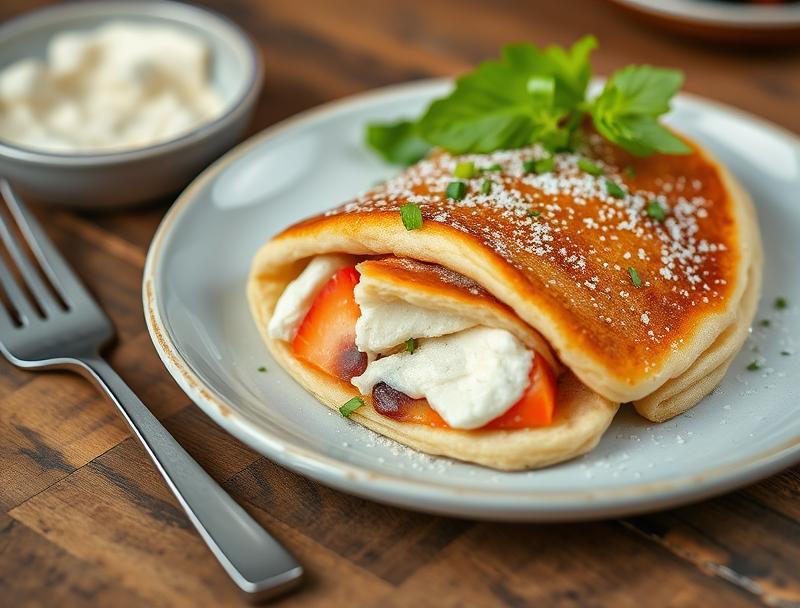
Imagine a breakfast or brunch dish that is not only delicious but also visually appealing and surprisingly easy to make. Russian Blini, thin pancakes that are traditionally served with sweet or savory fillings, are a perfect candidate for a creative and satisfying meal. This Fluffy Russian Blini Stuffed Pancakes Recipe brings together the simplicity of everyday ingredients with the elegance of a stuffed pancake, making it an ideal dish for both beginners and experienced cooks looking to impress their family and friends. With its balance of flavors and textures, this recipe is sure to become a favorite, whether you’re looking for a special breakfast treat or a unique dessert idea.
Why This Works
- Flavor balance and ingredient accessibility: The combination of simple, readily available ingredients with the option to choose your favorite fillings makes this recipe a winner for anyone looking to create something special without a lot of fuss.
- Ease of preparation: Despite the impressive presentation, these stuffed pancakes are relatively easy to prepare, requiring basic cooking skills and minimal preparation time.
- Impressive results with minimal effort: The end result is a dish that looks and tastes like it came from a professional kitchen, making it perfect for hosting brunches or special occasions without the need for extensive culinary experience.
Ingredients
- 1 1/2 cups all-purpose flour
- 2 1/2 teaspoons baking powder
- 1 teaspoon salt
- 1 cup milk
- 1 large egg
- 2 tablespoons sugar
- 2 tablespoons melted butter
- Filling ingredients of your choice (e.g., jam, Nutella, whipped cream, fresh fruits, cream cheese, etc.)
Instructions
- Step 1: Begin by preparing the blini batter. In a large bowl, whisk together the flour, baking powder, and salt. In a separate bowl, whisk the milk, egg, sugar, and melted butter until well combined. Gradually add the dry ingredients to the wet ingredients and mix until smooth. The batter should still be slightly lumpy.
- Step 2: Heat a non-stick pan or blini pan over medium heat. Using a ladle, pour a small amount of batter into the pan, just enough to cover the bottom. Tilt the pan to evenly coat the bottom. Cook for about 2 minutes, until bubbles appear on the surface and the edges start to dry. Loosen with a spatula and flip. Cook for another minute, until the other side is lightly browned.
- Step 3: Once your blini are cooked, it’s time to assemble the stuffed pancakes. Choose your filling and place a small amount in the center of a blini. Fold the blini in half to enclose the filling, or fold it into a triangle or roll for a different presentation. Repeat with the remaining blini and filling.
- Step 4: Serve your stuffed blini warm, garnished with additional filling if desired, along with fresh fruits, powdered sugar, or maple syrup. This step is all about presentation and personalizing the dish to your taste.
Handy Tips
- For an extra fluffy blini, make sure to not overmix the batter, and let it rest for about 30 minutes before cooking to allow the flour to absorb the liquid ingredients fully.
- Experiment with different fillings to find your favorite. Sweet options like Nutella, jam, or honey are delicious, while savory fillings like cream cheese with herbs or smoked salmon offer a nice contrast.
- Keep your blini warm by wrapping them in a clean towel or placing them on a baking sheet in a low-temperature oven (around 200°F) while you cook the remaining batter.
Heat Control
Maintaining the right heat is crucial for cooking the perfect blini. The pan should be hot but not smoking. If you find that your blini are cooking too quickly or burning, reduce the heat. Ideally, you want to cook the blini over medium heat, where they cook slowly and evenly, allowing for the perfect browning and texture.
Crunch Factor
The crunch factor in this recipe primarily comes from the texture contrast between the soft, fluffy blini and the filling of your choice. For added crunch, consider topping your stuffed blini with chopped nuts, toasted coconut flakes, or even a sprinkle of granola. This adds an interesting texture dimension to the dish.
Pro Kitchen Tricks
- Use a high-quality non-stick pan to prevent the blini from sticking and to make them easier to flip and remove.
- Don’t overcrowd the pan. Cook the blini one at a time to ensure they have enough room to cook evenly and to prevent them from sticking together.
- Keep the batter at room temperature. Cold batter can result in dense blini, while room temperature batter will yield lighter, fluffier pancakes.
Storage Tips
- Leftover blini can be stored in an airtight container in the refrigerator for up to 2 days. Simply reheat them in the microwave or in a toaster before filling and serving.
- For longer storage, blini can be frozen. Place them in a single layer in a freezer-safe bag or container and store for up to 2 months. Reheat frozen blini in the toaster or microwave until warmed through.
- It’s best to fill and assemble the stuffed blini just before serving to ensure the filling stays fresh and the blini retain their texture.
Gift Packaging Ideas
If you’re considering giving these stuffed blini as a gift, perhaps for a brunch gathering or as a breakfast treat, consider packaging them in a decorative tin or basket. Wrap each blini individually in plastic wrap or aluminum foil and place them in the container. Include a small jar of your favorite filling, such as jam or Nutella, and a sprinkle of powdered sugar on top for a beautiful presentation. Adding a ribbon or a gift tag with a personal message makes it an even more thoughtful gift.
Flavor Variations
- Different spices: Add a pinch of cinnamon, nutmeg, or cardamom to the batter for a unique flavor twist.
- Creative toppings: In addition to traditional fillings, try topping your stuffed blini with caramelized bananas, chocolate shavings, or a dollop of whipped cream.
- Ingredient swaps: For a gluten-free version, substitute the all-purpose flour with a gluten-free flour mix. For a vegan version, replace the egg with a flax egg and use a non-dairy milk.
Troubleshooting
- Texture problems: If your blini turn out too dense, check that you’re not overmixing the batter. If they’re too thin, adjust the amount of milk in the recipe.
- Ingredient replacements: If you don’t have buttermilk, you can make a substitute by mixing milk with a tablespoon of white vinegar or lemon juice and letting it sit for 5-10 minutes.
- Over/undercooking signs: Blini are cooked when they’re golden brown on both sides and firm to the touch. If they’re undercooked, they’ll be pale and soft; if overcooked, they’ll be dark brown and possibly crispy.
FAQs
- Can I freeze the batter? Yes, you can freeze the blini batter for up to a month. Thaw it overnight in the refrigerator before using.
- Is this recipe gluten-free? Not in its traditional form, but you can easily make it gluten-free by substituting the flour with a gluten-free flour blend.
- Can I double the recipe? Absolutely. Simply double all the ingredients to make a larger batch of blini.
Conclusion
This Fluffy Russian Blini Stuffed Pancakes Recipe is a versatile and delicious addition to any meal, offering the perfect blend of simplicity and elegance. Whether you’re a seasoned chef or a beginner in the kitchen, this recipe is sure to delight with its fluffy texture, flavorful fillings, and beautiful presentation. Feel free to experiment with different fillings and toppings to make the dish your own, and don’t hesitate to share your creations with friends and family. Happy cooking, and enjoy the delightful world of Russian blini!
Fluffy Russian Blini Stuffed Pancakes Recipe
A recipe for traditional Russian blini filled with sweet or savory ingredients, perfect for breakfast, brunch, or dessert.
🥘 Ingredients
👩🍳 Instructions
-
1Prepare the blini batter by whisking together the flour, baking powder, and salt in one bowl and the milk, egg, sugar, and melted butter in another. Combine the two mixtures and stir until smooth.
-
2Heat a non-stick pan over medium heat and cook the blini, using about 1/4 cup of batter for each. Cook for 2 minutes, until bubbles appear and the edges start to dry, then flip and cook for another minute.
-
3Assemble the stuffed blini by placing a small amount of your chosen filling in the center of each blini and folding or rolling it to enclose.
-
4Serve the stuffed blini warm, garnished with additional filling, fresh fruits, or powdered sugar as desired.