Funfetti Cheesecake Cake (No Cream Cheese!)
Introduction
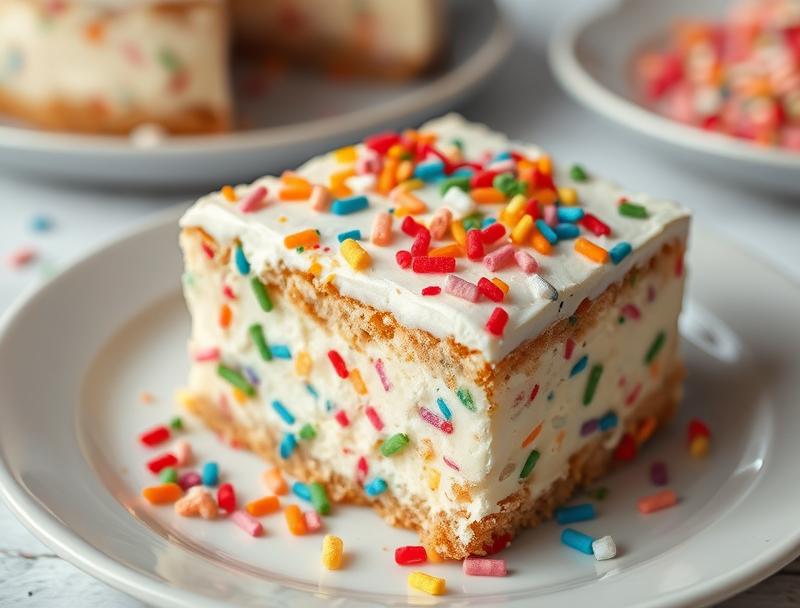
Imagine a moist and decadent cake that combines the richness of cheesecake with the fun of a birthday party, all without the need for cream cheese. This Funfetti Cheesecake Cake is a game-changer for anyone looking to impress their friends and family with a unique dessert that’s both easy to make and incredibly delicious. By using everyday ingredients and a few clever substitutions, you can create a masterpiece that’s sure to be the star of any celebration. Whether you’re a seasoned baker or a beginner in the kitchen, this recipe is perfect for anyone looking to add a little fun and creativity to their dessert repertoire.
Why This Works
- The combination of a dense, moist cake with a creamy cheesecake filling creates a delightful texture contrast that will leave everyone wanting more.
- The use of funfetti sprinkles adds a playful touch, making this cake perfect for birthdays, graduations, or any other occasion that calls for a little extra celebration.
- By skipping the cream cheese, we’ve made this recipe more accessible to those with dietary restrictions or preferences, without sacrificing any of the flavor or richness you’d expect from a traditional cheesecake.
Ingredients
- 2 cups all-purpose flour
- 1 cup granulated sugar
- 2 teaspoons baking powder
- 1/2 teaspoon salt
- 1/2 cup unsalted butter, softened
- 1 cup whole milk
- 2 large eggs
- 2 teaspoons pure vanilla extract
- 1 cup funfetti sprinkles
- 16 ounces ricotta cheese
- 1/2 cup granulated sugar
- 2 large eggs
- 1 teaspoon pure vanilla extract
Instructions
- Step 1: Prepare the Cake – Preheat your oven to 350°F (180°C). Grease two 9-inch round cake pans and line the bottoms with parchment paper. In a medium bowl, whisk together the flour, sugar, baking powder, and salt. In a large bowl, using an electric mixer, beat the butter until creamy. Add the dry ingredients to the butter in three parts, alternating with the milk, beginning and ending with the dry ingredients. Beat in the eggs one at a time, then beat in the vanilla extract. Fold in the funfetti sprinkles.
- Step 2: Bake the Cake – Divide the batter evenly between the prepared pans and smooth the tops. Bake for 30-35 minutes or until a toothpick inserted into the center comes out clean. Let the cakes cool in the pans for 10 minutes before transferring them to a wire rack to cool completely.
- Step 3: Prepare the Cheesecake Filling – In a blender or food processor, blend the ricotta cheese, granulated sugar, eggs, and vanilla extract until smooth.
- Step 4: Assemble the Cake – Once the cakes are completely cool, place one layer on a serving plate. Spread the cheesecake filling over the top of the cake layer. Place the second cake layer on top and press gently to adhere. Refrigerate the cake for at least 30 minutes to allow the flavors to meld together.
Handy Tips
- Make sure to not overmix the cake batter or the cheesecake filling, as this can result in a dense cake or a filling that doesn’t set properly.
- For an extra moist cake, try adding a teaspoon of sour cream or Greek yogurt to the batter.
- If you can’t find funfetti sprinkles, you can substitute with any other type of sprinkles or even chopped nuts for a different texture and flavor.
Heat Control
When baking the cake, it’s crucial to keep an eye on the temperature and timing. The ideal temperature is 350°F (180°C), and the cakes are done when a toothpick inserted into the center comes out clean. If you’re unsure, it’s always better to err on the side of underbaking than overbaking, as the cakes will continue to cook a bit after they’re removed from the oven.
Crunch Factor
The funfetti sprinkles add a delightful crunch and texture contrast to the cake. To enhance this, you can also try adding some chopped nuts or cookie crumbs to the batter for extra texture. However, be careful not to overdo it, as too many add-ins can make the cake feel dense or heavy.
Pro Kitchen Tricks
- To ensure that your cakes are perfectly level, try using a cake leveler or a serrated knife to trim the tops before assembling the cake.
- For a smooth and creamy cheesecake filling, make sure to blend the ingredients until they’re completely smooth and there are no lumps.
- To prevent the cake from becoming too soggy or wet, make sure to refrigerate it for at least 30 minutes before serving to allow the flavors to meld together and the filling to set.
Storage Tips
- The cake can be stored in an airtight container in the refrigerator for up to 3 days.
- For longer storage, consider freezing the cake. Wrap it tightly in plastic wrap or aluminum foil and place it in a freezer-safe bag. Frozen cake can be stored for up to 2 months.
- When reheating, let the cake come to room temperature or warm it up in the microwave in short increments until it’s heated through.
Gift Packaging Ideas
This cake makes a wonderful gift for friends and family, especially during the holidays or on special occasions. Consider packaging it in a decorative cake box or wrapping it in colorful paper and twine. You could also add a personalized note or card to make it an extra-special gift.
Flavor Variations
- Try adding a teaspoon of almond extract or a handful of chopped nuts to the batter for a different flavor profile.
- For a chocolate version, add a cup of cocoa powder to the batter and use chocolate funfetti sprinkles.
- Consider using different types of milk, such as almond or soy milk, for a non-dairy version of the cake.
Troubleshooting
- If your cake is too dense, try adding a little more milk or sour cream to the batter next time.
- If the cheesecake filling doesn’t set properly, it may be due to overmixing or underbaking. Try baking the cake for a few minutes longer or blending the filling ingredients until they’re completely smooth.
- If you notice any cracks or breaks in the cake, don’t worry! These can be easily covered up with frosting or decorations.
FAQs
- Can I freeze the cake? Yes, the cake can be frozen for up to 2 months. Wrap it tightly in plastic wrap or aluminum foil and place it in a freezer-safe bag.
- Is the cake gluten-free? No, the cake contains wheat flour and is not suitable for those with gluten intolerance or sensitivity. However, you can try substituting the flour with a gluten-free alternative.
- Can I double the recipe? Yes, the recipe can be easily doubled or tripled to make a larger cake. Just be sure to adjust the baking time accordingly.
Conclusion
This Funfetti Cheesecake Cake is a true showstopper that’s sure to impress your friends and family. With its moist and decadent texture, playful funfetti sprinkles, and creamy cheesecake filling, it’s the perfect dessert for any occasion. Whether you’re a seasoned baker or a beginner in the kitchen, this recipe is easy to follow and requires minimal special equipment. So go ahead, get creative, and have fun with it! And don’t forget to share your creations with us on social media using the hashtag #funfetticheesecakerecipe.
Funfetti Cheesecake Cake (No Cream Cheese!)
A moist and decadent cake that combines the richness of cheesecake with the fun of a birthday party, all without the need for cream cheese.
🥘 Ingredients
👩🍳 Instructions
-
1Preheat the oven to 350°F (180°C). Grease two 9-inch round cake pans and line the bottoms with parchment paper.
-
2Prepare the cake batter by whisking together the flour, sugar, baking powder, and salt. Beat in the butter, milk, eggs, and vanilla extract. Fold in the funfetti sprinkles.
-
3Divide the batter evenly between the prepared pans and smooth the tops. Bake for 30-35 minutes or until a toothpick inserted into the center comes out clean.
-
4Prepare the cheesecake filling by blending the ricotta cheese, granulated sugar, eggs, and vanilla extract until smooth.
-
5Assemble the cake by placing one layer on a serving plate, spreading the cheesecake filling over the top, and placing the second layer on top. Refrigerate for at least 30 minutes to allow the flavors to meld together.