Honey Glazed Grilled Carrots – Easy Easter Side Dish Recipe
Introduction
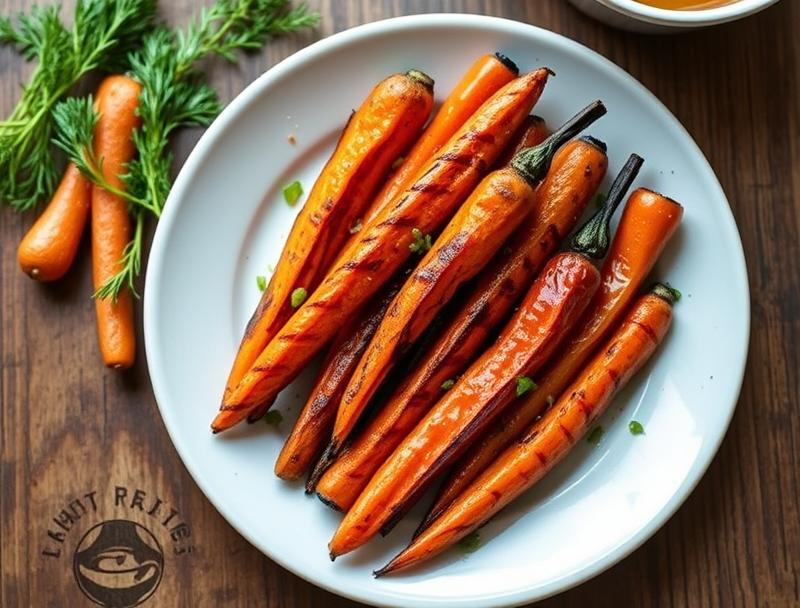
As Easter approaches, the quest for the perfect side dish begins. This Honey Glazed Grilled Carrots recipe is not only a stunning addition to your Easter table, but it’s also incredibly easy to make and packed with flavor. Using everyday ingredients, this dish is a masterclass in balance and creativity. The sweetness of the honey, the slight char from the grill, and the natural sweetness of the carrots come together in a symphony of flavors that will leave your guests impressed and wanting more. Whether you’re a seasoned chef or a beginner in the kitchen, this recipe is sure to become a favorite.
Why This Works
- The balance of flavors is key, with the honey and lemon juice providing a sweet and tangy contrast that complements the earthy sweetness of the carrots.
- The ease of preparation is another significant advantage, requiring minimal effort for maximum impact. The ingredients are readily available, and the steps are straightforward, making it accessible to anyone.
- Despite its simplicity, the dish yields impressive results. The glaze adds a luxurious touch, and the grilled texture gives the carrots a satisfying crunch, making it a perfect side dish for special occasions like Easter.
Ingredients
- 4 large carrots, peeled and trimmed
- 3 tablespoons honey
- 2 tablespoons olive oil
- 1 tablespoon fresh lemon juice
- 1 teaspoon grated fresh ginger
- 2 cloves garlic, minced
- Salt and pepper, to taste
- Fresh parsley or chives, chopped (for garnish)
Instructions
- Step 1: Begin by preheating your grill to medium heat. Meanwhile, prepare the glaze by whisking together the honey, olive oil, lemon juice, grated ginger, and garlic in a small bowl until well combined.
- Step 2: Place the carrots on a baking sheet or a large plate, brush them with a little bit of olive oil, and season with salt and pepper. Grill the carrots for about 10 minutes on each side, or until they start to develop some char and tenderness.
- Step 3: After the carrots have been grilling for about 15 minutes, start brushing them with the honey glaze every minute or so, until they’re nicely coated and caramelized. This step is crucial for developing the deep, sweet flavor of the dish.
- Step 4: Once the carrots are tender and the glaze is caramelized, remove them from the grill and garnish with chopped fresh parsley or chives. Serve hot, enjoying the combination of textures and flavors.
Handy Tips
- For a crisper exterior, make sure the grill is hot before adding the carrots. You can test the heat by flicking a little water on the grill; if it sizzles, it’s ready.
- Don’t overcrowd the grill, as this can prevent even cooking. Grill the carrots in batches if necessary, to ensure they have enough room.
- Keep an eye on the carrots during the glazing process, as the honey can quickly go from perfectly caramelized to burnt.
Heat Control
Maintaining the right temperature is crucial for achieving the perfect grill marks and tenderness. Aim for a medium heat, which should be around 350°F to 400°F. This temperature range allows for a nice char on the outside while cooking the carrots through. Timing is also essential; carrots typically take about 20 minutes to grill, turning every 5 minutes to ensure even cooking.
Crunch Factor
The texture of the carrots is a vital component of this dish. You’re aiming for a tender interior with a slightly caramelized, crunchy exterior from the glaze. To achieve this, ensure the carrots are not overcooked. They should still retain some of their natural crunch when bitten into. The glaze adds a sticky, sweet layer that complements the natural sweetness of the carrots, enhancing their appeal.
Pro Kitchen Tricks
- For an extra depth of flavor, add a sprinkle of smoked paprika or cumin to the carrots before grilling. These spices complement the sweetness of the honey and add a smoky dimension to the dish.
- Consider using a variety of carrot colors for a more visually appealing presentation. Orange, yellow, white, and purple carrots all grill beautifully and add a pop of color to the plate.
- To make cleanup easier, line the grill grates with foil before cooking. This prevents food from sticking and makes post-meal cleanup a breeze.
Storage Tips
- Leftover grilled carrots can be stored in an airtight container in the refrigerator for up to 3 days. Reheat them in the oven or on the grill until warmed through.
- For longer storage, carrots can be peeled, sliced, and frozen before glazing and grilling. Simply thaw and proceed with the recipe as instructed.
- When storing, it’s best to keep the carrots and glaze separate to prevent the carrots from becoming too soggy. Store the glaze in an airtight container in the fridge for up to a week.
Gift Packaging Ideas
This recipe makes for a wonderful gift, especially during Easter. Consider packaging the glazed carrots in decorative jars or containers, garnished with fresh herbs. You can also include a small bottle of the honey glaze for the recipient to use on their own grilled vegetables. Add a ribbon and a gift tag with the recipe and cooking instructions for a personal touch.
Flavor Variations
- Experiment with different spices in the glaze, such as cinnamon for a warmer flavor or cayenne pepper for a spicy kick.
- Add some grated citrus zest to the glaze for an extra burst of citrus flavor.
- Swap the honey for maple syrup or agave nectar for a slightly different sweetness profile.
Troubleshooting
- If the carrots are too crunchy, they may not have cooked long enough. Increase the cooking time, checking frequently to avoid overcooking.
- If the glaze is too thick, thin it out with a little more lemon juice or water. If it’s too thin, simmer it for a few minutes to reduce and thicken.
- Watch for signs of overcooking, such as a too-soft texture or a deeply burnt exterior. Adjust cooking time and heat as needed to achieve the perfect balance.
FAQs
- Can I freeze the carrots after glazing and grilling? Yes, but it’s best to freeze them before glazing for better texture preservation. Simply thaw and glaze when you’re ready to serve.
- Is this recipe gluten-free? Yes, this recipe is naturally gluten-free, making it a great option for those with gluten intolerance or sensitivity.
- Can I double the recipe? Absolutely, this recipe scales well. Simply double all the ingredients and adjust the cooking time slightly if necessary, depending on the quantity of carrots.
Conclusion
This Honey Glazed Grilled Carrots recipe is a game-changer for any Easter gathering or spring meal. It’s a testament to how simple, everyday ingredients can be transformed into something truly special with a little creativity and flair. Whether you’re cooking for a crowd or a intimate dinner, this dish is sure to impress. So don’t be afraid to experiment, share, and make it your own. Happy cooking, and from our table to yours, warmest wishes for a joyous Easter!
Honey Glazed Grilled Carrots – Easy Easter Side Dish Recipe
A delicious and easy-to-make side dish perfect for Easter, featuring honey glazed grilled carrots with a balance of sweet and tangy flavors.
🥘 Ingredients
👩🍳 Instructions
-
1Preheat the grill to medium heat and prepare the glaze by whisking together honey, olive oil, lemon juice, grated ginger, and garlic.
-
2Grill the carrots for about 10 minutes on each side, or until they start to develop some char and tenderness.
-
3Brush the carrots with the honey glaze during the last few minutes of grilling, until they're nicely coated and caramelized.
-
4Remove the carrots from the grill, garnish with chopped fresh parsley or chives, and serve hot.