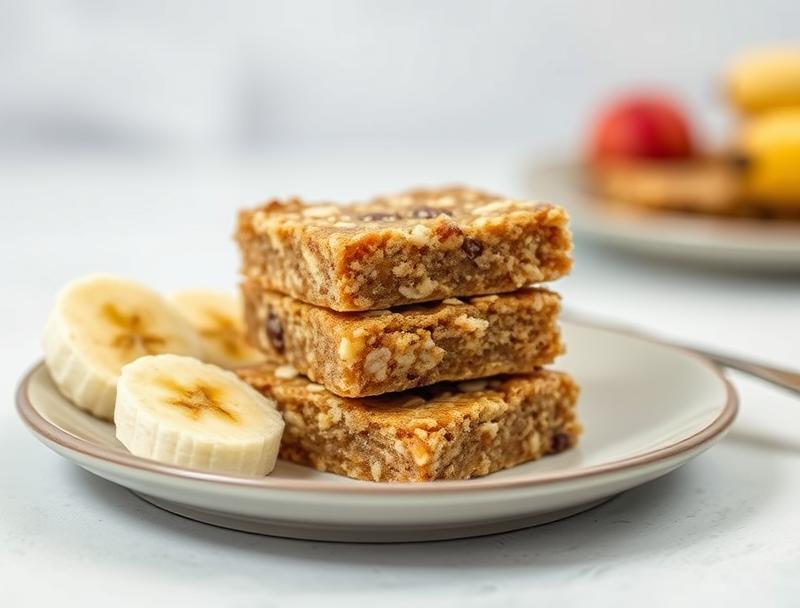
Healthy Banana Oatmeal Bars – 3 Ingredients & Kid-Friendly!
Introduction
Imagine a world where delicious, healthy treats are just a few simple ingredients away. Welcome to the world of Healthy Banana Oatmeal Bars, where the magic of three everyday ingredients comes together to create a snack that’s not only mouthwateringly good but also incredibly easy to make. These bars are a perfect blend of natural sweetness, hearty texture, and simplicity, making them a favorite among both kids and adults. Whether you’re a busy parent looking for a quick and healthy snack for your little ones or an individual seeking a guilt-free indulgence, these bars are the perfect solution. So, let’s dive into the wonderful world of Healthy Banana Oatmeal Bars and explore what makes them so special.
Why This Works
- Flavor balance and ingredient accessibility: The combination of ripe bananas, rolled oats, and a touch of honey creates a perfect balance of flavors that is both satisfying and healthy. The best part? These ingredients are likely already in your pantry or can be easily found in any grocery store.
- Ease of preparation: With only three ingredients, the preparation time is minimal. Simply mash, mix, and shape – it’s that easy. This simplicity makes it a great activity to do with kids, teaching them about measurements and mixing in a fun, hands-on way.
- Impressive results with minimal effort: Despite the simplicity of the ingredients and the preparation process, the end result is impressive. The bars are chewy, flavorful, and look great, making them perfect for snack time, lunchboxes, or even as a post-workout treat.
Ingredients
- 3 large ripe bananas
- 2 cups of rolled oats
- 2 tablespoons of honey
Instructions
- Step 1: Begin by prepping your ingredients. Peel the bananas and place them in a large mixing bowl. Mash the bananas with a fork until they’re smooth and creamy. This will be the base of your bars, holding everything together.
- Step 2: Add the rolled oats to the bowl with the mashed bananas. Mix well until the oats are fully incorporated into the banana mixture. You might need to use your hands to ensure everything is well combined.
- Step 3: Add the honey to the mixture. Honey acts as a natural sweetener and helps bind the ingredients together. Mix until the honey is fully incorporated and you have a uniform mixture.
- Step 4: Press the mixture into a lined or greased 8×8 inch baking dish. Make sure to press it down firmly to get an even layer. If desired, you can top with additional oats or a drizzle of honey for extra texture and flavor.
- Step 5: Refrigerate the mixture for at least 30 minutes to set. Once set, remove from the refrigerator and cut into bars. You can choose the size based on your preference or the intended use (e.g., snack size for kids).
Handy Tips
- For an extra crunchy topping, you can sprinkle some chopped nuts or seeds on top of the bars before refrigerating them.
- If you find the mixture too sticky, you can add a bit more oats. Conversely, if it’s too dry, you can add a bit more honey or use an additional ripe banana.
- Consider involving your kids in the process. They can help with mashing the bananas, mixing the ingredients, or even pressing the mixture into the baking dish.
Heat Control
One of the best things about these bars is that they don’t require any baking. The refrigeration step helps set the bars, making them firm and easier to handle. This no-bake approach is not only convenient but also preserves the natural nutrients found in the ingredients.
Crunch Factor
The texture of these bars is primarily chewy due to the oats and bananas. However, you can achieve a crunchier texture by adding nuts, seeds, or even a bit of granola on top before setting them in the refrigerator. This adds a nice contrast in texture that many find appealing.
Pro Kitchen Tricks
- To make the bars more visually appealing, you can use a cookie cutter to cut out fun shapes after they have set. This is a great way to make them more appealing to kids.
- For a different flavor twist, you can add a teaspoon of vanilla extract or a pinch of cinnamon to the mixture before pressing it into the baking dish.
Storage Tips
- Store the bars in an airtight container in the refrigerator for up to 5 days.
- For longer storage, you can freeze the bars for up to 2 months. Simply place them in a freezer-safe bag or container and thaw at room temperature or in the refrigerator when you’re ready to eat them.
Gift Packaging Ideas
These bars make a wonderful gift, especially for new parents, fitness enthusiasts, or anyone looking for a healthy snack option. Consider packaging them in decorative jars, bags, or wraps and adding a personalized note. For a more rustic look, you can wrap individual bars in parchment paper and tie with a twine, perfect for a homemade touch.
Flavor Variations
- Adding different spices like cinnamon, nutmeg, or ginger can give the bars a unique flavor profile.
- Using creative toppings such as coconut flakes, chocolate chips, or dried fruits can add texture and flavor variety.
- Swapping honey for maple syrup or another natural sweetener can slightly alter the flavor and provide options for those with specific dietary needs.
Troubleshooting
- Texture problems: If the bars are too sticky, add more oats. If they’re too dry, add a bit more honey or an additional banana.
- Ingredient replacements: While the recipe is designed to be simple with just three ingredients, you can experiment with replacements like using different types of oats or sweeteners.
- Over/undercooking signs: Since these bars are no-bake, you don’t have to worry about overcooking. However, under-refrigeration can result in bars that are too soft. Ensure they set properly in the refrigerator before cutting and serving.
FAQs
- Can I freeze it? Yes, you can freeze the bars for up to 2 months. Thaw at room temperature or in the refrigerator when you’re ready to eat them.
- Is it gluten-free? Yes, as long as you use gluten-free oats, these bars are gluten-free, making them a great option for those with gluten intolerance or sensitivity.
- Can I double the recipe? Absolutely. Simply double all the ingredients and press the mixture into a larger baking dish. You might need to adjust the refrigeration time slightly to ensure the bars set properly.
Conclusion
Healthy Banana Oatmeal Bars are a game-changer for anyone looking for a quick, healthy, and delicious snack. With their simplicity, versatility, and the fact that they’re kid-friendly, these bars are perfect for busy lifestyles. Whether you’re making them for yourself, your family, or as a gift, remember to have fun with the recipe. Experiment with different toppings, flavor combinations, and enjoy the process of creating something healthy and tasty. Happy snacking!
Healthy Banana Oatmeal Bars – 3 Ingredients & Kid-Friendly!
A simple, healthy, and delicious snack made with bananas, oats, and honey. Perfect for kids and adults alike, these no-bake bars are easy to make and require minimal ingredients.
🥘 Ingredients
👩🍳 Instructions
-
1Mash the bananas in a large mixing bowl until they're smooth.
-
2Add the oats to the bowl and mix until well combined.
-
3Add the honey and mix until the mixture is uniform.
-
4Press the mixture into a lined or greased 8x8 inch baking dish.
-
5Refrigerate for at least 30 minutes to set, then cut into bars.
-
6Store in an airtight container in the refrigerator for up to 5 days or freeze for up to 2 months.