Energizing Homemade Trail Mix Cups for Kids
Introduction
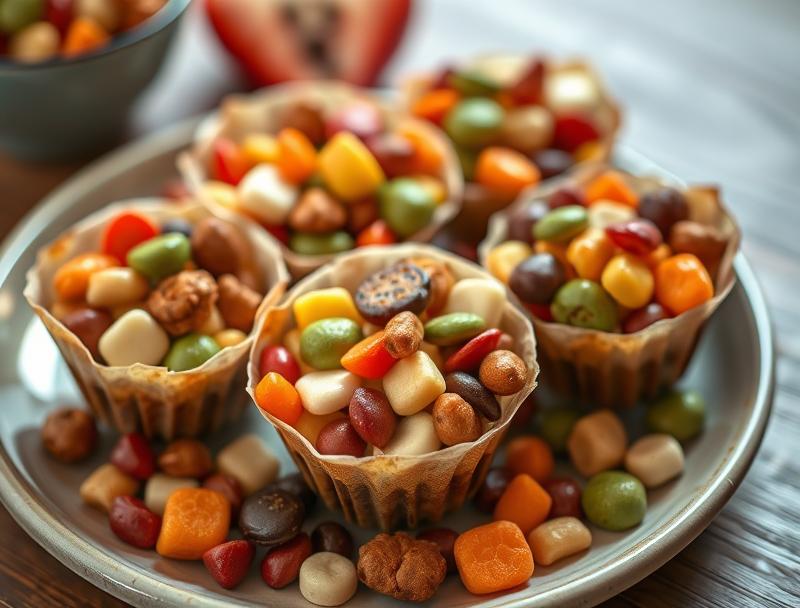
Creating healthy and delicious snacks for kids can be a challenge, but with the right ingredients and a little creativity, it’s easier than you think. Homemade trail mix cups are a perfect solution, offering a balanced mix of nutrients, flavors, and textures that kids will love. The best part? They’re incredibly easy to make using everyday ingredients, allowing you to tailor the mix to your child’s preferences and dietary needs. Whether you’re looking for a quick after-school snack, a lunchbox treat, or a healthy option for on-the-go, these energizing homemade trail mix cups are the perfect choice.
Why This Works
- Flavor balance and ingredient accessibility: The combination of nuts, seeds, dried fruits, and a touch of chocolate provides a delicious and satisfying flavor profile that kids will enjoy, while using ingredients that are easily found in most supermarkets.
- Ease of preparation: With no cooking required, these trail mix cups are a breeze to prepare, making them ideal for busy parents or as a fun activity to do with the kids.
- Impressive results with minimal effort: Despite the simplicity of the recipe, the end result is a beautifully presented and nutritious snack that’s sure to impress both kids and adults alike.
Ingredients
- 2 cups mixed nuts (such as almonds, cashews, and pecans)
- 1 cup dried fruit (such as cranberries, raisins, and cherries)
- 1/2 cup pumpkin seeds
- 1/2 cup dark chocolate chips (at least 70% cocoa)
- 1/4 cup honey
- 1 tablespoon chia seeds
- Pinch of salt
- Optional: other ingredients like coconut flakes, candy pieces, or cereal can be added to customize the mix
Instructions
- Step 1: In a large bowl, combine the mixed nuts, dried fruit, and pumpkin seeds. Stir until well combined.
- Step 2: In a small bowl, melt the dark chocolate chips in the microwave in 30-second increments, stirring between each interval, until smooth.
- Step 3: Pour the melted chocolate over the nut and fruit mixture, stirring until everything is well coated.
- Step 4: Stir in the honey, chia seeds, and salt until the mixture is evenly distributed.
- Step 5: Spoon the mixture into small cups or containers, such as muffin tin cups or small plastic cups. Refrigerate for at least 30 minutes to set.
Handy Tips
- Customize the mix to your child’s preferences by adding or substituting different ingredients. For example, if they don’t like nuts, you can add more dried fruit or seeds.
- Use a variety of nuts and seeds to provide a range of textures and flavors.
- If using chocolate, consider using a higher percentage of cocoa for a less sweet and more nutritious option.
Heat Control
As this recipe doesn’t require cooking, there’s no need to worry about heat control. However, if you’re melting the chocolate in the microwave, be careful not to overheat it, as this can cause the chocolate to seize up and become grainy.
Crunch Factor
The combination of nuts, seeds, and dried fruit provides a satisfying crunch, while the chocolate adds a smooth and creamy element. To achieve the perfect crunch, make sure to stir the mixture well after adding the chocolate, and refrigerate the cups for at least 30 minutes to set.
Pro Kitchen Tricks
- Use a variety of textures and flavors to keep the mix interesting and engaging for kids.
- Consider making a large batch of the mix and portioning it out into individual cups or containers for a quick and easy snack.
- Experiment with different ingredients and flavor combinations to create unique and delicious variations.
Storage Tips
- Store the trail mix cups in an airtight container in the refrigerator for up to 5 days.
- Consider freezing the cups for up to 2 months and thawing as needed.
- Keep the cups away from direct sunlight and heat sources to prevent the chocolate from melting.
Gift Packaging Ideas
These trail mix cups are perfect for gifting to friends, family, or teachers. Consider packaging them in small cellophane bags or containers and tying with a ribbon or twine. You could also add a personalized note or label to make the gift even more special.
Flavor Variations
- Try adding different spices, such as cinnamon or nutmeg, to give the mix a warm and comforting flavor.
- Experiment with different types of nuts or seeds, such as peanuts or sunflower seeds, to change up the texture and flavor.
- Consider adding dried cranberries or cherries for a sweet and tangy flavor combination.
Troubleshooting
- If the mixture is too sticky, try adding a bit more nuts or seeds to balance it out.
- If the chocolate is too hard, try microwaving it for a few seconds to soften it.
- If the cups are too crumbly, try adding a bit more honey or chocolate to hold them together.
FAQs
- Can I freeze it? Yes, you can freeze the trail mix cups for up to 2 months and thaw as needed.
- Is it gluten-free? Yes, this recipe is gluten-free, making it a great option for kids with gluten intolerance or sensitivity.
- Can I double the recipe? Yes, you can easily double or triple the recipe to make a larger batch of trail mix cups.
Conclusion
With these energizing homemade trail mix cups, you can provide your kids with a healthy and delicious snack that’s perfect for on-the-go. Whether you’re looking for a quick after-school snack or a lunchbox treat, these cups are sure to be a hit. So why not get creative and start making your own trail mix cups today? With a few simple ingredients and some easy instructions, you can create a snack that’s both nutritious and fun. Happy snacking!