Easy No-Bake Chocolate Eclair Cake
Introduction
Imagine indulging in a rich, creamy, and decadent dessert without spending hours in the kitchen. The Easy No-Bake Chocolate Eclair Cake is a game-changer for anyone with a sweet tooth, as it combines the elegance of a traditional eclair with the simplicity of a no-bake recipe. Using everyday ingredients, this cake is not only a delight to the taste buds but also a testament to the creativity that can be achieved with minimal effort. Whether you’re a seasoned baker or a beginner in the kitchen, this recipe is sure to impress with its perfect balance of flavors and textures, all without the need for baking.
Why This Works
- The balance of flavors between the chocolate, cream, and pastry elements creates a harmonious and indulgent taste experience, making it accessible to a wide range of palates.
- The ease of preparation is a significant advantage, as it requires no baking and can be assembled with minimal cooking skills, making it perfect for quick desserts or special occasions.
- The impressive results, despite the minimal effort required, make this cake an ideal choice for gatherings or events where you want to make a statement without spending too much time in the kitchen.
Ingredients
- 1 1/2 cups graham cracker crumbs
- 1/4 cup granulated sugar
- 1/2 cup unsalted butter, melted
- 2 cups heavy cream
- 1 cup powdered sugar
- 1 teaspoon vanilla extract
- 1 cup instant vanilla pudding mix
- 1 cup milk
- 1 cup semisweet chocolate chips
- 1 cup whipped cream, for topping
- Chocolate shavings or chocolate chips, for garnish
Instructions
- Step 1: Begin by preparing the crust. In a medium bowl, mix together the graham cracker crumbs and sugar. Pour in the melted butter and stir until the crumbs are evenly moistened. Press the mixture into the bottom of a 9×13-inch dish. Refrigerate for about 10 minutes to set.
- Step 2: In a large bowl, whip the heavy cream until it begins to thicken. Add the powdered sugar and vanilla extract, and continue whipping until stiff peaks form. Set aside.
- Step 3: In another bowl, combine the pudding mix and milk. Whisk until the pudding is well combined and starting to set. Fold the whipped cream into the pudding mixture until no white streaks remain.
- Step 4: Melt the chocolate chips in a double boiler or in the microwave in 30-second increments, stirring between each interval until smooth. Allow the chocolate to cool slightly.
- Step 5: Assemble the cake by spreading half of the pudding mixture over the prepared crust. Drizzle with half of the melted chocolate. Repeat the layers, starting with the remaining pudding mixture, and then the remaining chocolate. Top with whipped cream and garnish with chocolate shavings or chips.
- Step 6: Refrigerate the cake for at least 3 hours or overnight to allow the flavors to meld together and the cake to set.
Handy Tips
- For a firmer crust, bake the graham cracker mixture in a preheated oven at 350°F for 8-10 minutes. Let it cool completely before proceeding.
- Use high-quality chocolate for the best flavor. You can also melt the chocolate in a microwave-safe bowl in 10-second increments, stirring between each interval, to avoid a grainy texture.
- Don’t overmix the pudding and whipped cream mixture, as it can become too stiff and separate.
Heat Control
Since this is a no-bake recipe, the only heat control you need to worry about is melting the chocolate. It’s essential to melt the chocolate gently to prevent it from seizing up or becoming grainy. If using a microwave, do it in short increments and stir well between each heating. If using a double boiler, ensure the water doesn’t boil but simmers gently, and remove the chocolate from the heat as soon as it’s melted and smooth.
Crunch Factor
The crunch in this dessert comes from the graham cracker crust. To enhance the crunch, you can toast the graham cracker crumbs in a 350°F oven for a few minutes before mixing with sugar and melted butter. Alternatively, adding some chopped nuts like almonds or pecans to the crust mixture can provide an additional texture contrast.
Pro Kitchen Tricks
- To ensure the cake sets properly, it’s crucial to not overmix the pudding and whipped cream. Fold them gently until just combined.
- For a more defined layering, chill each layer in the refrigerator for about 15-20 minutes before adding the next. This helps prevent the layers from mingling too much.
- Experiment with different flavors of pudding mix or extract to create unique variations of the cake, such as using a chocolate pudding mix for an intense chocolate experience.
Storage Tips
- Store the cake in the refrigerator, covered with plastic wrap or aluminum foil, for up to 3 days.
- Freeze the cake for up to 2 months. Thaw frozen cake in the refrigerator overnight before serving.
- For the best texture, it’s recommended to assemble the cake just before serving. However, you can prepare the components (crust, pudding mixture, and chocolate) ahead of time and store them separately in the refrigerator for up to a day before assembly.
Gift Packaging Ideas
If you’re considering gifting this cake, it’s best to package it in a way that maintains its refrigerated state. Use a sturdy, insulated cake box or a large cooler with ice packs. You can also package individual slices in airtight containers or wrap them tightly in plastic wrap and then in foil, placing them in a gift basket filled with ice packs. Decorate the box or basket with ribbons and a gift card for a personal touch.
Flavor Variations
- Try using different flavors of pudding mix, such as chocolate, strawberry, or lemon, to create unique variations of the cake.
- Add creative toppings like fresh fruits, caramel sauce, or nuts to give the cake an extra layer of flavor and texture.
- Swap the graham cracker crust for another type of cookie crust, like chocolate sandwich cookies or wafers, for a different base flavor.
Troubleshooting
- If the cake doesn’t set, it might be due to the pudding not being mixed correctly or the whipped cream being over-whipped. Try chilling the components separately before assembly.
- If the chocolate becomes too hard, it can be due to overheating. Try melting it gently and cooling it slightly before using.
- If the crust becomes too soggy, it might be due to overbaking (if baked) or using too much butter. Adjust the baking time or the amount of butter in the crust mixture accordingly.
FAQs
- Can I freeze it? Yes, you can freeze the cake for up to 2 months. Thaw it in the refrigerator overnight before serving.
- Is it gluten-free? The graham cracker crust typically contains gluten. To make a gluten-free version, substitute the graham cracker crumbs with a gluten-free alternative.
- Can I double the recipe? Yes, you can double the recipe, but you might need to adjust the size of your dish accordingly. A 9×18-inch dish could work well for a doubled recipe.
Conclusion
The Easy No-Bake Chocolate Eclair Cake is a versatile and indulgent dessert that can be enjoyed on any occasion. With its simple ingredients and straightforward assembly, it’s a perfect choice for both beginners and experienced bakers. Feel free to experiment with different flavors and toppings to make the cake your own, and don’t hesitate to share your creations with friends and family. Whether you’re looking for a quick dessert solution or a show-stopping centerpiece for your next gathering, this cake is sure to impress and delight. So go ahead, get creative, and enjoy the process of making something truly special.
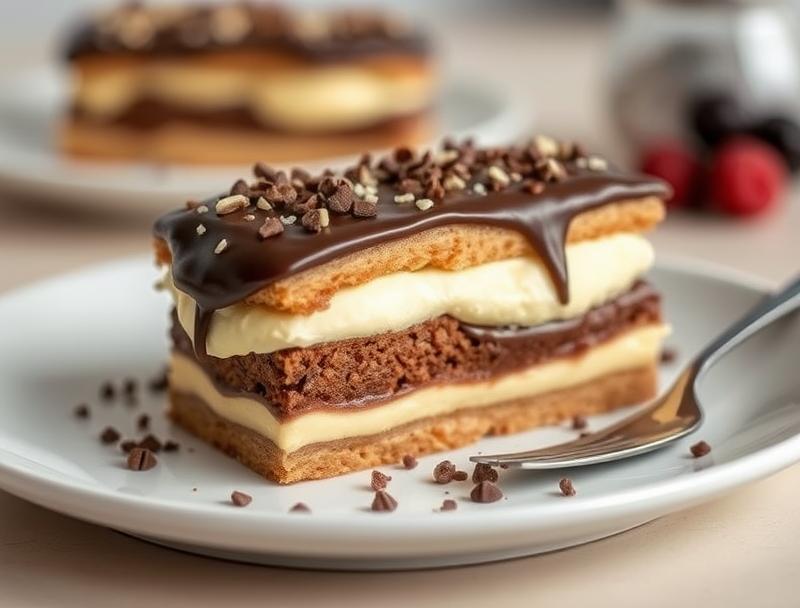
Easy No-Bake Chocolate Eclair Cake
A no-bake dessert that combines the elegance of a traditional eclair with the simplicity of a no-bake recipe, featuring a graham cracker crust, a creamy pudding and whipped cream filling, and a rich chocolate topping.
🥘 Ingredients
👩🍳 Instructions
-
1Prepare the crust by mixing graham cracker crumbs, sugar, and melted butter. Press into a 9x13-inch dish and refrigerate for 10 minutes.
-
2Whip the heavy cream until it thickens, then add powdered sugar and vanilla extract. Continue whipping until stiff peaks form.
-
3Combine the pudding mix and milk. Whisk until well combined and starting to set. Fold the whipped cream into the pudding mixture until no white streaks remain.
-
4Melt the chocolate chips gently and allow them to cool slightly.
-
5Assemble the cake by spreading half of the pudding mixture over the prepared crust, followed by half of the melted chocolate. Repeat the layers and top with whipped cream and chocolate shavings or chips.
-
6Refrigerate the cake for at least 3 hours or overnight to allow the flavors to meld together and the cake to set.