Easy Pepperoni Pizzadillas – Kid-Approved Back to School Lunch Idea!
Introduction
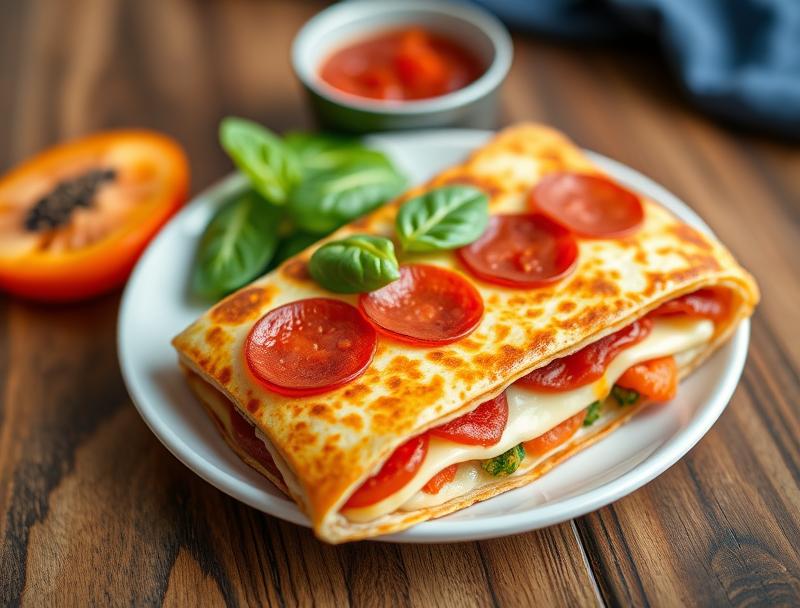
Are you looking for a creative, easy, and delicious back to school lunch idea that your kids will love? Look no further! Easy Pepperoni Pizzadillas are the perfect solution. Made with everyday ingredients like tortillas, pepperoni, cheese, and pizza sauce, these tasty treats are not only a breeze to prepare but also packed with flavor. The best part? They can be customized to suit your child’s taste preferences, making them an ideal option for picky eaters. In this article, we’ll dive into the world of pizzadillas, exploring why they work, the ingredients you’ll need, and a step-by-step guide on how to make them.
Why This Works
- Flavor balance and ingredient accessibility: The combination of melted cheese, savory pepperoni, and tangy pizza sauce creates a flavor profile that kids adore. Plus, the ingredients are easily found in most supermarkets.
- Ease of preparation: Pizzadillas are incredibly simple to make. They require minimal cooking skills and can be prepared in under 30 minutes, making them perfect for busy school mornings.
- Impressive results with minimal effort: Despite their simplicity, pizzadillas look and taste like a gourmet meal, sure to impress both kids and adults alike.
Ingredients
- 4 large tortillas
- 12 slices of pepperoni
- 1 cup shredded mozzarella cheese
- 1/2 cup pizza sauce
- 1 tablespoon olive oil
- Salt and pepper, to taste
- Optional toppings: diced onions, bell peppers, mushrooms, olives
Instructions
- Step 1: Begin by preheating a large skillet or griddle over medium heat. Meanwhile, lay out your tortillas and spread a tablespoon of pizza sauce on half of each tortilla, leaving a small border around the edges.
- Step 2: Arrange 3 slices of pepperoni on top of the sauce, followed by a sprinkle of mozzarella cheese. You can also add any optional toppings you like at this stage.
- Step 3: Fold the tortillas in half to enclose the filling. Place the pizzadillas in the preheated skillet and cook for about 2-3 minutes on each side, until the tortillas are crispy and the cheese is melted.
- Step 4: Once cooked, remove the pizzadillas from the skillet and let them cool for a minute or two. Slice them in half and serve hot. You can also pack them in lunchboxes or containers for a convenient school lunch.
Handy Tips
- For an extra crispy crust, cook the pizzadillas in a skillet with a small amount of olive oil.
- Consider using whole-wheat tortillas for a healthier twist.
- Let your kids get creative with the toppings – it’s a great way to encourage them to try new foods!
Heat Control
To achieve the perfect crispiness and melted cheese, it’s essential to control the heat. Cook the pizzadillas over medium heat, adjusting as needed to prevent burning. You’ll know they’re done when the tortillas are golden brown and the cheese is melted and slightly bubbly.
Crunch Factor
The crunch factor in pizzadillas comes from the crispy tortilla exterior and the slightly crunchy pepperoni. To enhance this texture, make sure not to overcook the pizzadillas, as this can make them soft and soggy. A slight crunch when you bite into them is perfect.
Pro Kitchen Tricks
- Use a pizza stone in the oven to cook the pizzadillas for an extra crispy crust.
- Prepare the fillings ahead of time and store them in the fridge for up to a day to save time in the morning.
- For a fun twist, try using different types of cheese or meats, like ham or chorizo.
Storage Tips
- Leftover pizzadillas can be stored in an airtight container in the fridge for up to 3 days. Reheat them in the microwave or oven until crispy and hot.
- Consider freezing cooked pizzadillas for up to 2 months. Simply thaw and reheat when needed.
- When packing pizzadillas in lunchboxes, include a small ice pack to keep them cool and fresh until lunchtime.
Gift Packaging Ideas
If you’re looking to gift pizzadillas, consider packaging them in cute containers or bags with a side of marinara sauce for dipping. You could also include a small salad or fruit for a complete meal. Add a ribbon or a gift tag with a personal message for a thoughtful touch.
Flavor Variations
- Spicy Italian: Add some red pepper flakes or sliced jalapeños for an extra kick.
- Mediterranean: Top with feta cheese, olives, and artichoke hearts for a Greek-inspired twist.
- Meat lovers: Add some cooked sausage or bacon for a hearty, satisfying option.
Troubleshooting
- Texture problems: If your pizzadillas are too soggy, try cooking them for a minute or two longer. If they’re too crispy, reduce the cooking time.
- Ingredient replacements: Don’t have pepperoni? Try using sliced ham or turkey instead.
- Over/undercooking signs: Keep an eye on the pizzadillas while they’re cooking. If they’re undercooked, the tortillas will be soft and the cheese won’t be melted. If they’re overcooked, the tortillas will be dark brown and the filling might be dry.
FAQs
- Can I freeze it? Yes, cooked pizzadillas can be frozen for up to 2 months. Simply thaw and reheat when needed.
- Is it gluten-free? Depending on the type of tortillas used, pizzadillas can be gluten-free. Look for gluten-free tortillas to make this recipe suitable for those with gluten intolerance.
- Can I double the recipe? Absolutely! Simply multiply the ingredients and cook the pizzadillas in batches if necessary.
Conclusion
Easy Pepperoni Pizzadillas are a game-changer for back to school lunches. They’re easy to make, fun to eat, and can be customized to suit your child’s taste preferences. With these simple steps and handy tips, you’ll be well on your way to creating delicious pizzadillas that your kids will love. So why not give them a try? Get creative, have fun, and happy cooking!
Easy Pepperoni Pizzadillas – Kid-Approved Back to School Lunch Idea!
A simple and delicious back to school lunch idea made with tortillas, pepperoni, cheese, and pizza sauce.
🥘 Ingredients
👩🍳 Instructions
-
1Preheat a large skillet or griddle over medium heat.
-
2Spread a tablespoon of pizza sauce on half of each tortilla, leaving a small border around the edges.
-
3Arrange 3 slices of pepperoni on top of the sauce, followed by a sprinkle of mozzarella cheese.
-
4Fold the tortillas in half to enclose the filling and cook in the preheated skillet for about 2-3 minutes on each side, until the tortillas are crispy and the cheese is melted.