Red Velvet Oreo Cheesecake
Introduction
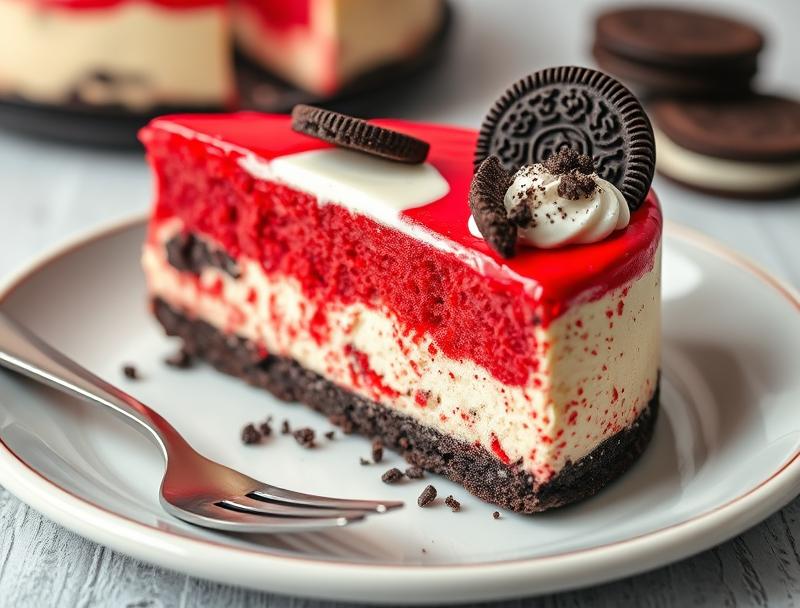
The Red Velvet Oreo Cheesecake is a masterpiece of flavors and textures, combining the deep, velvety smoothness of cheesecake with the vibrant, slightly tangy taste of red velvet and the crunch of Oreo cookies. This dessert is not just a treat for the taste buds but also a feast for the eyes, with its striking red color and layers of creamy cheesecake and crunchy cookies. What makes this recipe truly special is its accessibility – using everyday ingredients and straightforward steps, anyone can create this stunning dessert. Whether you’re a seasoned baker or just starting out, this Red Velvet Oreo Cheesecake is sure to impress with its ease of preparation, flavor balance, and the wow factor it brings to any gathering.
Why This Works
- The balance of flavors between the red velvet, cheesecake, and Oreo cookies creates a delightful harmony that is both familiar and exciting.
- The ease of preparation makes it accessible to bakers of all skill levels, requiring minimal specialized equipment or techniques.
- The impressive presentation and layers of the cheesecake, coupled with the simplicity of its preparation, make it an ideal choice for special occasions or as a centerpiece for any dessert table.
Ingredients
- 1 1/2 cups graham cracker crumbs
- 1/4 cup granulated sugar
- 6 tablespoons (3/4 stick) unsalted butter, melted
- 2 pounds cream cheese, softened
- 3 large eggs
- 1/2 cup granulated sugar
- 2 teaspoons red food coloring
- 1 teaspoon vanilla extract
- 1 cup sour cream
- 1 cup crushed Oreo cookies
- 1 cup chopped pecans or walnuts (optional)
Instructions
- Step 1: Prepare the Crust – Preheat your oven to 350°F (175°C). In a medium bowl, mix together the graham cracker crumbs, sugar, and melted butter until well combined. Press the mixture into the bottom of a 9-inch springform pan. Bake for 10 minutes, then let cool completely.
- Step 2: Prepare the Cheesecake Batter – In a large mixing bowl, beat the cream cheese until smooth. Add the eggs one at a time, beating well after each addition. Gradually add the granulated sugar and beat until combined. Stir in the red food coloring and vanilla extract.
- Step 3: Add the Sour Cream and Mix-ins – Beat in the sour cream until well combined. Stir in the crushed Oreo cookies and chopped nuts (if using).
- Step 4: Assemble and Bake the Cheesecake – Pour the cheesecake batter into the prepared pan over the crust. Bake for 55-60 minutes or until the edges are set and the center is just slightly jiggly. Let cool in the pan for 1 hour, then run a knife around the edges and release the springform. Let cool completely on a wire rack.
- Step 5: Chill and Serve – Once cooled, refrigerate the cheesecake for at least 4 hours or overnight. Release from the pan and slice to serve. You can garnish with additional crushed Oreos or whipped cream if desired.
Handy Tips
- Ensure all ingredients are at room temperature for a smoother cheesecake batter.
- Don’t overmix the batter to prevent cracking.
- For a water bath, wrap the outside of the springform pan with foil and place in a larger pan filled with water to the halfway mark of the springform pan.
Heat Control
It’s crucial to maintain the oven at 350°F (175°C) for even baking. The cheesecake is done when the edges are set, and the center is slightly jiggly. Avoid overbaking, as this can cause the cheesecake to dry out and crack. If you notice the edges starting to brown too quickly, you can cover the cheesecake with foil for the remainder of the baking time.
Crunch Factor
The crunch in this dessert comes from the Oreo cookies and the graham cracker crust. To maintain the crunch, avoid overbaking the crust, and make sure the Oreos are well distributed throughout the cheesecake batter. If desired, you can also sprinkle some crushed Oreos on top of the cheesecake before serving for an extra crunchy topping.
Pro Kitchen Tricks
- Use a water bath to ensure the cheesecake cooks evenly and to prevent cracking.
- Let the cheesecake cool completely in the pan before attempting to remove it, as this will help prevent breaking.
- For a clean slice, dip your knife in hot water and wipe dry before cutting the cheesecake.
Storage Tips
- Store the cheesecake in the refrigerator for up to 5 days.
- For longer storage, the cheesecake can be frozen for up to 2 months. Wrap tightly in plastic wrap or aluminum foil and place in a freezer-safe bag.
- To thaw, place in the refrigerator overnight or at room temperature for a few hours.
Gift Packaging Ideas
This cheesecake makes a wonderful gift, especially for special occasions. Consider packaging it in a decorative tin or on a cake stand, wrapped with a ribbon. You can also add a personal touch with a handwritten note or card. For a more rustic look, place the cheesecake on a wooden cutting board or a decorative plate and wrap with clear plastic or a large piece of parchment paper tied with twine.
Flavor Variations
- Try using different types of cookies, like chocolate sandwich cookies or peanut butter cookies, for a different twist.
- Add a teaspoon of espresso powder to intensify the chocolate flavor.
- Use different nuts, like almonds or hazelnuts, for added texture and flavor.
Troubleshooting
- If your cheesecake cracks, it might be due to overbaking or sudden temperature changes. To minimize cracking, ensure the cheesecake cools slowly and evenly.
- If the crust becomes too dark, it might be due to overbaking. Keep an eye on the crust during the baking time, and cover with foil if necessary.
- If the cheesecake doesn’t set properly, it could be due to underbaking or incorrect oven temperature. Ensure your oven is at the correct temperature, and consider using an oven thermometer to verify.
FAQs
- Can I freeze it? Yes, the cheesecake can be frozen for up to 2 months. Wrap tightly and store in a freezer-safe bag.
- Is it gluten-free? No, this recipe includes graham cracker crumbs and Oreos, which contain gluten. However, you can substitute these with gluten-free alternatives.
- Can I double the recipe? Yes, you can double the recipe, but you’ll need to adjust the baking time accordingly. Keep an eye on the cheesecake to ensure it doesn’t overcook.
Conclusion
Creating the Red Velvet Oreo Cheesecake is a rewarding experience that combines classic flavors with modern twists, resulting in a dessert that is both familiar and exciting. With its accessible ingredients, straightforward preparation, and impressive presentation, this cheesecake is perfect for special occasions, gatherings, or simply as a treat for yourself. Don’t be afraid to experiment with different flavors and toppings to make it your own, and enjoy the process of crafting something truly delicious and visually stunning.
Red Velvet Oreo Cheesecake
A rich and decadent cheesecake combining red velvet cake, cheesecake, and Oreo cookies, perfect for special occasions or as a dessert centerpiece.
🥘 Ingredients
👩🍳 Instructions
-
1Preheat oven to 350°F (175°C).
-
2Prepare the crust by mixing graham cracker crumbs, sugar, and melted butter. Press into a 9-inch springform pan and bake for 10 minutes.
-
3Prepare the cheesecake batter by beating cream cheese, adding eggs one at a time, then granulated sugar, red food coloring, and vanilla extract.
-
4Add sour cream and mix-ins (crushed Oreos and nuts if using) to the cheesecake batter and mix well.
-
5Pour the cheesecake batter into the prepared pan and bake for 55-60 minutes or until the edges are set and the center is slightly jiggly.
-
6Let cool in the pan for 1 hour, then release the springform and let cool completely on a wire rack.
-
7Refrigerate for at least 4 hours or overnight before serving.
-
8Slice and serve. Garnish with additional crushed Oreos or whipped cream if desired.