Easy Espresso Brownies Recipe with Rich Chocolate Flavor
Introduction
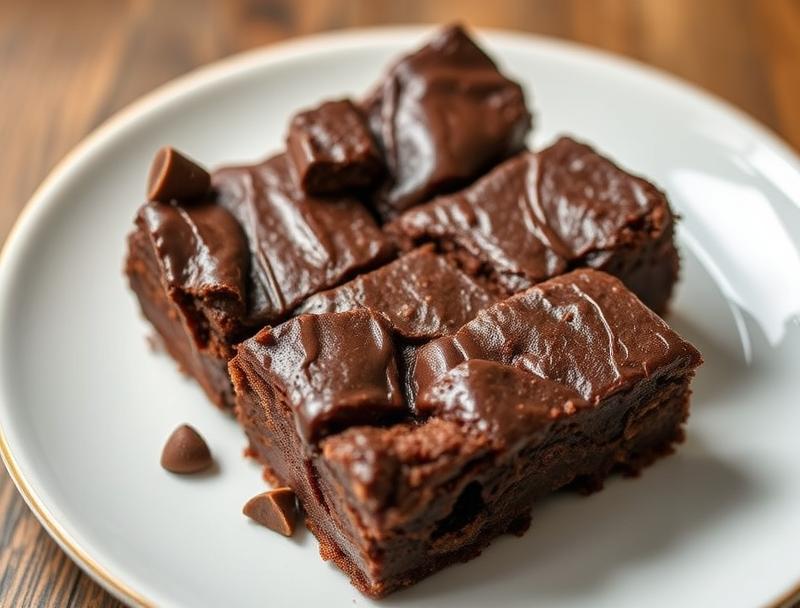
Indulge in the decadence of rich, velvety chocolate and the deep, bold flavor of espresso with our Easy Espresso Brownies Recipe. This delightful treat is not only a chocolate lover’s dream but also surprisingly easy to make, requiring minimal effort for maximum flavor. By combining everyday ingredients in a creative way, you can achieve a dessert that’s both impressive and delicious. Whether you’re a seasoned baker or a beginner in the kitchen, this recipe is perfect for anyone looking to satisfy their sweet tooth with a unique twist.
Why This Works
- The balance of flavors between the bitterness of the espresso and the sweetness of the chocolate creates a perfect harmony that will tantalize your taste buds.
- The ease of preparation makes this recipe accessible to everyone, regardless of their baking experience. With simple steps and readily available ingredients, you can have a batch of these brownies ready in no time.
- Despite the simplicity of the recipe, the end result is nothing short of impressive. The combination of textures and flavors will make these brownies a hit at any gathering or a wonderful treat to enjoy on your own.
Ingredients
- 1 and 1/2 sticks of unsalted butter (12 tablespoons), plus more for greasing the pan
- 2 cups of sugar
- 4 large eggs
- 1/2 cup of unsweetened cocoa powder
- 1 teaspoon of vanilla extract
- 1 and 1/4 cups of all-purpose flour
- 1 teaspoon of salt
- 1 cup of semi-sweet chocolate chips
- 2 teaspoons of instant espresso powder (or 1-2 shots of strong brewed espresso)
- 1 cup of chopped walnuts (optional)
Instructions
- Step 1: Preparation – Preheat your oven to 350°F (180°C). Grease an 8-inch square baking pan with butter and line it with parchment paper, leaving some overhang for easy removal.
- Step 2: Mixing the Batter – In a medium bowl, whisk together flour, salt, and cocoa powder. Set aside. In a large bowl, use an electric mixer to beat together the butter and sugar until light and fluffy. Beat in the eggs one at a time, followed by the vanilla extract.
- Step 3: Combining Dry and Wet Ingredients – Gradually mix the dry ingredients into the wet ingredients until just combined, being careful not to overmix. Melt the chocolate chips in a double boiler or in the microwave in 30-second increments, stirring between each interval until smooth. Allow the chocolate to cool slightly, then fold it into the batter along with the espresso powder (or brewed espresso) and walnuts (if using).
- Step 4: Baking and Cooling – Pour the batter into the prepared baking pan and smooth the top. Bake for 25-30 minutes or until a toothpick inserted into the center comes out with a few moist crumbs attached. Remove from the oven and let cool completely in the pan before cutting into squares and serving.
Handy Tips
- For an intense chocolate experience, use high-quality cocoa powder and chocolate chips.
- Don’t overbake, as this can make the brownies dry. A slightly underbaked texture is preferable for a fudgier result.
- Experiment with different types of nuts or even dried cranberries for added texture and flavor contrast.
Heat Control
Maintaining the right temperature is crucial. Ensure your oven is at 350°F (180°C) for even baking. The baking time may vary depending on your oven, so keep an eye on the brownies after 20 minutes and check every 5 minutes thereafter until they’re done to your liking.
Crunch Factor
The addition of walnuts provides a delightful crunch, contrasting beautifully with the dense, fudgy brownies. If you prefer a chewier texture, bake for 23-25 minutes. For a firmer brownie, bake up to 30-32 minutes, keeping a close eye to avoid overcooking.
Pro Kitchen Tricks
- Use room temperature ingredients for a smoother batter and better texture in the finished brownies.
- Don’t overmix the batter, as this can lead to tough brownies. Stop mixing as soon as the ingredients are combined.
- Let the brownies cool completely in the pan before cutting. This helps them retain their moisture and makes them easier to cut cleanly.
Storage Tips
- Store the brownies in an airtight container at room temperature for up to 3 days.
- For longer storage, wrap the brownies tightly in plastic wrap or aluminum foil and freeze for up to 2 months. Thaw at room temperature or reheat in the microwave.
- Consider cutting the brownies into smaller squares before freezing for easier thawing and serving.
Gift Packaging Ideas
These brownies make a wonderful gift, especially when packaged with a personal touch. Consider wrapping individual brownies in decorative paper or placing a batch in a gift tin lined with parchment paper. Adding a bag of gourmet coffee or a few chocolate-covered espresso beans on the side can elevate the gift to a thoughtful coffee and chocolate pairing experience.
Flavor Variations
- Try adding a teaspoon of mint extract or a handful of chopped peppermint candies for a refreshing twist.
- For a fruity twist, fold in some dried cranberries or cherries into the batter.
- Experiment with different types of coffee or espresso for varying intensities of coffee flavor.
Troubleshooting
- If your brownies turn out too dry, they might have been overbaked. Try reducing the baking time in future batches.
- For brownies that are too dense, ensure you’re not overmixing the batter, and try adding an extra egg or a little more flour to balance the texture.
- If you notice the top of the brownies cracking, this could be due to the batter being too cold when it went into the oven or the oven temperature being off. Try to ensure all ingredients are at room temperature and invest in an oven thermometer.
FAQs
- Can I freeze the batter instead of the baked brownies? While it’s possible, freezing the batter can affect the texture of the brownies. It’s recommended to freeze the baked brownies for the best results.
- Is this recipe gluten-free? The recipe includes all-purpose flour, which contains gluten. To make it gluten-free, substitute the flour with a gluten-free flour mix, but note that this might affect the texture and structure of the brownies.
- Can I double the recipe? Yes, you can double the recipe, but be sure to use a larger baking pan (approximately 9×13 inches) and adjust the baking time accordingly. Keep an eye on the brownies after 30 minutes and check every 5 minutes thereafter until they’re done to your liking.
Conclusion
With its perfect blend of rich chocolate and deep espresso flavor, this Easy Espresso Brownies Recipe is sure to become a favorite. Whether you’re baking for a special occasion or just a Tuesday, these brownies are sure to impress. Don’t be afraid to experiment with the recipe, adding your own favorite nuts, spices, or even a splash of liqueur to make it truly unique. Share your creations with friends and family, and enjoy the joy of baking and sharing delicious food together.
Easy Espresso Brownies Recipe with Rich Chocolate Flavor
A rich and decadent brownie recipe combining the deep flavor of espresso with the sweetness of chocolate, perfect for any chocolate lover.
🥘 Ingredients
👩🍳 Instructions
-
1Preheat the oven to 350°F (180°C). Grease an 8-inch square baking pan with butter and line it with parchment paper.
-
2Mix the dry ingredients in a medium bowl and set aside. Beat the butter and sugar in a large bowl until light and fluffy, then beat in the eggs one at a time, followed by the vanilla extract.
-
3Gradually mix the dry ingredients into the wet ingredients until just combined. Melt the chocolate chips and fold them into the batter along with the espresso powder.
-
4Pour the batter into the prepared baking pan and smooth the top. Bake for 25-30 minutes or until a toothpick inserted into the center comes out with a few moist crumbs attached. Let cool completely in the pan before cutting into squares and serving.