Easy Espresso Brownies Recipe with Rich Chocolate Flavor
Introduction
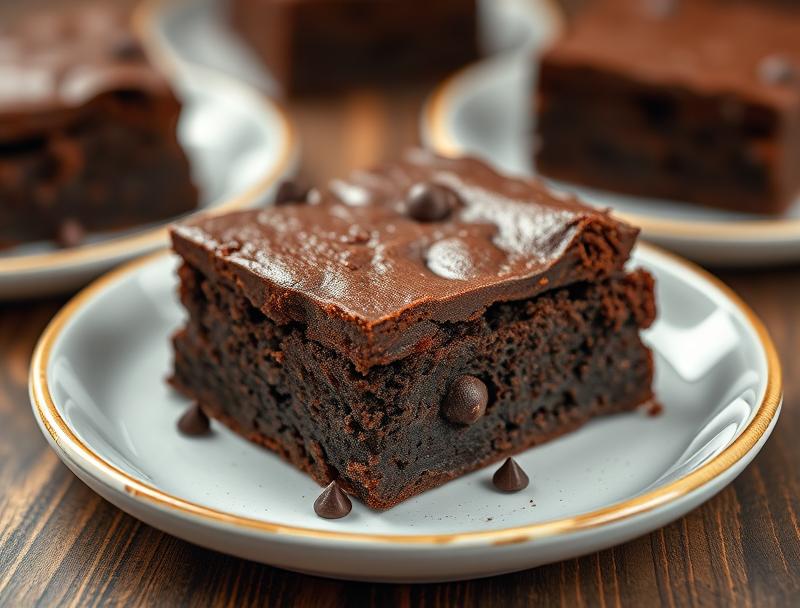
Indulge in the decadence of rich, velvety chocolate and the deep, bold flavor of espresso with our easy espresso brownies recipe. This delightful dessert is not only a treat for the taste buds but also a testament to the magic that can happen with everyday ingredients. The beauty of this recipe lies in its simplicity and accessibility, making it perfect for both novice bakers and seasoned chefs looking to satisfy their chocolate cravings without fuss. With the combination of dark chocolate, espresso powder, and a hint of sugar, these brownies are sure to become a favorite among friends and family, and their ease of preparation means you can whip them up for any occasion, from casual gatherings to special celebrations.
Why This Works
- Flavor balance and ingredient accessibility: The combination of espresso and dark chocolate creates a deep, rich flavor profile that is both sophisticated and indulgent, all while using ingredients that are readily available in most supermarkets.
- Ease of preparation: Despite their impressive flavor, these brownies are incredibly easy to make, requiring minimal preparation time and no special baking skills, making them perfect for a quick dessert fix.
- Impressive results with minimal effort: The simplicity of the recipe belies the richness and depth of flavor in the finished product, ensuring that you can impress your guests with very little hassle.
Ingredients
- 1 and 1/2 sticks of unsalted butter (12 tablespoons), plus more for greasing the pan
- 2 cups of sugar
- 4 large eggs
- 1/2 cup of unsweetened cocoa powder
- 1 teaspoon of vanilla extract
- 1 and 1/4 cups of all-purpose flour
- 1 teaspoon of salt
- 1 cup of semi-sweet chocolate chips
- 1 teaspoon of instant espresso powder (or 2 teaspoons of instant coffee powder as a substitute)
- 1 cup of chopped walnuts (optional)
Instructions
- Step 1: Preparation – Preheat your oven to 350°F (180°C). Grease an 8-inch square baking pan with butter and line it with parchment paper, leaving some overhang for easy removal.
- Step 2: Mixing the Batter – In a medium bowl, whisk together flour, salt, and espresso powder. Set aside. In a large bowl, use an electric mixer to beat together the butter and sugar until light and fluffy. Beat in the eggs one at a time, followed by the vanilla extract.
- Step 3: Combining Wet and Dry Ingredients – With the mixer on low speed, gradually add the flour mixture to the wet ingredients, mixing until just combined. Then, melt the chocolate chips in a double boiler or in the microwave in 30-second increments, stirring between each interval until smooth. Allow the chocolate to cool slightly, then fold it into the batter until well combined. If using walnuts, fold them into the batter at this stage.
- Step 4: Baking and Cooling – Pour the batter into the prepared baking pan and smooth the top. Bake for 25-30 minutes or until a toothpick inserted into the center comes out with a few moist crumbs attached. Let the brownies cool completely in the pan before cutting into squares and serving.
Handy Tips
- For a more intense chocolate flavor, use dark or bittersweet chocolate chips instead of semi-sweet.
- If you don’t have espresso powder, you can substitute it with a bit more cocoa powder for a deeper chocolate flavor, though the espresso adds a unique dimension.
- Don’t overmix the batter, as this can lead to dense brownies. Stop mixing as soon as the ingredients are combined.
Heat Control
When baking the brownies, it’s crucial to keep an eye on them to avoid overcooking. The ideal baking time will depend on your oven, but a general rule of thumb is to check for doneness at the 25-minute mark. The brownies are done when a toothpick inserted into the center comes out with a few moist crumbs attached. If the toothpick is clean, the brownies may be overcooked and dry. The edges should be set, and the center should still be slightly gooey.
Crunch Factor
The addition of walnuts provides a delightful crunch to the brownies, contrasting beautifully with the fudgy texture. If you prefer a chewier brownie, bake for 23-25 minutes. For a firmer brownie, bake for 30-32 minutes. The texture will also depend on how you cut the brownies – cutting them when they are completely cool will help you achieve clean, sharp edges.
Pro Kitchen Tricks
- For an extra fudgy center, don’t overbake. It’s better to err on the side of underbaking slightly, as the brownies will continue to cook a bit after being removed from the oven.
- Use high-quality chocolate for the best flavor. While it may be more expensive, the difference in taste is noticeable.
- Let the brownies cool completely in the pan before cutting. This helps them set properly and makes them easier to cut into clean squares.
Storage Tips
- Store the brownies in an airtight container at room temperature for up to 3 days. They can also be stored in the refrigerator for up to 5 days or frozen for up to 2 months. Wrap them tightly in plastic wrap or aluminum foil and place in a freezer-safe bag for freezing.
- For reheating, let frozen brownies thaw at room temperature or reheat them in the microwave in short increments until warmed through.
Gift Packaging Ideas
These brownies make a wonderful gift, especially when packaged thoughtfully. Consider cutting them into bite-sized squares and arranging them in a decorative tin or jar. You can also wrap individual brownies in parchment paper or cellophane bags and tie with a ribbon for a more rustic look. Adding a packet of gourmet coffee or a few chocolate-covered espresso beans on the side can elevate the gift and tie in with the espresso theme.
Flavor Variations
- Different spices: Add a pinch of cayenne pepper for a spicy kick or a teaspoon of cinnamon for a warm, aromatic flavor.
- Creative toppings: Top the brownies with a scoop of vanilla ice cream, caramel sauce, or whipped cream for added indulgence.
- Ingredient swaps: Use almond flour instead of all-purpose flour for a gluten-free version, or substitute the sugar with honey or maple syrup for a different sweetness profile.
Troubleshooting
- Texture problems: If your brownies turn out too dry, they may have been overbaked. If they’re too gooey, they might not have been baked long enough.
- Ingredient replacements: While the recipe is quite flexible, replacing the butter with oil can affect the texture and flavor significantly. It’s best to use butter for the richest flavor.
- Over/undercooking signs: Keep an eye on the baking time and check the brownies frequently towards the end of the baking time. Overcooked brownies will be dry and possibly cracked on top, while undercooked ones will be too soft and possibly raw in the center.
FAQs
- Can I freeze it? Yes, you can freeze the brownies for up to 2 months. Wrap them tightly to prevent freezer burn.
- Is it gluten-free? Not in its current form, but you can make it gluten-free by substituting the all-purpose flour with gluten-free flour.
- Can I double the recipe? Yes, you can double the recipe, but you’ll need to adjust the baking time accordingly. A larger batch may take about 40-45 minutes to bake, but keep a close eye on it to avoid overcooking.
Conclusion
With its rich, intense flavor and ease of preparation, the easy espresso brownies recipe is a must-try for any chocolate lover. Whether you’re a seasoned baker or just starting out, this recipe is sure to become a favorite. Don’t be afraid to experiment with different flavor combinations and toppings to make the recipe your own, and enjoy the process of creating something delicious to share with others. Happy baking!
Easy Espresso Brownies Recipe with Rich Chocolate Flavor
A rich and decadent brownie recipe infused with the deep flavor of espresso, perfect for chocolate lovers and easy to make for any occasion.
🥘 Ingredients
👩🍳 Instructions
-
1Preheat the oven to 350°F (180°C). Grease an 8-inch square baking pan with butter and line it with parchment paper.
-
2Mix the batter by combining the flour, salt, and espresso powder in one bowl, and the butter, sugar, eggs, and vanilla extract in another. Then, melt the chocolate and fold it into the batter.
-
3Pour the batter into the prepared baking pan and smooth the top.
-
4Bake for 25-30 minutes or until a toothpick inserted into the center comes out with a few moist crumbs attached. Let cool completely before cutting and serving.