Sausage and Zucchini Skillet – Savory, Hearty & Ready in Minutes!
Introduction
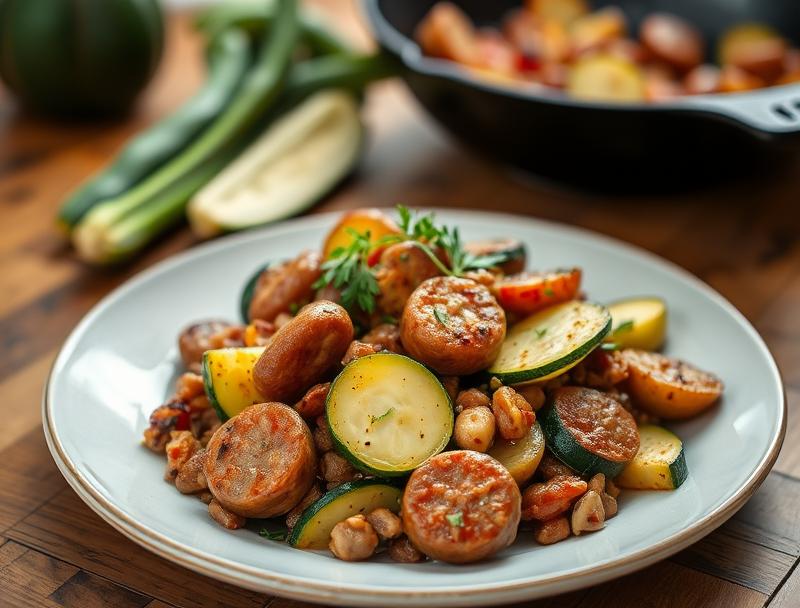
Imagine a dish that’s not only savory and hearty but also ready in minutes, perfect for a busy day when you need a meal that’s both satisfying and quick to prepare. The Sausage and Zucchini Skillet is exactly that – a flavorful, easy-to-make recipe that combines the richness of sausage with the freshness of zucchini, all cooked to perfection in one skillet. This recipe is a testament to the magic of everyday ingredients coming together to create something truly special. With its balance of flavors, ease of preparation, and impressive results, it’s a must-try for anyone looking to elevate their mealtime without spending hours in the kitchen.
Why This Works
- Flavor balance and ingredient accessibility: The combination of sausage, zucchini, and spices creates a harmonious balance of flavors that is both comforting and exciting. The ingredients are easily accessible, making this dish a practical choice for any day of the week.
- Ease of preparation: The beauty of this recipe lies in its simplicity. With just a few ingredients and straightforward steps, it’s a dish that anyone can make, regardless of their culinary experience.
- Impressive results with minimal effort: Despite its simplicity, the presentation and flavor of the Sausage and Zucchini Skillet are impressive, making it perfect for both family dinners and special occasions.
Ingredients
- 1 pound of sausage (preferably Italian sausage or Chorizo), sliced
- 2 medium zucchinis, sliced
- 1 large onion, chopped
- 3 cloves of garlic, minced
- 1 tablespoon olive oil
- 1 teaspoon dried oregano
- Salt and pepper, to taste
- 1/4 cup of chicken broth
- 1/4 cup of grated Parmesan cheese (optional)
- Fresh parsley, chopped (for garnish)
Instructions
- Step 1: Begin by heating the olive oil in a large skillet over medium-high heat. Add the sliced sausage and cook until browned, about 5 minutes. Remove the sausage from the skillet and set aside.
- Step 2: In the same skillet, add the chopped onion and cook until it starts to soften, about 3 minutes. Add the minced garlic and cook for another minute, until fragrant.
- Step 3: Add the sliced zucchinis to the skillet, cooking until they start to soften and lightly brown, about 5 minutes. Season with salt, pepper, and dried oregano.
- Step 4: Return the cooked sausage to the skillet, pouring in the chicken broth. Stir to combine, ensuring the sausage and zucchinis are well coated. Reduce heat to low and simmer for about 10 minutes, allowing the flavors to meld together. If using Parmesan cheese, sprinkle it on top and cover the skillet for the last 2 minutes of cooking, until the cheese is melted and bubbly.
Handy Tips
- For an extra burst of flavor, use homemade chicken broth or add a squeeze of fresh lemon juice towards the end of cooking.
- Consider substituting the sausage with other types, like bell pepper sausage or classic pork sausage, to change up the flavor profile.
- Avoid overcooking the zucchinis, as they can become mushy. Aim for a tender but still crisp texture.
Heat Control
Maintaining the right heat is crucial for this recipe. Start with medium-high heat to achieve a good sear on the sausage, then reduce to medium or low to prevent burning and promote even cooking of the zucchinis and onions. The ideal internal temperature for cooked sausage is at least 160°F (71°C), ensuring food safety.
Crunch Factor
Achieving the right texture is key to this dish. The zucchinis should retain some crunch, while the onions should be softened. The sausage, when cooked properly, will be nicely browned on the outside and juicy on the inside. To enhance the crunch factor, consider adding some chopped bell peppers or carrots to the skillet with the onions and zucchinis.
Pro Kitchen Tricks
- Use a cast-iron skillet for this recipe, as it retains heat well and can achieve a beautiful sear on the sausage and vegetables.
- Don’t overcrowd the skillet. Cook the ingredients in batches if necessary, to ensure each piece has enough room to cook evenly.
- For easier cleanup, line the skillet with parchment paper before cooking, especially if using a lot of olive oil or if you’re concerned about the sausage sticking.
Storage Tips
- Leftovers can be stored in an airtight container in the refrigerator for up to 3 days. Reheat gently over low heat, adding a bit of water or broth if the mixture seems too dry.
- For longer storage, consider freezing the cooked sausage and zucchini mixture in airtight containers or freezer bags for up to 2 months. Thaw overnight in the fridge and reheat as needed.
- When reheating, you can add fresh ingredients like parsley or lemon juice to refresh the flavors.
Gift Packaging Ideas
While the Sausage and Zucchini Skillet is primarily a meal to be enjoyed fresh, components of it can be gifted. For instance, you can package homemade sausage seasoning mixes in decorative jars, along with a recipe card for the skillet dish. Alternatively, prepare the skillet meal for a friend or family member in need of a comforting meal, presenting it in a beautifully wrapped cast-iron skillet or a decorative casserole dish.
Flavor Variations
- Different spices: Experiment with various spice blends like fajita seasoning for a Mexican twist or Italian seasoning for a more Mediterranean flavor.
- Creative toppings: Add some creativity to your skillet with toppings like diced tomatoes, shredded mozzarella cheese, or a dollop of sour cream.
- Ingredient swaps: Substitute sausage with chicken, shrimp, or tofu for a vegetarian option, adjusting the cooking time and seasonings accordingly.
Troubleshooting
- Texture problems: If the zucchinis become too soft, it may be due to overcooking. Try reducing the cooking time or adding zucchinis towards the end of the cooking process.
- Ingredient replacements: If you can’t find Italian sausage, you can use other types of sausage or even bacon as a substitute, adjusting the cooking time as needed.
- Over/undercooking signs: Keep an eye on the internal temperature of the sausage and the texture of the vegetables to avoid over or undercooking.
FAQs
- Can I freeze it? Yes, you can freeze the cooked mixture for up to 2 months. Thaw and reheat when needed.
- Is it gluten-free? This recipe is naturally gluten-free, making it a great option for those with gluten intolerance. However, always check the ingredients of the sausage and chicken broth to ensure they are gluten-free.
- Can I double the recipe? Absolutely, this recipe can be easily doubled or tripled to feed a larger crowd. Just adjust the cooking time slightly to ensure everything is cooked through.
Conclusion
The Sausage and Zucchini Skillet is a versatile and delicious meal that’s perfect for any occasion. With its hearty flavors, ease of preparation, and the possibility of customizing it to your taste, it’s a recipe that’s sure to become a staple in your kitchen. Don’t be afraid to experiment with different ingredients and spices to make it your own, and enjoy the process of cooking a meal that will leave everyone satisfied and wanting more. Whether you’re a seasoned chef or a beginner in the kitchen, this recipe is a great way to explore the world of skillet meals and discover the joy of cooking with everyday ingredients.
Sausage and Zucchini Skillet – Savory, Hearty & Ready in Minutes!
A savory and hearty skillet dish combining sausage and zucchini, ready in minutes and perfect for a quick, flavorful meal.
🥘 Ingredients
👩🍳 Instructions
-
1Heat olive oil in a large skillet over medium-high heat. Add sliced sausage and cook until browned, about 5 minutes. Remove and set aside.
-
2Add chopped onion to the skillet and cook until it starts to soften, about 3 minutes. Add minced garlic and cook for another minute.
-
3Add sliced zucchinis to the skillet, cooking until they start to soften and lightly brown, about 5 minutes. Season with salt, pepper, and dried oregano.
-
4Return cooked sausage to the skillet, pour in chicken broth, and stir to combine. Reduce heat to low and simmer for about 10 minutes, allowing flavors to meld. If using Parmesan cheese, sprinkle on top, cover, and cook for an additional 2 minutes until melted and bubbly.