Cheesecake Stuffed Red Velvet Cookies — Soft & Decadent Dessert
Introduction
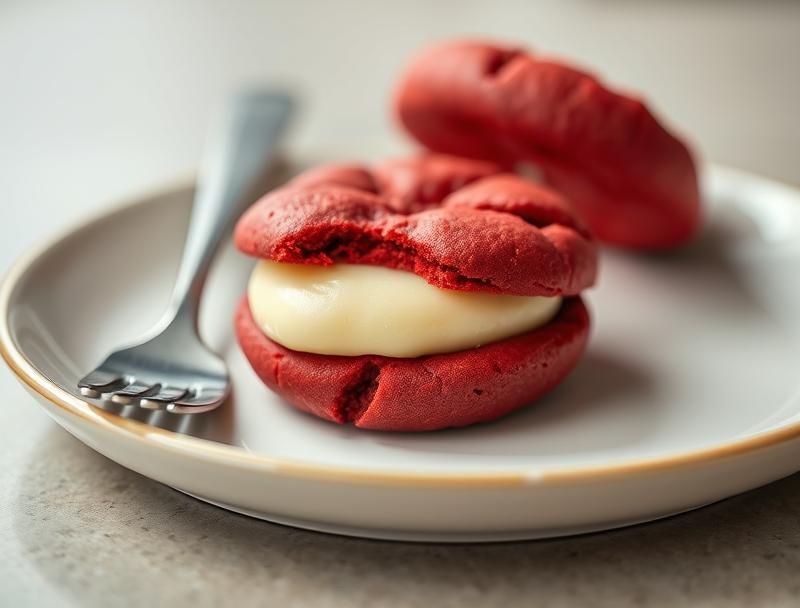
Imagine sinking your teeth into a soft, chewy red velvet cookie, only to discover a surprise center of creamy cheesecake. This ingenious dessert combines the best of both worlds, offering an explosion of flavors and textures that will leave anyone craving for more. The best part? It’s surprisingly easy to make, using everyday ingredients that you might already have in your pantry. With this recipe, you’ll learn how to create a truly decadent treat that’s perfect for special occasions or everyday indulgence. So, let’s dive in and explore the magic of cheesecake stuffed red velvet cookies!
Why This Works
- Flavor balance and ingredient accessibility: The combination of red velvet and cheesecake is a match made in heaven, and the ingredients are easily found in most supermarkets.
- Ease of preparation: Despite the impressive results, this recipe is relatively simple to follow, requiring minimal effort and expertise.
- Impressive results with minimal effort: The end result is a show-stopping dessert that’s sure to impress friends and family, making it perfect for special occasions or potlucks.
Ingredients
- 2 1/4 cups all-purpose flour
- 1 tsp baking soda
- 1 tsp salt
- 1 cup unsalted butter, at room temperature
- 3/4 cup white granulated sugar
- 1 cup brown sugar
- 2 large eggs
- 2 tsp red food coloring
- 1 tsp vanilla extract
- 1 cup cream cheese, softened
- 1/2 cup granulated sugar
- 2 large eggs, separated
- 1 tsp vanilla extract
Instructions
- Step 1: Preheat your oven to 375°F (190°C). Line a baking sheet with parchment paper or a silicone mat. In a medium bowl, whisk together the flour, baking soda, and salt. Set aside.
- Step 2: In a large bowl, use an electric mixer to cream together the butter and sugars until light and fluffy, about 2-3 minutes. Beat in the eggs one at a time, followed by the red food coloring and vanilla extract.
- Step 3: Gradually add the flour mixture to the wet ingredients, mixing until just combined. Wrap the dough in plastic wrap and refrigerate for at least 30 minutes.
- Step 4: To make the cheesecake filling, beat the cream cheese and granulated sugar until smooth. Beat in the egg yolks and vanilla extract. Set aside.
- Step 5: Scoop the chilled cookie dough into balls, about 1 1/2 tbsp each. Flatten each ball into a disk, then place a spoonful of cheesecake filling in the center. Fold the cookie dough over the filling, pressing the edges to seal. Place the stuffed cookies onto the prepared baking sheet, leaving about 2 inches of space between each cookie.
- Step 6: Bake the cookies for 12-15 minutes, or until the edges are set and the centers are just slightly soft. Allow the cookies to cool on the baking sheet for 5 minutes, then transfer them to a wire rack to cool completely.
Handy Tips
- Make sure to chill the cookie dough for at least 30 minutes to help the cookies retain their shape and bake up with a better texture.
- Don’t overfill the cookies with cheesecake filling, as this can cause them to burst open during baking.
- If you want a crisper cookie, bake for 15-20 minutes. If you prefer a chewier cookie, bake for 10-12 minutes.
Heat Control
To ensure the cookies bake up with the right texture, it’s essential to control the heat. Bake the cookies at 375°F (190°C) for 12-15 minutes, or until the edges are set and the centers are just slightly soft. Keep an eye on the cookies during the baking time, as the baking time may vary depending on your oven.
Crunch Factor
The crunch factor in these cookies comes from the edges, which should be set and slightly crispy. To achieve this, make sure to bake the cookies for the recommended time, and avoid overbaking. If you prefer a chewier cookie, bake for 10-12 minutes. If you prefer a crisper cookie, bake for 15-20 minutes.
Pro Kitchen Tricks
- Use a cookie scoop to portion out the dough, ensuring that each cookie is uniform in size.
- Chill the cheesecake filling in the refrigerator for at least 30 minutes to help it set and make it easier to handle.
- Use a combination of white and brown sugar to create a rich, caramel-like flavor in the cookies.
Storage Tips
- Store the cookies in an airtight container at room temperature for up to 5 days.
- Freeze the cookies for up to 2 months, then thaw at room temperature when ready to serve.
- Reheat the cookies in the microwave for 10-15 seconds to restore their soft, chewy texture.
Gift Packaging Ideas
These cookies are perfect for gift-giving, especially during the holiday season. Package the cookies in a decorative tin or jar, or wrap them individually in plastic wrap or wax paper. Add a ribbon or gift tag to make the gift even more special. You can also include a batch of the cookies in a gift basket filled with other sweet treats and goodies.
Flavor Variations
- Try adding different extracts, such as almond or coconut, to the cookie dough for a unique flavor twist.
- Use different types of sugar, such as turbinado or muscovado, to create a distinct flavor profile.
- Add-ins like chopped nuts, dried cranberries, or chocolate chips can add texture and flavor to the cookies.
Troubleshooting
- If the cookies spread too much during baking, try chilling the dough for a longer period or using a higher ratio of white sugar to brown sugar.
- If the cookies are too dense, try adding an extra egg yolk or using a higher ratio of butter to sugar.
- If the cheesecake filling is too runny, try chilling it for a longer period or adding an extra tablespoon of cream cheese.
FAQs
- Can I freeze the cookie dough? Yes, you can freeze the cookie dough for up to 2 months. Simply thaw the dough at room temperature when ready to bake.
- Is this recipe gluten-free? No, this recipe contains all-purpose flour, which contains gluten. However, you can try substituting the flour with a gluten-free flour blend to make the cookies gluten-free.
- Can I double the recipe? Yes, you can double the recipe to make a larger batch of cookies. Simply multiply the ingredients by two and proceed with the instructions as usual.
Conclusion
Cheesecake stuffed red velvet cookies are a game-changer for anyone who loves desserts. With their soft, chewy texture and creamy cheesecake center, they’re sure to become a favorite among friends and family. Don’t be afraid to experiment with different flavor variations and add-ins to make the cookies your own. And remember, the most important ingredient in any recipe is love, so be sure to add a generous helping of that to your cookies as you bake them. Happy baking!
Cheesecake Stuffed Red Velvet Cookies — Soft & Decadent Dessert
A soft and chewy red velvet cookie with a surprise center of creamy cheesecake, perfect for special occasions or everyday indulgence.
🥘 Ingredients
👩🍳 Instructions
-
1Preheat the oven to 375°F (190°C).
-
2Whisk together the flour, baking soda, and salt.
-
3Cream together the butter and sugars until light and fluffy.
-
4Beat in the eggs one at a time, followed by the red food coloring and vanilla extract.
-
5Gradually add the flour mixture to the wet ingredients, mixing until just combined.
-
6Chill the dough for at least 30 minutes.
-
7Scoop the dough into balls, about 1 1/2 tbsp each.
-
8Flatten each ball into a disk, then place a spoonful of cheesecake filling in the center.
-
9Fold the cookie dough over the filling, pressing the edges to seal.
-
10Bake the cookies for 12-15 minutes, or until the edges are set and the centers are just slightly soft.