Easy No Churn Strawberry Ice Cream Recipe
Introduction
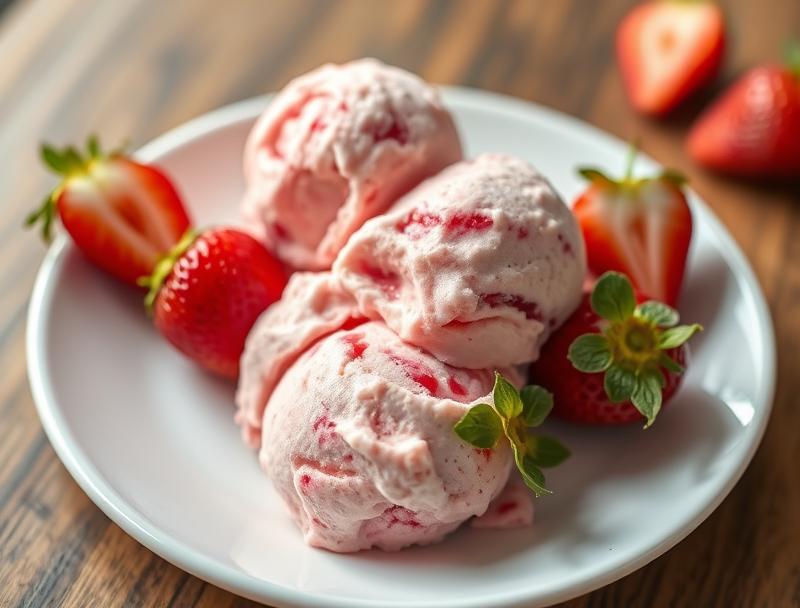
Imagine sinking your teeth into a creamy, sweet, and tangy ice cream on a warm summer day, without the hassle of churning or special equipment. This Easy No Churn Strawberry Ice Cream Recipe is a game-changer for anyone looking to indulge in a delicious homemade treat using everyday ingredients. The beauty of this recipe lies in its simplicity and the ability to customize it to your taste preferences, making it perfect for families, gatherings, or as a quick dessert fix. With just a few ingredients and minimal effort, you can create a flavorful ice cream that rivals store-bought versions, all while enjoying the freshness of strawberries.
Why This Works
- Flavor balance and ingredient accessibility: The combination of sweetened condensed milk, heavy cream, and pureed strawberries creates a perfectly balanced flavor profile that is both refreshing and decadent. All ingredients are easily found in most supermarkets, making this recipe accessible to everyone.
- Ease of preparation: Unlike traditional ice cream recipes that require an ice cream maker or constant churning, this no-churn method simplifies the process to just mixing and freezing, saving you time and effort.
- Impressive results with minimal effort: Despite its simplicity, this recipe yields a creamy and smooth ice cream that is sure to impress. The no-churn method eliminates the risk of ice crystals forming, ensuring your ice cream stays smooth and enjoyable.
Ingredients
- 1 can (14 oz) of sweetened condensed milk
- 1 cup of heavy cream
- 1/2 cup of pureed strawberries (fresh or frozen, thawed)
- 1 tsp of vanilla extract
- A pinch of salt
- Optional: Additional sliced strawberries or other toppings for serving
Instructions
- Step 1: In a large mixing bowl, whip the heavy cream with an electric mixer until it forms stiff peaks. This should take about 2-3 minutes, depending on your mixer’s speed. Be careful not to over-whip, as this can lead to butter formation.
- Step 2: In a separate bowl, mix together the sweetened condensed milk, strawberry puree, vanilla extract, and a pinch of salt until well combined.
- Step 3: Fold the whipped cream into the sweetened condensed milk mixture gently until no white streaks remain. This step is crucial for maintaining the airy texture of the whipped cream within the mixture.
- Step 4: Pour the mixture into a 9×13 inch baking dish or a metal loaf pan, cover it with plastic wrap or aluminum foil, and place it in the freezer. Every 30 minutes, remove the mixture from the freezer and use a fork to scrape the mixture and break up any forming ice crystals. This is known as “tempering” and helps achieve a smooth texture. Repeat this process for 2-3 hours, or until the desired consistency is reached.
Handy Tips
- For a more intense strawberry flavor, use 3/4 cup of strawberry puree or add a few drops of strawberry extract to the mixture.
- If using frozen strawberries, make sure they are completely thawed and drained before pureeing to avoid excess water in the ice cream.
- Experiment with different flavors by substituting the strawberry puree with other fruit purees, like raspberries, blueberries, or mangoes.
Heat Control
This recipe does not require heat, as it relies on freezing for texture. However, if you’re planning to make any caramel or hot toppings for your ice cream, ensure you follow safe cooking practices and use a thermometer to achieve the ideal temperature for your toppings.
Crunch Factor
To add a crunch factor to your ice cream, consider mixing in chopped nuts (like almonds or walnuts), chocolate chips, or even crushed cookies (like wafers or biscuits) into the mixture before freezing. This will provide a nice textural contrast to the smooth ice cream.
Pro Kitchen Tricks
- Use high-quality ingredients: The flavor and texture of your ice cream will greatly depend on the quality of your ingredients. Choose fresh strawberries and real vanilla extract for the best results.
- Don’t over-mix: After folding the whipped cream into the sweetened condensed milk mixture, stop mixing. Over-mixing can lead to a dense ice cream.
- Experiment with flavors: This recipe is a great base for trying out different flavors. Consider adding a pinch of salt, a teaspoon of liqueur, or a handful of chopped herbs to create unique and interesting flavors.
Storage Tips
- Store your ice cream in an airtight container in the freezer to prevent freezer burn and other flavors from affecting its taste.
- If you won’t be consuming the ice cream within a few days, consider scooping it into individual portions, placing them in freezer-safe bags or containers, and freezing. This makes it easier to grab a serving without having to thaw and refreeze the entire batch.
- For the best texture, consume your homemade ice cream within 3-5 days. After this period, ice crystals may start to form, affecting the smoothness of the ice cream.
Gift Packaging Ideas
This ice cream makes a wonderful gift, especially during summer months or as a unique dessert for gatherings. Consider packaging it in decorative ice cream containers or jars, topping it with fresh fruits or nuts, and adding a ribbon or gift tag with serving suggestions or the ingredients used.
Flavor Variations
- Different spices: Add a pinch of cinnamon, nutmeg, or cardamom to give your ice cream a warm, spicy flavor.
- Creative toppings: Use fresh fruits, caramel sauce, chocolate shavings, or even candy pieces to top your ice cream and add texture and flavor.
- Ingredient swaps: Substitute heavy cream with coconut cream for a dairy-free version, or use different types of milk (almond, soy, oat) for a non-dairy ice cream base.
Troubleshooting
- Texture problems: If your ice cream turns out too icy, it may be due to over-freezing or not tempering the mixture enough during the freezing process. If it’s too soft, it might not have been frozen long enough or the mixture was not chilled properly before freezing.
- Ingredient replacements: Always substitute ingredients with similar properties to maintain the texture and flavor balance. For example, replacing heavy cream with half-and-half will change the fat content and potentially the freezing point of your ice cream.
- Over/undercooking signs: Since this recipe doesn’t involve cooking, be aware of the freezing time and texture. Under-frozen ice cream will be too soft, while over-freezing can lead to ice crystal formation and a grainy texture.
FAQs
- Can I freeze it? Yes, this ice cream is meant to be frozen. However, for the best results, follow the tempering process described in the instructions to achieve a smooth texture.
- Is it gluten-free? Yes, this recipe is gluten-free, making it suitable for those with gluten intolerance or sensitivity, provided that the ingredients used (like the sweetened condensed milk) are gluten-free.
- Can I double the recipe? Yes, you can double or even triple this recipe if you’re serving a larger crowd. Just ensure you have a large enough container to hold the mixture and adjust the freezing time accordingly.
Conclusion
Making ice cream at home doesn’t have to be a daunting task, especially with this Easy No Churn Strawberry Ice Cream Recipe. The simplicity, flavor, and flexibility of this recipe make it a staple for any dessert lover. Whether you’re a fan of classic strawberry, looking to experiment with new flavors, or seeking a dessert to impress your guests, this recipe has got you covered. So, go ahead, give it a try, and enjoy the creamy, sweet delight of homemade ice cream without the hassle of churning.
Easy No Churn Strawberry Ice Cream Recipe
A simple and delicious no-churn strawberry ice cream recipe using sweetened condensed milk, heavy cream, and pureed strawberries.
🥘 Ingredients
👩🍳 Instructions
-
1Whip the heavy cream until stiff peaks form.
-
2Mix the sweetened condensed milk, strawberry puree, vanilla extract, and salt in a separate bowl.
-
3Fold the whipped cream into the sweetened condensed milk mixture.
-
4Pour the mixture into a 9x13 inch baking dish, cover, and freeze, tempering every 30 minutes until the desired consistency is reached.